Pages

April 30, 2012

Two Headed Dragon Cake


Have I mentioned my daughters obsession with dragons? Well, she's obsessed with a lot of things as I'm sure all toddlers are but dragons are right at the top of her list.  I think it's really funny since a close second is all things princess.  She will often times be dressed in her princess dress up clothes (jewelry, crown and wand) playing with her dragons.  

She's a complicated girl. 

I decided I was going to try to make a dragon cake for her birthday party this year.  Well first of all you should know that she's going to have three parties this year.  She just had the first one in Boston with my husbands family where I made this dragon cake. 

One down, two more to go. We'll be heading to Montana soon for her second party and then finally here for her third and final party. Yes I have a theme for the second party, no I don't have a theme for the third party. 


I didn't want to make myself crazy(er) by making the cake from scratch so I purchased the cake flavor of her choice and canned frosting.  Cake flavor here was Funfetti and the frosting just needed to be white so we chose buttercream.

I ended up making four round cakes but had one left over. I used two and a half cans of frosting that we tinted slightly pink (her choice).

here's what  you'll need.

2 boxes cake mix (you pick the flavor) You only need three round cakes so maybe you can make cupcakes with the leftover cake mix, or cake pops.
3 containers of frosting - white so you can color it.
1 pkg orange slices candy
1 bag of chocolate covered graham cracker squares
1 box of fruit roll ups - preferably NOT with the writing on it like I got. You want colors that remind you of fire so reds and oranges are best.
a few chocolate chips or M&M's for the eyes and nose.  I used peanut M&M's for the eyes and butterscotch chips for the nose because that's what we had.
Food Coloring
2 wooden skewers

Find a large surface that you can wrap in tin foil or Saran wrap.  I used one that was about 2 feet by 3 feet.

Bake the cakes as instructed on the box and set aside to cool.

When cool, cut the cake in sections as described here but double the cuts so you can have two heads and two tails.

Arrange the cake pieces first before you begin frosting so you can see how it looks.  Color the frosting with some food coloring.  Frost a thin layer of frosting first if you're doing a crumb layer but ONLY if you have a freezer big enough to fit the board you have prepared.  We didn't have this opportunity so I was just very careful about the crumbs.

Once frosted, cut the orange slices in half and arrange four pieces on each foot with the cut side facing the cake so the toe part curves down like a claw. I used four cut pieces per foot.

Next, cut the chocolate covered graham crackers in thirds diagonally so you're able to two corners for the back fin part of the dragon.

For the wings I used two wooden skewers.  Unwrap two pieces of fruit roll-ups and lay them flat.  Run the skewer along one side of the fruit roll-up in an up and down motion sort of like you are sewing it with the skewer.  Cut off any excess length of the wood skewer and place the wing on the back of the dragon.  Do this again for a second wing.

Use two or three more fruit roll-ups for the fire out of the dragon mouth.  I cut thin strips of the fruit roll-up and alternated the orange and red colors for this. Put one end of the fruit where the mouth will be and the rest of it out in front in a haphazard fashion to make it look like fire.

Use one more orange slice and cut in in half length wise and also in half width wise to use for the eyebrows.

Place the M&M's in the frosting for the eyes and the chocolate chips in the frosting for the nose.

Take lots of pictures and prepare yourself for the kids to fight over who gets the head(s). Enjoy!


April 28, 2012

Boston: A Birthday Party and the Hall of Fame

Did you miss me this past week? I'm sorry.  I had a mini vacation to the Boston area where my husband is from.  A town called Natick actually.  He was a BIG football hero in that town, still is.  He was a running back for the 1982 team that began their State Super Bowl Championship stretch and three undefeated seasons.  My husband was a senior in 1982 and was one of four Captains; all three teams were nationally ranked in USA Today, 82-84.   His team started the tradition of Super Bowl champions and made the town of Natick one of the proudest towns you've ever seen.  Have you ever seen that movie "Hoosiers"? It was sort of like that.  When they won the Super Bowl back in 1982 they were police escorted by several of the surrounding towns on their way back to Natick.  When they got to Natick they were greeted by a police escort and fire trucks and thousands of people for a huge celebration.  They really were hero's of that town and even today when you walk downtown with my husband you will hear people approach him and ask if he's Dave from the Superbowl win.  He's got quite a following.
His 1982 team; along with the 1983 and 1984 football teams were inducted into the Hall of Fame this past Thursday.  He saw people he hasn't seen in 30 years and it was just like they saw each other yesterday.  You could feel the air change in that room of about 400 people.  They inducted several individuals as well, but the football teams were the last to go and there was an audible difference in the way people responded. It was really special and I'm glad I got to see it first hand.


That's my husband Dave with his team.  Second from the left.


From the left: Nick Luisi, Mike McBreen, Dave Morrill, Jim DePalo

While we were there we also squeezed in a birthday party for my little girl who will be turning 4 in a couple of weeks.  I made a two headed dragon cake which I will post about separately. We crammed a lot of activities into just a couple of days!


My daughter loves the zippleback from that movie "How to Train Your Dragon" so this was my attempt at it.  Not bad!


April 23, 2012

Anne Springs Gateway

This is our weekend in a nutshell.  Busy busy.  Ballet, Anne Springs Gateway for an Earth Day celebration which we (my daughter and I) look forward to every year, Ice Cream babysat a friend's daughter for the afternoon.  We didn't stop at all from the minute we left the house at 9am and that was just Saturday!  Great weekend.  I hope you all enjoyed yours as much as we did.  I thought you might enjoy some photographs of our time at Anne Springs as well as some pictures of the flowers that are in bloom in our backyard.  Such a pretty time of year. 


Our roses are in full bloom and are so fragrant and beautiful.


I thought this Rhododendron was going to be yellow but I'm loving this color too.  I wonder if there are yellow Rhododendron's to begin with?

We saw milk cows, goats, sheep, chickens, bunnies.  Everything all little kids should be so lucky to live near all the time.  


This cool swinging bridge in this beautiful tree canopy over a cute little creek that the kids always like to play in.  The weather held out even though they kept telling us we might get some rain.  In fact the weather was so great that I could have stayed out there all day long just sitting in the grass and watching the activities.  They gave free horseback rides and only asked for a donation if you could.


I do have a recipe to share with you a little later this week.

How was your weekend?

April 20, 2012

Orange Ice Cream


So there I was making all of these candied orange peels (to be posted about later) and using all these orange skins and not really thinking about what I was going to do with the actual oranges.  Basically I did it backwards.  I should have decided to make orange ice cream and then thought about the candied orange peels so I wouldn't be wasting anything. Even better, I shouldn't have told anyone the truth about me being a backwards thinker and just let you all think that I'm not wasteful. Yep, that's what I should have done. 

If only there was a delete button or something.

Oh there is?  It's too late now.  I'm too far in.

I really enjoyed this ice cream.  I'm really more of a custard based ice cream lover but this one was pretty creamy for not having eggs.  The flavor was very good, fresh orange juice is the key here. 


Orange Ice Cream
From "Joy of Baking" found here
1 1/2 cups heavy cream
1/2 cup half and half
2 cups freshly squeezed orange juice
1/2 cup granulated sugar
1 Tbsp. lemon juice
1 Tbsp. orange zest
1 tsp. vanilla extract
Mix all of the ingredients in a bowl and refrigerate until very cold, overnight is best.

Place the mixture into your ice cream maker and follow the manufacturers instructions.

April 18, 2012

Graham Crackers


I've been dying to try this recipe ever since I saw it on "Smitten Kitchen".  I've tried the Martha Stewart graham cracker recipe also and it was very good.  That was long before I had a blog so I'll have to make them again for you sometime and compare.

One thing I learned from the first time I made graham crackers is to roll them out thin so they stay crispy.  No problems with crispiness here.  I love the crunch and I'm hoping to experiment with a smore soon for the ultimate test. Or just because I love smores.  Whatev's.

If you're planning to make some graham crackers for yourself just remember that it is a multiple step process.  After you make the dough it needs to chill again before you can roll it out and cut it, then it chills again before you a bake it.  That's what makes it nice and crunchy.


I used a food processor for this but you could use a stand mixer or even do it by hand.  Smitten Kitchen has all the details on her site.  Link below.

You want your butter to be very cold...frozen in fact.  That's what helps make the crunch. 

Adding the lovely honey mixture that gives graham crackers their distinctive flavor.


Nice and thin.  Keep this dough cold so it's easier to work with. Work fast. 


After cutting and poking holes in them they need to chill again before baking.


There is no way I can do justice to the original post from Smitten Kitchen so I just put her link below.  I love these graham crackers and plan to make them again.  Definitely a keeper!

I found this recipe at "Smitten Kitchen" here and didn't change a thing.

April 16, 2012

New Orleans Style Barbecued Shrimp


I'm addicted to Pinterest.  I know you've heard me mention it here before and if you haven't been on yet you just have to. HAVE to.  There are so many little gems of loveliness on there.  I'm learning how to do things like make my own laundry detergent.  OK well I haven't done that yet but I could if I wanted to.  I have the skills. I have the pictures.  I have the links.

The shrimp you see above it one of the little gems I found and pinned.  I want to eat more shrimp.  It's healthy and quick and easy and goooood.

I found the recipe here, which reminds me.  You just won't believe how many blogs I've stumbled on that I might not have known about otherwise. 

Anyway, give this recipe a try.  As you'll soon see, there isn't much here that has to do with barbecue but apparently in Louisiana this is considered barbecue.  It's really a dry rub and then some sauteing. You won't be sorry, I promise.

New Orleans Style Barbecued Shrimp
Found at "Once Upon a Chef"
1 teaspoon paprika
1 teaspoon ancho chili pepper powder
1 teaspoon cumin
1 teaspoon sugar
3/4 teaspoon salt
2 pounds extra large shrimp, peeled and deveined
5 tablespoons unsalted butter
3 large garlic cloves, minced
2 tablespoons Worcestershire sauce
1 tablespoon lemon juice, from one lemon
3 scallions, white and green parts, thinly sliced
In a large bowl, combine the paprika, chili powder, cumin, sugar and salt.  Add the shrimp and coat well. Set aside.

In a large skillet, melt the butter and then add the garlic.  Stir the garlic and cook for about a minute being careful not to get the garlic brown.  Add the shrimp and cook until the shrimp is almost done.   Add the Worcester, lemon juice and finish cooking the shrimp.  Sprinkle the scallions over the top before serving.

April 12, 2012

Mushroom Risotto


I think mushroom risotto is one of my favorite side dishes ever.  I just love how creamy the risotto gets and that mushroom flavor.  Yum!

Risotto can be a little time consuming but it's totally worth it.  It's not difficult by any means and it's easy to do while having a conversation with your friends before dinner.  Everyone gathers in the kitchen anyway right? Might as well make risotto. 


Slice up your mushrooms of choice, I used Cremini.


Cook until soft and then move to another plate until needed again.

Sorry for the lack of pictures from here on out.  I promise it isn't difficult.  Cook the shallots, add the rice and brown.  Add the wine and cook until absorbed.  Now you just keep adding broth until it's all gone and the rice is tender.  Add the mushrooms back in and your almost done.  Mix in some cheese, butter, chives, salt and pepper and eat.  See? Not difficult.

Mushroom Risotto
Recipe modified slightly and found at "AllRecipes" here


  • 6 cups chicken broth, divided
  • 3 Tbsp olive oil, divided
  • 1 pound Crimini mushrooms, thinly sliced
  • 2 shallots, diced
  • 1 1/2 cups Arborio rice (I used short grain brown rice)
  • 1/2 cup dry white wine
  • sea salt to taste
  • freshly ground black pepper to taste
  • 3 tablespoons finely chopped chives
  • 4 tablespoons butter
  • 1/3 cup freshly grated Parmesan cheese


In a sauce pan over medium heat, bring the broth to a simmer.

In a large frying pan add the olive oil and cook the mushrooms until soft over medium high heat.  When  done, remove the mushrooms to a plate along with their juices.

In the same frying pan, add 1 Tbsp of olive oil and the shallots and cook for 1 minute. Add the rice and stir to coat with the oil.  Cook for about 2 minutes until slightly golden. Stir in the wine and cook until it is absorbed.  Add 1/2 cup of broth at a time until it is absorbed before adding more.

When all the broth has been added and the rice is tender, turn off the heat and add the mushrooms back in.  Add the chives, butter, cheese, salt and pepper to taste.

April 10, 2012

Frozen Chocolate Covered Banana Bites


Things are heating up in the South.

I think I've mentioned how we didn't get much of a winter.  I'm not bitter about it.  Wait, yes I am.  I like winter.  I want snow and sweaters and roaring fires.  Yes, you're right I should probably move out of the South but I like it here too.  Usually we'll get at least one good snowfall a year and that holds me over.  Not this year.  Boy I get on a tangent easily don't I?

I usually have some hot weather treats in my freezer like ice cream and pop cycles, but I'm trying to find some treats that are a little more diet friendly.  We've all had frozen chocolate covered banana's before so I'm sure this is not new to you.  The only difference is that these are bite sized and you only need two ingredients. 


I bag of Hershey's Special Dark chocolate chips.


Four bananas, cut into bite sized pieces.


Walla.  Delicious.  Pretty darn healthy - hello, dark chocolate is good for you!

Frozen Chocolate Covered Banana Bites

4 bananas
1 bag Hershey's Special Dark chocolate chips

Cut up the banana's into bite sized pieces and set aside.

Line a cookie sheet or jelly roll pan with wax paper.

In a double boiler, heat the bag of chocolate chips over simmering water. Stir often and remove from the heat when the chocolate is all melted and smooth.  Do not over heat!

Dip each banana in the chocolate and cover completely.  Place on the wax paper.  When all the banana bites are covered and on the wax paper, put the cookie sheet into the freezer for about an hour. Remove the pieces and place in a freezer safe plastic storage bag.

Enjoy!


April 8, 2012

Resurrection Rolls


I've seen this recipe several times on Pinterest so I wanted to give it a try.  Yes, I realize I'm posting this on Easter Day and you've probably already made your breakfast's.  On the other hand, this would make a tasty dessert too so you might still have time. If not, just file it away until next year. 

I found this recipe - or should I say that Pinterest directed me to a wonderful site called "The Girl Who Ate Everything".  She gives a great breakdown of the symbolism of this roll.  Also, she called these "Empty Tomb" marshmallow delights.  She has a great site and I encourage you to visit it. The link will be provided below. 

  • Large Marshmallows - body of Jesus
  • Melted Butter - oils of embalming
  • Cinnamon  and Sugar Mix- spices used to anoint the body.
  • Crescent Roll - the wrapping of Jesus’ body or the tomb.
  • Oven – the tomb
  • Cavity in bun – the empty tomb or the empty cloths


Don't ask me why there is a cookie sheet in this picture.  You don't actually need a cookie sheet, I had it out to put the crescent roll dough onto.


Melt some butter, mix up some cinnamon sugar.  First drop the marshmallow into the butter.


Now roll it around in the cinnamon sugar. 


Wrap if very snugly in the crescent roll dough.  There cannot be any holes or openings to make sure you pinch the dough together very well.


Roll the top of the dough ball in the butter and then the cinnamon sugar mixture and put into a greased muffin cup. 


 Bake for 12 to 14 minutes.  As you can see above.  Some of mine opened up and let the marshmallow out.


This is what they are supposed to look like.  Hollow.  The disappearing marshmallow symbolized the resurrection of Christ.  Isn't that cool?

Resurrection Rolls
Found at "The Girl Who Ate Everything" here

1 tube crescent roll dough
1/4 c melted butter
1/4 c sugar
1 Tbsp cinnamon
8 large marshmallows

Preheat the oven to 475 degrees.  Grease 8 cups in a muffin pan.

Lay out each of the crescent rolls individually.  Mix together the cinnamon and sugar and set aside.  Melt the butter.

Take 1 marshmallow and roll it around in the butter, then the cinnamon sugar mixture.  Wrap the marshmallow tightly in one crescent roll making sure to pinch all the seams shut so no marshmallow can escape. Dip the crescent roll top in butter, then the cinnamon sugar mixture and place in the muffin pan with the cinnamon sugar area on top.

Bake for 12 to 14 minutes.  Let cool slightly before opening.

Enjoy, Happy Easter!


April 6, 2012

Butter Cream Chicken


I'm always looking for more ways to incorporate chicken into our menu plan.  I like chicken, but I don't love it by itself.  It needs to be covered in a sauce or coated in something delicious in order for me to find it appealing.  

Now I can add this recipe to my arsenal.  This recipe has both a crispy coating and a creamy sauce.  Since it's not the most diet friendly food in the world we changed things up a bit by using pork rinds for the breading as my co-worker suggested; it was really good.  I didn't want to cut any corners on the sauce because I wanted to experience it in all it's glory.  


See how deliciously crispy they are?  All from pork rinds? Who knew?


Well you didn't think you could make Butter Cream Chicken without butter and cream I hope. :)


The sauce gets nice and thick!


Butter Cream Chicken
Recipe adapted slightly found at "Jamie Cooks it Up" here


4 chicken breasts
1 1/2 cups pork rinds, crushed
Olive Oil
1 C chicken broth
4 Tbsp butter
1 C  + 2 Tbsp half and half, divided
1/2 tsp thyme, dried
2 Tbsp cornstarch
salt and pepper


Cut the chicken into pieces and then place into a zip lock bag.  Pound out the pieces so they are thin, I used a heavy fry pan for this but you can use a meat mallet and look less psychotic.

Place two good handfuls of pork rinds in a zip lock bag and press hard on them until they are nice and fine.  They're going to look like, well, bread crumbs.

Roll the chicken around in the pork rinds until they are well coated.

In a large fry pan add some olive oil (about 5 Tbsp) and begin cooking the chicken until they are golden brown on all sides.  About 5 minutes per side.

Remove the chicken to another plate and keep it warm.  In the same fry pan that you cooked the chicken, add the butter and the chicken broth and scrape the bottom of the pan to loosen up any chicken pieces.  Now add 1 cup of the half and half and the thyme.  Whisk well and allow it to come to a boil.

In a separate bowl but the cornstarch and 2 Tbsp of half and half. Stir well.  Add to the broth/cream mixture and whisk well.  Let it come back up to a boil, whisking occasionally.  Season to taste with salt and pepper.

Serve with the chicken and enjoy!

April 4, 2012

Banana Chocolate Chip Ice Cream


As usual I found myself staring at 6 banana's that were a little too far beyond the yellow color that I usually like.  I think I've mentioned before that I seem to always be buying banana's at the grocery store but then they just sit on the counter.  I'll eat one and my husband might eat one but that's usually it.  Unless I'm making smoothies or banana bread there they sit.

Summer has officially arrived here in the south (about a month early) so ice cream seemed like a safe bet.  There was only one problem, my daughter doesn't like banana's.  She does like chocolate however so that's why I decided to make this a chocolate chip variety.  It worked.  She loves it.  I also shared some with her daycare and those kids loved it too so I'd say we have a winner on our hands.


I doubled the recipe and it turned out just great.


When my dad was visiting one time he made a wonderful stove top banana dessert that had all of the ingredients you see above.  The only difference was that he cooked just cut the banana in half first and mine are cut in little pieces.  He also cooked his in a frying pan on the stove and these are baked.  But still, same idea.

Makes your house smell really good.


After the oven.  The butter and brown sugar have made a yummy sauce.


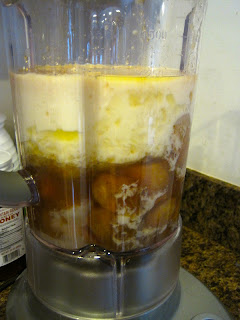
Pour the banana mixture into your blender and add the milk, sugar, vanilla, lemon juice and salt. Puree until nice and smooth.


Pour this mixture into a bowl with a  cover and refrigerate overnight.


Now just pour the mixture into your ice cream maker and follow the manufacturers instructions.  Add the chocolate chips at the end. Enjoy!


Banana Chocolate Chip Ice Cream
modified slightly from "Brown Eyed Baker" found here

3 medium-sized ripe bananas, peeled 
1/3 cup light brown sugar
1 tablespoon butter (salted or unsalted), cut into small pieces
1½ cups whole milk
2 tablespoons granulated sugar
½ teaspoon vanilla extract
1½ teaspoons lemon juice
¼ teaspoon coarse salt

1/2 cup semi sweet chocolate chips


Pretheat the oven to 400 degrees. 


Cut up the banana's in small pieces and place them into a heat proof dish.  Add the brown sugar and butter and bake for 40 minutes stirring once halfway through. 


Pour the mixture (hot is fine) into a blender and add the milk, sugar, vanilla, lemon juice and salt.  Puree the mixture until smooth.  Pour the mixture into a dish with a cover and refrigerate overnight. 


Pour the cold mixture into your ice cream maker (stir a little if it seems thick).  Follow the manufacturers instructions.  Add the chocolate chips the last 5 minutes of processing or just stir them in at the end.  Freeze.