Showing posts with label Comfort Food. Show all posts

March 15, 2017

April's Corn and Shrimp Chowder


Be warned, this makes a huge recipe! Not kidding, you can feed 15 to 20 people easily. I recently made this at a friends house and it was amazing.  Even though there were 7 of us eating it felt like we didn't even make a dent in the amount this makes.  Next time, I think I'll half it.

The result was amazing, however.  The chowder is thick and hearty, with tons of flavor.  There are big chunks of vegetables as well as shrimp.  I used a medium sized shrimp we found in the freezer section.  They'd already been deveined so all we had to do was peel and take their tails off.  The creamy base was thick and flavorful.  I was completely satisfied after my meal.  We served it with French Bread and Butter, and that was all.

The most time consuming portion of the meal was the chopping and getting the shrimp ready. Not difficult, just allow time for it.  

Such a hearty filling meal, and since there were so many vegetables we didn't feel it was necessary to add a side dish.  It was all made in one giant pot so clean up was pretty easy. You're going to want to make this for a crowd, and hope there are still leftovers for you to savor on your own. I loved this. My husband has declared this, one of the best chowder's he's ever had.

April's Corn and Shrimp Chowder
Recipe from April


Ingredients
  • 1/2 cup (1 stick) butter
  • 2 whole onions, chopped
  • 2 bell peppers, chopped
  • 3 ribs celery, chopped
  • 1 bunch green onion, diced (for garnish)
  • 1 pound bacon, cut into small pieces
  • 4-5 pounds shrimp, deveined and tails removed
  • 3 cans cream of corn
  • 4 cans gold and white corn
  • 1 can Rotel tomatoes
  • 1 bunch carrots
  • 4-5 pounds potatoes, cubed
  • 1 quart half and half
  • 1 pint whipping cream
  • salt and pepper to taste
Cooking Directions
  1. Saute the onions, bell pepper, celery and green onions in the butter until they are beginning to soften. Remove from the pan and set aside.
  2. In the same pan add the bacon pieces and fry until they are crispy. Remove the bacon to a plate lined with a paper towel but leave the grease in the pan.
  3. Saute the shrimp in the bacon grease and remove. If you want a little bit of spice you can sprinkle shrimp with a some old bay, slap your mama, or any other seasoning to your desired spice level. 
  4. Add all of the other ingredients (not the shrimp or the green onions) including the vegetables that were cooked and set aside and cook until the potatoes are done. You can drain the canned corn if you want a thicker chowder or leave the liquid to thin it out a bit. 
  5. Season to taste with salt and pepper. Add the shrimp about 5 minutes before serving. Garnish with green onions.
*Some accompaniment options: Hot Sauce, Shredded Cheese, Diced Green Onion, Crispy Bacon Pieces

February 8, 2017

Panera Bread Macaroni and Cheese


As part of my ongoing quest to make homemade macaroni and cheese that my daughter will actually eat, I tried this new one last night. 

I figured this was a sure winner, since she loves Panera Macaroni and Cheese. 

I was wrong about her liking it, but I LOVED it. 

Is it wrong that I'm actually happy she didn't like it, so I can have the rest? Her reasons for not liking it were: The consistency was thicker than the store version.  So, the flavor was a match but because I let it cool down (and it thickened) she wouldn't eat it. This is the story of my life.  Do you feel sorry for me? 

Well, obviously you just have to add a little more milk to get the consistency to thin out but she'd already determined that it wasn't right and therefore nothing would change her mind. 

It's OK, I'll eat it. 

Panera Bread Macaroni and Cheese
Recipe from Food Folks and Fun


Ingredients
  • 16 oz rigati pasta
  • 1/4 cup unsalted butter
  • 1/4 cup all-purpose flour
  • 2 1/2 cups milk (2% or whole)
  • 6 slices American cheese (white) cut into strips
  • 8 oz extra sharp cheddar (white) grated
  • 1/2 tsp dijon mustard
  • 1 tsp kosher salt
  • 1/4 tsp hot sauce
Cooking Directions
  1. Boil the pasta according to package directions.
  2. Meanwhile, in a medium saucepan melt the butter. Add the flour and whisk constantly for 1 minute. Add the milk and whisk until thick. Add the cheese and stir until melted. Now turn off the heat and add the mustard, salt and hot sauce.
  3. Add the cooked, drained pasta and stir well.
  4. Serve hot

December 14, 2016

Gluten Free Chocolate Cake


So, let me start off by apologizing for the lack of posts.  See, Thanksgiving happened and then soon after that I started to get word that my gramma wasn't doing well.  Well, I'm in South Carolina and she's in Montana so I was sort of playing it by ear.  When the call came that it had gotten more serious, me and my daughter jumped on a plane and flew to Montana.  My gramma passed away at the age of 96, so it was expected but still difficult.  So, that's why there hasn't been any posts from me lately.  But I'm back and ready to hit the kitchen again!

This recipe was made before I left.  My husband, as you may or may not know, is on a gluten free diet as it greatly helps with his asthma.  

This cake had great chocolatey flavor.  It's more dense than your average flour cake but I didn't mind it and neither did my husband and daughter.  It didn't last long in this house! Because, when you're craving chocolate cake you just gotta have it!


I just used a store bought gluten free frosting but homemade would be delicious too.  I'm glad I tried this recipe and now have one more for my gluten free recipe box!


Gluten Free Chocolate Cake
Recipe from Hershey


Ingredients
  • 2 cups granulated sugar
  • 1 3/4 cup gluten free flour mix
  • 3/4 cup cocoa powder
  • 1 tsp salt
  • 1/4 tsp baking soda
  • 1/4 tsp baking powder
  • 2 large eggs
  • 1 cup milk
  • 1/2 cup vegetable oil
  • 2 tsp vanilla extract
  • 1 cup boiling water
Cooking Directions
  1. Preheat the oven to 350º
  2. Spray 2 9-inch cake pans with non-stick spray and then dust with cocoa powder.
  3. Mix all of the dry ingredients together in a large bowl and whisk together. Add the eggs and milk and stir, then add the remaining ingredients and mix until smooth and lump free.
  4. Pour into the prepared cake pans. Place in the oven and bake for 35-60 minutes, or until a toothpick inserted in the middle comes out clean.
  5. Remove from the oven and let cool on a cooling rack. After about 5 minutes you can run a knife along the edges and then remove so a cooling rack to cool completely before frosting.

October 19, 2016

Quick Gluten Free Lasagna


A chill in the air means I break out the comfort food and lasagna is one of our favorites.  My daughter only recently started liking lasagna, and after 8 years of not eating it she requests it often.  I'm only too happy to oblige of course.  I mean, how could I say no? This recipe is very simple to throw together on a busy week night and tastes amazing.

Everything is already cooked when you throw the layers together so it's just a matter of melting the cheese.  Gluten free is such a big deal right now that it's not problem at all finding Rotini noodles. And most pasta sauce is gluten free but just check the label to make sure.

I have used both sliced mozzarella and shredded for this recipe but the slices to tend to be a bit stringier (which I like) so that's what I use mostly. Feel free to substitute your favorite meat sauce for the jarred sauce and meat, since you're making this you can add whatever your family likes best.  I love this recipe and my family does too.

Quick Gluten Free Lasagna
Recipe from FlippenDelicious


Ingredients
  • 1 pound gluten free rotini
  • 1 pound hamburger
  • 1 (32 oz) jar pasta sauce (gluten free)
  • 1 (24 oz) container cottage cheese
  • 1/2 cup grated Parmesan cheese
  • 1 1/2 tsp Italian seasoning
  • 2 1/2 cups shredded mozzarella cheese
Cooking Directions
  1. Preheat the oven to 375º
  2. Follow the package instructions to cook the pasta. Set aside.
  3. Brown the ground beef, drain off the excess fat.
  4. In a bowl, combine the cottage cheese, Parmesan cheese and Italian seasoning.
  5. Pour just enough pasta sauce on the bottom of a 9x13 inch dish to cover the bottom.
  6. Pour the cooked pasta on top of that, followed by the cooked hamburger.
  7. Top all that with the remaining pasta sauce.
  8. Spoon the cheese mixture over the top of all that and spread around evenly and then sprinkle with mozzarella cheese.
  9. Bake for 20 minutes or until the cheese is melted.

July 20, 2016

Brooke's Best Bombshell Brownies


These brownies were a late night decision by my family after dinner.  As usual, I named off the not so appealing items we could have for an after dinner treat.  And, as usual, my family named something they wanted in which we didn't already have, but needed to be made.

I should probably mention that when they asked for brownies, my mouth almost immediately started drooling.  But, I put my wrist to my forehead and threw my head back very dramatically and said "yes, of course I will whip up a batch of brownies, even though I just slaved for hours making dinner".  That probably would have actually worked, had we not just had salad for dinner.

Anyways, never one to turn down a request from my family, I jumped online to find my next brownie recipe.  This one jumped out at me for a couple of reasons.  First of all, it was made in a 9x13 inch dish which means there would be plenty....for my family. Second, the description said "chewy" which is a key word for me.  I love chewy brownies and chewy cookies.

I have to say, the recipe was easy to throw together.  There's plenty of chocolate in there with the addition of the chocolate chips (you could frost them if you really wanted more chocolate). They are chewy, the edges get nice and firm, and the flavor is very chocolaty.  Exactly what you're looking for in a brownie.  Most of us have these ingredients in our pantry, so whip some up tonight.


Brooke's Best Bombshell Brownies
Recipe from AllRecipes


Ingredients
  • 1 cup unsalted butter, melted
  • 3 cups granulated sugar
  • 1 Tbsp vanilla extract
  • 4 whole eggs
  • 1 1/2 cups all-purpose flour
  • 1 cup unsweetened cocoa powder
  • 1 tsp salt
  • 1 cup semi-sweet chocolate chips
Cooking Directions
  1. Preheat the oven to 350º
  2. Spray a 9x13 inch dish with non-stick cooking spray
  3. In the bowl of your stand mixer with the paddle attachment add the sugar and butter and mix well.
  4. Add the eggs one by one blending after each addition.
  5. In a separate bowl add the flour, cocoa powder and salt and whisk together.
  6. Slowly add the dry ingredients into the wet with the mixer on low until thoroughly incorporated.
  7. Add in the chocolate chips and mix briefly.
  8. Pour the batter into the prepared dish, even out and bake for 35-40 minutes or until a toothpick inserted into the center comes out clean.
  9. Let cool on a cooling rack and serve.

May 11, 2016

Cheesy Stuffed Shells


If you're looking for some hot cheesy deliciousness, look no further.  This dish is the definition of comfort food.  Hot, melty and delicious. It requires a little bit of time to stuff the shells but honestly, it doesn't take that long once you get a system down.

I decided to try this one out when I saw that it was a little unusual in that it doesn't have a red sauce.  Don't get me wrong.  I love me some red sauce, but I wanted different. I wanted cheese! Oh boy did I get it.

I am in love with this recipe and I can't wait to make it again soon.

Cheesy Stuffed Shells
Recipe from Delish


Ingredients
  • 15 jumbo pasta shells
  • 1 1/2 cup ricotta
  • 1 cup + more for sprinkling Italian cheese blend
  • 1 whole large egg
  • salt
  • pepper
  • 1 stick butter
  • 1 cup heavy cream
  • 1/2 cup Parmesan cheese
  • fresh basil for topping (optional)
Cooking Directions
  1. Preheat the oven to 350 degrees.
  2. In a large pot of boiling, salted, water - cook the shells until al dente and then let cool.
  3. Meanwhile, in a large bowl, mix together the ricotta, cheese blend, egg, and salt.
  4. Stuff the mixture into the shells.
  5. In the saucepan over medium low heat, melt the butter. Add the cream and bring to a simmer. Add the Parmesan cheese and whisk until smooth. Season with pepper.
  6. Pour 2/3 of the cheese sauce into a baking dish or oven safe pan. Top with the stuffed shells and then pour the remaining sauce over the top of the shells. Sprinkle with some more of the blended shredded cheese.
  7. Bake for 15-20 minutes until hot and bubbly.
  8. Garnish with basil if desired.

April 20, 2016

Kids Favorite Stove-top Macaroni and Cheese


As some of you may know, I struggle to find a homemade macaroni and cheese recipe that my daughter actually likes. Well, I finally found one.  It only took 7 years.....

I literally have tried ton's or recipes to come to this moment. I've blogged about the one's I loved even though she hated them.  See the problem was that for the first portion of her life she was in daycare.  They aren't making homemade macaroni and cheese at daycare as you know. So she grew up eating boxed macaroni and cheese and it sort of ruined her for all others.  Eventually we were able to get her to eat and like a frozen variety in a red box.  Then after many trials we found two restaurants that she would eat theirs.  Of course I couldn't find a copy cat recipe for either of those two restaurants.  

So, I began with whittle down her favorite cheese options.  This was actually quite easy considering she seems to have her mom's love for cheese.  So I ended up using two cheeses, mild cheddar and Munster.  I think it's important to use at least half of a soft cheese to achieve that creaminess.

I'm happy to report that she loved this one.  It had the look she loves (she doesn't like melted cheese or bread crumbs on top), it had the creaminess she loves, and it didn't have any strange specks of pepper or herbs in there.  Win Win!  Oh yeah, and she loved the taste obviously.

I hope your picky eaters like it too .

Kids Favorite Stove-Top Macaroni and Cheese
Recipe from The Kitchn


Ingredients
  • 1 pound pasta, any shape
  • 1 1/2 cups whole or 2% milk
  • 2 Tbsp all-purpose flour
  • 2 to 3 cups shredded cheese like Colby or Monterrey Jack
  • 1/2 tsp salt
  • 1/4 tsp ground mustard
Cooking Directions
  1. Boil the pasta as directed on the package.
  2. While the pasta is boiling, use another medium saucepan to warm 1 cup of the milk.
  3. Mix together the remaining 1/2 cup of milk and flour so there are no lumps.
  4. When the milk in the pan starts to steam, pour the flour/milk mixture in and whisk until smooth. Cook 3-4 minutes, until thick.
  5. Turn the heat to low and start adding the cheese, little by little. Also add the salt and ground mustard and whisk until smooth.
  6. Stir half the cheese mixture in with the cooked pasta until fully coated and then add the remaining sauce.
  7. Serve immediately.
  8. When reheating leftovers, just add a splash of milk to make it creamy again.

December 30, 2015

Creamy Spinach and Mushroom Lasagna


My husband wasn't home for Christmas day so we didn't do a traditional dinner.  Several days after Christmas I made this lasagna and we both loved it.  My daughter even liked it (that's saying a lot for her).

This recipe was easy to make, well no harder than a regular lasagna and was quicker because there wasn't any meat.  I loved the cremini mushrooms but they weren't all that easy to find.  I went to three stores before I found some but they were absolutely delicious.  Perfect for this recipe.

The creaminess of the sauce and the stringy cheese was amazing.  I might have added a little more cheese than indicated....

Also, I found that the leftover lasagna was even better!  The flavors just got enhanced by the next day, I love it.


Creamy Spinach and Mushroom Lasagna
Recipe from Damn Delicious


Ingredients
  • 9 lasagna noodles
  • 1 (15 oz) container whole milk ricotta
  • 2 (10 oz) packages frozen spinach (thawed and squeezed dry)
  • 3 cups shredded mozzarella cheese, divided
  • 3/4 cup freshly grated Parmesan cheese, divided
  • 2 Tbsp chopped fresh parsley
Sauce:
  • 1/4 cup unsalted butter
  • 2 cloves garlic, minced
  • 1 pound cremini mushrooms, thinly sliced
  • 1 onion, diced
  • 1/4 cup all-purpose flour
  • 3 cups milk, at room temperature
  • 1 tsp dried basil
  • 1/2 tsp dried oregano
  • pinch of nutmeg 
  • salt and pepper to taste
Cooking Directions
  1. Preheat the oven to 350º
  2. Use a large skillet to melt the butter, then add the garlic, mushrooms, and onion.  Cook until tender, about 5-10 minutes. 
  3. Sprinkle the flour over the vegetables and cook for about 1 minute. 
  4. Slowly add the milk while stirring to avoid clumps of flour. Add the basil, oregano and nutmeg and then salt and pepper to taste.  Cook until thickened. Remove from heat and let sit until needed. 
  5. Cook the lasagna noodles as indicated on the package instructions. 
  6. Begin to assemble the lasagna by using a 9x13 inch pan.  Put 1 cup of sauce on the bottom of the pan and top with 3 noodles. 
  7. Spread 1/2 the ricotta over the noodles.  Top that with 1 cup of mozzarella cheese, 1/4 cup of Parmesan and then another layer of noodles, the remaining ricotta and 1 more cup of mozzarella cheese and 1/4 cup of Parmesan cheese. 
  8. Finish with 3 more noodles and dump the sauce over the top.  Top with the remaining mozzarella and Parmesan cheeses. 
  9. Bake for 35 - 45 minutes or until hot and bubbly. Broil for 2-3 minutes just to get some brown on the top. 
  10. Let cool for about 15 minutes and garnish with parsley if desired. 

December 8, 2015

Creamy Rice Pudding


You're looking at my husbands favorite dessert.  Well, one of many.  His great grandmother used to make it all the time.  Apparently this recipe was very close to hers.  She said that sometimes she added raisins to hers.  Needless to say, he was a happy camper when I made this.

I myself haven't had much rice pudding in my life.  I don't remember my grandmother making it.  I don't think I even tried it until I was an adult.  But I have to say, this rice pudding recipe is WAY better than the kind you buy in the refrigerated section of the grocery store.  I've never been a big fan of that one, but I loved this one.

Creamy, sweet with a little bit of cinnamon in the background.  You could certainly add raisins like my husbands grandmother did.  I don't think there is much you could add that wouldn't be delicious.  The thing about rice pudding is it's sort of just a creamy vanilla concoction.  There's LOTS of room to add the things you like best.  I however loved it just like this.  Yum!

Creamy Rice Pudding
Recipe from Sprinkle Some Sugar


Ingredients
  • 3/4 cup uncooked white rice (I used minute rice)
  • 1 cup half and half
  • 1 cup milk
  • 4 Tbsp granulated sugar
  • 1 Tbsp light brown sugar
  • 1/4 tsp salt
  • 2 egg yolks
  • 1 Tbsp unsalted butter
  • 1/2 tsp vanilla extract
  • 1/4 tsp cinnamon
Cooking Directions
  1. Boil the rice, water (using the directions on the box), granulated sugar and salt in a medium sauce pan until tender.
  2. Pour in the half and half and 1/2 cup of milk and simmer for about 20 minutes. It will look like there is a lot of milk but it will get absorbed, I promise. Stir frequently until creamy and thick.
  3. Mix in the brown sugar.
  4. In a small bowl whisk the egg yolks and slowly add 3 Tbsp of the rice mixture into the eggs to temper them.
  5. Add the egg yolk mixture into the saucepan with the rest of the rice mixture.
  6. Add in the remaining 1/2 cup of milk and cook for 3-5 minutes more. Remove from the heat and add the butter, vanilla extract and cinnamon and mix.
  7. Serve hot or cold. Refrigerate leftovers.

November 18, 2015

Chicken and Dumplings


This recipe reminds me of one my gramma used to make.  We always had Sunday dinner at my gramma's house and this was one of my favorite dishes. This is not her actual recipe, but it was still close enough to make me homesick.

Perfect for a cold winters day, this dish firmly falls in the "comfort food" category.  Chicken soup topped with big fluffy dumplings that have steamed to perfection.  You just can't ask for more than that in my opinion.

I live in the South now, and they make their dumplings completely different here.  Totally delicious but totally different. The dumplings here are basically flat, wide pieces of pasta that are cooked inside of the soup so they sort of float around in there.  I also have a recipe for that sort of chicken and dumplings posted on this site but this recipe is the one that brings back memories for me.


Chicken and Dumplings
Recipe from jocooks.com


Ingredients

Dumplings:
  • 1 cup all-purpose flour
  • 1 whole egg, beaten
  • 2 tsp baking powder
  • 1/2 tsp salt
  • 2 Tbsp chives, chopped
  • 1/2 cup buttermilk
Chicken Soup:
  • 1 Tbsp olive oil
  • 1 medium onion, chopped
  • 1 large carrot, chopped
  • 1 large celery stalk, chopped
  • 1/2 tsp dry thyme
  • 4 cups chicken broth
  • 1/3 cup all-purpose flour
  • salt and pepper to taste
  • 1/2 cup frozen peas
  • 2 cups roasted chicken, shredded. (Any part of the chicken will work, an assortment of both dark and light meat will add nice flavor)
Cooking Directions
  1. In a large dutch oven or stock pot add the oil and then add the carrots, celery and onion. Cook for 5-7 minutes until the onion becomes translucent.
  2. Add the thyme and chicken broth. 
  3. In a small dish, whisk together a label full of broth and the flour.  Pour the mixture back into the pot and whisk to make sure there are no lumps. 
  4. Add the frozen peas and the shredded chicken. 
  5. Season with salt and pepper. Let simmer to thicken, while you make the dumplings. 
  6. Place all the dumpling ingredients in a medium sized bowl and whisk to combine.  Do not over mix or the dumplings will be too dense. 
  7. Dollop the dough onto the soup, keep in mind that the dumplings will double in size. I used a large tablespoon, perhaps 1/4 cup. 
  8. Cover the pot and simmer for 15-20 minutes.  Do not remove the top to check on them or it'll flatten your dumplings. Test them for doneness by using a toothpick inserted in the middle of the dumpling to come out clean. 

November 5, 2015

Chocolate Cream Pie


So there I was, trying to think of the next thing to put on this blog when it occurred to me that I hardly ever ask my daughter what SHE wants me to make.

So, of course it was chocolate.

And of course I was happy to oblige, even if it isn't even a week after Halloween and we have ton's of candy in the house.

I mean, who am I to say no.  Right?

Right.

Pinterest really comes in handy at times like these.  The original recipe uses a regular flour pie crust but I thought I'd like it more on a chocolate sandwich cookie pie crust.  So that's what I did.  When you make your own stuff from scratch you can do whatever you want. :)

The filling is super easy to make, just make sure to get it nice and cold before cutting so it doesn't slide all over the place.  The crust is super easy to make, and the whipped cream topping is super easy to make.  The longest part of making this pie is the time needed to refrigerate. Heck, you could even buy the pre-made Oreo pie crust and the pre-made whipped cream if you're really trying to save some effort but honestly, you'd be skimping on the flavor.  Homemade is best.

My whole family loved this pie, oh and we all loved it even more the second day.  Do yourself a favor and make it ahead of time so it can refrigerate for about a day.  It's amazing!!  The filling is super creamy and smooth, the whipped cream is light.  Add some mini chocolate chips to the top and you get that little texture every so often.  Just yum!

All you chocolate lovers will appreciate this recipe. Enjoy!


Homemade Chocolate Cream Pie
Pie Crust Recipe from What's Cooking America
Pie Filling Recipe from Cookie Madness


Ingredients

Chocolate Cookie Pie Crust
  • 24 chocolate sandwich cookies (Oreo's)
  • 1/4 cup butter, melted
Pie Filling
  • 3/4 cup granulated sugar
  • 3 1/2 Tbsp cornstarch
  • 1/8 tsp salt
  • 2 1/2 cups whole milk
  • 4 large egg yolks
  • 2 Tbsp unsalted butter, at room temperature
  • 2 tsp vanilla extract
  • 3/4 tsp chocolate extract (optional)
  • 3 oz unsweetened chocolate, chopped
  • 1 to 2 cups heavy whipping cream
  • 2 to 4 Tbsp confectioners' sugar
Cooking Directions
  1. You can also use a regular pie crust that has been pre-baked.
  2. To make the chocolate sandwich cookie pie crust, place the cookies in a food processor and pulse until the cookies are finely ground. Drizzle in the melted butter and pulse a couple more times until it all comes together. Press the mixture into a deep dish pie plate and set aside.
  3. In a medium saucepan that is on a COLD stove add the sugar, cornstarch and salt.  Whisk together. 
  4. Add the milk and egg yolks and whisk together.  Turn the heat on medium. Whisk continually until the mixture has begun to thicken. 
  5. Add the butter one piece at a time and whisk until melted before adding the other. 
  6. Add the vanilla extract, whisk.
  7. Add the chocolate pieces a little at a time, whisking until incorporated before adding more. 
  8. Pour the chocolate mixture into the prepared pie shell, cover with plastic wrap and refrigerate for several hours until cold. 
  9. In the bowl of your stand mixer or use a hand held beater with the whisk attachment.  Add the cream and whisk until stiff peaks begin to form. Slowly add the confectioners' sugar and whisk until incorporated. 
  10. Spread the whipped cream onto the chocolate cream pie and top with shaved chocolate or mini chocolate chips if desired. 
  11. Serve cold and refrigerate leftovers. 

May 13, 2015

Pasta e Fagioli (Olive Garden CopyCat)


It's getting a little warm in our neck of the woods to be making soup but this one is too darn delicious to pass up. Simple and easy ingredients that you probably have most of in your refrigerator already.  You can make this spicy or mild depending on the sausage you use.  I used a sweet sausage so my daughter would eat it, and she did!

So comforting and just like you would get from Olive Garden. This version is fairly quick and can be on your table in less than and hour.

Make sure to get some good ol' crusty bread from your super market or try this recipe if you know you're making this one in advance. So good!


Pasta e Fagioli (Olive Garden Copycat)
Recipe by Damn Delicious


Ingredients
  • 1 cup ditalini pasta (or other small pasta)
  • 2 Tbsp olive oil, divided
  • 1 pound spicy Italian sausage
  • 3 cloves garlic, minced
  • 1 onion, chopped
  • 3 carrots, peeled and diced
  • 2 stalks celery, diced
  • 3 cups chicken broth
  • 1 (16 oz) can tomato sauce
  • 1 (15 oz) can diced tomatoes
  • 1 tsp dried basil
  • 1 tsp dried oregano
  • 3/4 tsp dried thyme
  • salt and pepper to taste
  • 1 (15 ounce) can red kidney beans, drained and rinsed
  • 1 (15 ounce) can great northern beans, drained and rinsed
Cooking Directions
  1. Cook pasta according to package directions in salted water. Drain and set aside. 
  2. Heat 1 Tbsp of olive oil in a large stock pot or a dutch oven. Add the sausage and cook until no longer pink.  Crumble it as  you cook it. Drain off the excess grease and set aside. 
  3. Add the remaining oil, onions, garlic, carrots and celery to the pot cook until tender about 3-4 minutes. 
  4. Return the meat to the pot with the vegetables. 
  5. Whisk in the tomato sauce, diced tomatoes, basil, oregano, thyme, salt and pepper to taste. Bring to a boil and then lower to a simmer and cook until the vegetables are tender.  About 15-20 minutes. 
  6. Add both beans and heat through and then serve hot. 

April 24, 2015

Banana Pudding


I'm constantly on the lookout for ways to use up overripe bananas.  You'd think I'd learn to just buy two at a time.

The the upside, I'm finding a lot of really good banana recipes.

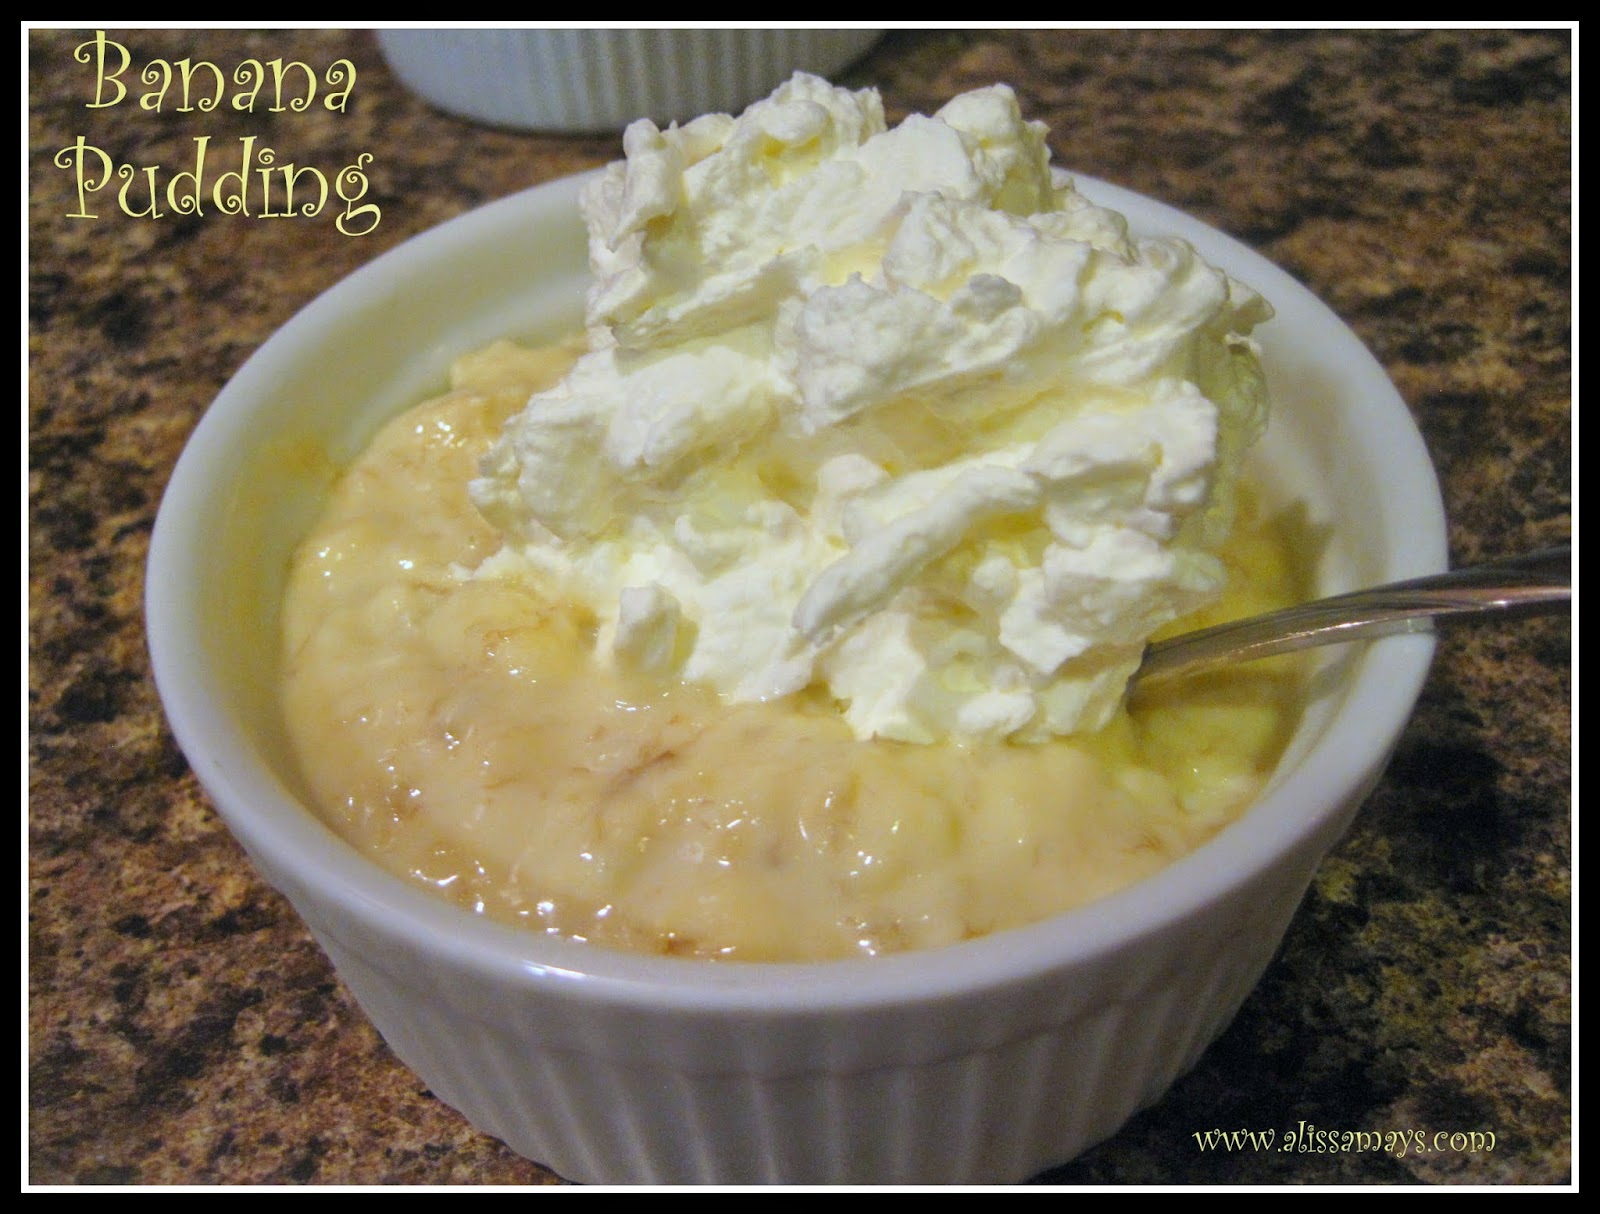
Banana pudding seemed like the thing to make this last time.  I happened to have all the ingredients so why not?  I really didn't know that making pudding would be so easy.  I don't know why people use the box stuff now.  I'll be making mine from scratch from now on.

This recipe is easy and great tasting.  Ton's of banana flavor of course, a great way to use up bananas and a not-so-horrible-for-you dessert! And, you can make fresh whipped cream with any leftover heavy cream you have. I'm really glad I made this and I can't wait to try other pudding recipes.

Banana Pudding
Recipe from Jen's Favorite Cookies


Ingredients
  • 2-3 very ripe banana's
  • 1 cup milk (I used 1%)
  • 1 cup whipping cream
  • 1/2 cup granulated sugar
  • 3 Tbsp cornstarch
  • pinch of salt
  • 3 egg yolks
  • 1 tsp vanilla extract
Cooking Directions
  1. Add the squished banana's and the milk and cream to a heavy saucepan. Heat until hot but not boiling and then mash the banana's into the milk mixture. 
  2. In another small dish add the sugar, salt and cornstarch. Whisk together to mix. When the milk mixture is almost to the point of boiling, add the sugar mixture and mix well. 
  3. In a small dish lightly beat the egg yolks.  Slowly add a little bit of the heated milk/sugar mixture to temper the eggs so they don't scramble. Add a little hot mixture while stirring the eggs.  Once the egg mixture has heated up a bit via the mixture you can add it all back into the saucepan with the rest of the milk/sugar mixture. 
  4. Bring to a boil for 1-2 minutes, stirring occasionally. Remove from heat and add the vanilla. 
  5. Add the pudding to individual ramekins or a large bowl and cover with plastic wrap. Let cool completely or it can be eaten while still slightly warm. 
  6. Top with whipped cream if desired. 

April 21, 2015

PW's Beef Enchiladas


I love Mexican food.  I could eat it twice a week or more.  For some reason I don't make it very often and it's probably because I think it's not going to be as good as the restaurant's.

When will I learn?

This dish has several steps to accomplish but they are easy, and when your end result tastes as delicious as anything you would order at a restaurant, I'd say it's worth it. Plus, the leftovers are just good and it made lunches a lot easier for me for several days after I made it.

You can make this hot or mild depending on the enchilada sauce you use and of course you could also add you favorite spices afterward if you like it really hot.  The flavor is so delicious, the corn tortillas get a little crispy right on the edges and the gooey cheese and yummy filling is so comforting. I love cilantro and it gives every bite a little added freshness.  So good!


PW's Beef Enchiladas
Recipe from The Pioneer Woman


Ingredients

Sauce
  • 1 Tbsp canola oil
  • 1 Tbsp all-purpose flour
  • 1 can (28 ounce) enchilada sauce or red sauce
  • 2 cups chicken broth
  • 1/2 tsp salt
  • 1/2 tsp ground black pepper
  • 2 Tbsp fresh cilantro, chopped
Meat
  • 1 1/2 pounds ground beef
  • 1 whole medium onion, chopped
  • 2 cans (4 ounces each) diced green chili's
  • 1/2 tsp salt
Tortillas
  • 10-14 whole corn tortillas
  • 1/2 cup canola oil
Extras
  • 3 cups sharp cheddar cheese, grated
  • 1/2 cup chopped black olives
  • 1 cup green onions, chopped
  • 1/2 cup fresh cilantro, chopped
Cooking Directions
  1. For the Sauce: In a large saucepan add the oil and flour and heat over medium heat. Use a whisk to combine and let cook for 1 minute. Add the enchilada sauce, chicken broth, salt, pepper and cilantro. Set aside. 
  2. For the Meat: In a large skillet add the meat and onions and cook until the meat is no longer pink and the onion has softened. Drain any fat. Add the green chili's and the salt and set aside. 
  3. For the Tortillas: Use a small fry pan to heat the canola oil.  Set up your workstation so that you have a dish with some paper towels on it for draining the oil off the tortillas after cooking and a cookie sheet so you can place the tortillas there after you've dipped them in red sauce and are ready to fill them. Get a baking dish ready as well, 9x13 is perfect. Pour 1/2 cup of red sauce into the bottom of that dish and set aside. 
  4. To assemble: Fry each tortilla for just a minute or so to soften them up, you don't want them crispy.  Place them on the paper towels to drain while you cook the rest. 
  5. After they are all cooked, dip them individually into the prepared red sauce and then place them on the cookie sheet.  Place some meat in the middle, then the olives and cheese and green onions (or whatever fill ins you choose).  Roll them and place them in the 9x13 inch dish, seam side down.  Continue until they are all filled and rolled and in the dish. 
  6. Pour the remaining red sauce over the top and sprinkle with more cheese. Bake at 350º for 20 minutes or until bubbly.  Serve hot, garnish with more cilantro if desired. 

April 7, 2015

PW's Potatoes Au Gratin


So there I was on Easter Day, just getting around to planning dinner for that night.  I'm on top of things around here let me tell ya. So, we knew we'd be doing ham steaks because they're easy, and it's ham, and we all like ham.  We totally disagreed on the vegetable we wanted so all three of us ate a different vegetable.  My husband wanted mashed potatoes and I wanted something different, so we compromised and settled on this Au Gratin recipe from The Pioneer Woman. 

Yum, just yum. 

Creamy, cheesy, garlic-y deliciousness.  It was a perfect accompaniment to our dinner.  It doesn't take long to prepare and I had the majority of the ingredients on hand.  I had to run out for heavy cream but that was it. 

I hope you all had a wonderful Easter.  I hope next year I have my stuff together enough to plan dinner before the actual dinner. :)

PW's Potatoes Au Gratin
Recipe from The Pioneer Woman


Ingredients
  • 2 Tbsp butter, softened
  • 6-7 small potatoes (I used gold) scrubbed clean and diced
  • 1/2 cup whole milk
  • 1 1/2 cup heavy cream
  • 2 Tbsp flour
  • 3-5 cloves garlic, minced
  • 1 tsp salt
  • pepper to taste
  • 1 1/2 cups sharp cheddar, shredded
  • fresh chives, thinly sliced
Cooking Directions
  1. Preheat the oven to 400º
  2. Use the softened butter to coat the bottom and sides of a 9x13 inch baking dish.
  3. Place the diced potatoes in the prepared dish.
  4. In a medium bowl, combine the milk, cream, flour, garlic, salt and pepper and whisk to combine.
  5. Pour over the top of the potatoes.
  6. Cover with tin foil and bake for 30 minutes.
  7. Remove cover and bake for 20-30 minutes more.
  8. Right before serving, add the shredded cheddar and bake for 3-5 minutes or until the cheese is melted and bubbly.
  9. Garnish with chives if desired.

March 10, 2015

Creamy Spinach and Tomato Tortellini


So, this daylight savings change has really screwed me up this time.  I mean, it's been harder than usual.  Waking up while it's still dark outside just seems so wrong.

On the upside, I made this Tortellini dish on Saturday, before the sleep deprivation kicked in.

There are lots of reasons I love this dish.  It doesn't take long to make, less than 30 minutes.  It tastes fantastic and even though it's main component is cheese tortellini it also has spinach and tomato so I'm still classifying it as healthy-ish.  Just kidding, it's not skinny food, that's for sure. The creamy sauce is so delicious and comforting. Perfect meal to just snack on or to have as a side.  I made it at a cookout I was invited to (yes we had a day nice enough to cook out in) and I thought it was a great accompaniment with burgers.


Creamy Spinach and Tomato Tortellini
Recipe from Bombshell Bling


Ingredients
  • 1 (8 oz) bag dried or (16 oz) fresh Tortellini
  • 2 tsp minced garlic
  • 1 cup fresh spinach, chopped
  • 1 (14.5 oz) can petite diced tomatoes
  • 1/2 tsp salt
  • 1/4 tsp black pepper
  • 1 1/2 tsp dried basil
  • 1 tsp onion flakes
  • 2 Tbsp all-purpose flour
  • 1 1/2 cups half and half
  • 1/4 cup Parmesan, grated or finely shredded
Cooking Directions
  1. Follow the instructions on the tortellini to cook the pasta.
  2. While the pasta cooks, use a large skillet to briefly warm the minced garlic. About 30 seconds.
  3. Add the canned tomatoes, spinach, salt and pepper, dried basil and onion flakes. Cook over medium heat until it bubbles. 
  4. In a separate bowl, whisk together the flour and the half and half until mostly smooth. 
  5. Add the half and half mixture to the skillet along with the Parmesan cheese and stir until well incorporated.  Heat to a boil and then reduce to medium low heat and let thicken, about 5 minutes. 
  6. Add in the drained tortellini and stir well.  Serve. 

February 24, 2015

Slow Cooker Chili


Winter seems to have finally hit here in the South.  A little snow this morning, not much but it's just a teaser about what's on it's way.  I might be the only one happy about that.

Because of this cold weather, now is an excellent time to post this chili recipe.  I usually just wing my own chili and it always turns out well, so it was unusual for me to follow a recipe.  But it was going into the slow cooker so I thought a recipe might be helpful.  I'm so glad I tried it.  Talk about yummy.
I loved the texture and the fact that it wasn't overly soupy.  I used one regular Rotel can and one mild just in case but it wasn't too spicy at all.

We served ours with some sour cream and some shredded cheese but there are ton's of things that would be delicious on top.  I can tell you that crushed up Dorito's are also really good on top.  Don't ask me how I know that.

If you're looking for a basic chili recipe that will appeal to a large group, this is it!

Slow Cooker Chili
Recipe from CookingClassy


Ingredients
  • 2 pounds ground beef
  • 1 Tbsp olive oil
  • 1 large yellow onion, chopped
  • 3 cloves garlic, minced
  • 2 (14.4 ounce) cans diced onion with green chili's
  • 3 (8 ounce) cans tomato sauce
  • 1/2 cup water or beef broth
  • 2 Tbsp chili powder
  • 2 1/2 tsp ground cumin
  • 2 tsp paprika
  • 2 tsp cocoa powder
  • 1 tsp granulated sugar
  • 1/2 tsp ground coriander
  • salt and pepper to taste
  • 1 (15 ounce) can dark red kidney beans, drained and rinsed
  • 1 (15 ounce) can light red kidney beans, drained and rinsed
Cooking Directions
  1. Add the oil to a large skillet, when hot add the diced onion. Cook for about 3 minutes. Add the minced garlic and cook for 30 seconds.
  2. Add to a preheated 7 quart slow cooker.
  3. Use the same pan to brown the ground beef until no longer pink. Drain all but 2 Tbsp of fat. Pour into the slow cooker with the onions.
  4. Add all the remaining ingredients except the beans and stir. Cook on low 5-6 hours.
  5. Add the beans and heat through about 10 more minutes. Add 1/2 more beef broth or water if you want it soupier. 
  6. Serve with your choice of toppings.  Some recommendations are shredded cheddar cheese, sour cream, chopped chives, crackers, cilantro, red pepper flakes, hot sauce. 

February 10, 2015

Shepherds Pie


This is another one of my husbands favorite dishes.  He's from New England and it's a favorite up there.  If you've never heard of Shepherds Pie, you're in for a real treat.  This is one of those comfort food meals that you will love to make on a cold winters day.

I love to whip this up after a meal where I have leftover mashed potatoes. If I don't use the mashed potatoes in a respectable dish like this, I'm likely to sit down with just a bowl of them and dig in.  Not as respectable.

Shepherds pie is derived from "cottage pie",  however cottage pie was typically made with beef and shepherds pie was usually made form lamb.  Because shepherds have sheep, see.  Originally a pie made of any meat and mashed potatoes was called "cottage pie".  That concludes your history lesson for today.


Shepherds Pie
From Alissamay's kitchen


Ingredients
  • 1 pound ground beef
  • 1 medium onion, chopped
  • 3 medium carrots, peeled and chopped
  • olive oil
  • 1 Tbsp A1 Sauce (or your favorite steak sauce)
  • 8 ounces tomato sauce
  • 1 cup frozen peas
  • 1 cup frozen corn
  • 3-5 cups already prepared mashed potatoes
  • shredded sharp cheddar cheese (optional)
Cooking Directions
  1. Preheat the oven to 350º
  2. In a large skillet, add a little oil and then add the chopped carrots and onions.  Cook until they are beginning to soften. 
  3. In a medium saucepan, add the frozen peas and corn and add water and then heat to boiling. 
  4. Add the ground beef and cook until no longer pink. Drain. 
  5. Add the A1 sauce and tomato sauce and stir until well combined.  Remove from the heat and pour the meat mixture into a 9x13 inch baking dish. 
  6. Microwave the mashed potatoes until warm. Set aside. 
  7. Drain the water from the peas and corn and add them to the top of the meat mixture. 
  8. Use a spoon to dollop the prepared mashed potatoes onto the top of the peas and corn.  Use the spoon to press the potatoes into an even layer. 
  9. Sprinkle the top with cheese if desired and bake for 30-45 minutes or until the shepherds pie is hot all the way through. If the cheese hasn't turned as golden as you'd like, broil it for about 5-10 minutes.  Keep a careful eye on it so it doesn't burn. 
  10. Serve hot and refrigerate leftovers. 

January 29, 2015

Vinegar-Braised Chicken and Onions


I know I've mentioned in the past that I'm not the biggest chicken lover in the world.  I make myself eat it because I don't want to eat red meat all the time.  The secret for me is a gravy or sauce of some kind.

When I saw this recipe online the other day and it was like it was calling to me.  First off, I love dutch oven cooking. Secondly, I love the flavor of vinegar.

The recipe did not disappoint.  It had me at "pancetta". I love pancetta.

It does take a little bit of time to get this recipe on the table but it is SO worth it.  I am in love with this recipe, and that coming from me is high praise.  If you're not a vinegar fan, don't worry, the chicken doesn't have a really strong vinegar flavor. However, all of the flavors combined are out of this world.  The chicken is extremely moist and falling off the bone. The onions and pancetta are remarkable with the chicken, and the vinegar broth puts it over the top for me.  This is one of my new favorites.

Vinegar-Braised Chicken and Onions
Recipe from Bon Appetit


Ingredients
  • 2 pounds pearl or cipollini onions
  • kosher salt
  • 3 Tbsp olive oil
  • 8 ounces pancetta, cut into 1/4 inch pieces
  • 4 whole garlic cloves, peeled and crushed
  • 5 pounds chicken, bone-in, skin-on. Thighs and legs. If using breasts, half them crosswise
  • freshly ground black pepper
  • 3/4 cup balsamic vinegar
  • 3/4 cup red wine vinegar
  • 2 cups low-sodium chicken broth
  • 1/2 cup golden raisins
  • 2 bay leaves
Cooking Directions
  1. Heat some water in a large saucepan, add the onions and boil for 5-8 minutes. Drain and set aside until cool enough to handle. Cut off the root end of the onion and peel off the skin. 
  2. Meanwhile, add the oil to a dutch oven and cook the pancetta until it is golden brown.  Use a slotted spoon to remove and put them into a large bowl. 
  3. Add the onions to the same dutch oven and brown, about 8-10 minutes. 
  4. Add the garlic and cook for 3 minutes. Remove the onions and garlic to the same bowl the pancetta is in. 
  5. Season the chicken with salt and pepper on both sides.  Cook in the same dutch oven in batches so that all the pieces are golden brown on all sides. 
  6. Drain the oil.  Add both vinegars and bring to a boil.  Scrape the brown bits off the bottom.  Add the broth, raisins and bay leaves and all the previously cooked items. (onions, pancetta, garlic and chicken). 
  7. Bring back up to a boil and then reduce the heat and simmer for 35-40 minutes with the dutch oven partially covered. 
  8. Season with additional salt and pepper if necessary.  Remove the chicken and them skim the fat off the top of the liquid and serve the chicken with the onions with some liquid poured over the top. 

January 19, 2015

Sloppy Joe Cornbread Casserole


One of my favorite childhood foods was Sloppy Joe's.  I still love them to this day although I don't make them that often.  

As some of you know, my daughter falls into that "worlds pickiest eater" category.  I had high hopes for this casserole.  She hasn't liked regular sloppy joe's in the past.

The result? 

She liked it.  Didn't love it but certainly didn't snub her nose at it like she does most things.  

We might be making progress. 

I on the other hand really liked this.  It's easy to make and quick.  I know that most of us are always trying to find something for busy weeknights and this is a great one. It takes less than an hour from start to finish, so not super fast but fast enough for most of us. 


You basically start out by making a cornbread with creamed corn in it.  While it's baking you whip up the meat mixture.  Pour the meat mixture on top of the partially cooked cornbread and then bake it the rest of the way.  Easy peasy.

Soppy Joe Cornbread Casserole
Recipe from BunsInMyOven


Ingredients
  • 1 (8.5 ounce) box cornbread mix (like Jiffy)
  • 1 cup cheddar cheese, shredded
  • 1/3 cup milk
  • 1 whole egg
  • 1 (14 3/4 ounce) can cream style corn
  • 1 (24 ounce) can sloppy joe sauce
  • 1 pound ground beef
  • 1 Tbsp butter
  • 1/2 sweet onion, chopped
  • 1 bell pepper, chopped
  • 1/4 cup green onion, diced
Cooking Directions
  1. Preheat the oven to 400º
  2. In a bowl mix together the cornbread mix, 1/2 cup of the cheese, milk, egg and canned corn. Stir together and pour into a greased 9x13 inch dish.
  3. Bake for 15 minutes, or until just set.
  4. While the cornbread is baking, work on the sloppy joe portion.
  5. In a large skillet, add the butter and the onion and bell pepper. Cook until just starting to soften.
  6. Add the ground beef and cook until no longer pink, drain.
  7. Pour in all but 1/2 cup of sloppy joe mix. Stir around and let get warm.
  8. When the cornbread comes out of the oven prick it with a fork all over. Pour the 1/2 cup of reserved sloppy joe mix over the cornbread and smooth out.
  9. Pour the meat mixture over the top and top with the remaining cheese.
  10. Bake for 15 minutes. 
  11. Garnish with the green onion if desired.