Showing posts with label My Favorites. Show all posts

March 4, 2017

Lemon Ice Cream Bars


Sorry for the delay in posting this week.  We had our house painted, as well as my kitchen cabinets.  So needless to say, I was out of the way for most of the week.  Then I unplugged my internet and had to have my husband help me fix it.  So, luckilyI'm back in business now, a week later.

So, I was going through all of my old Food Network Magazine's and I discovered I had some pages marked, so I finally got around to making these.

I'm telling you, theses are g.o.o.d.  The lemon curd is nice and tart but easily gets sweetened up by the ice cream.  The crust is crumbly and delicious, a good combination of sweetness with a little hint of lemon.  Great recipe to have for the upcoming summer!


Lemon Ice Cream Bars
Recipe from Food Network Magazine. Jan/Feb 2014 page 64


Ingredients
  • 6 large egg yolks
  • 1 cup granulated sugar
  • 1 cup fresh lemon juice
  • 12 Tbsp unsalted butter, cut into small pieces
  • 1/2 tsp lemon zest
  • pinch of salt
  • cooking spray
  • 2 5-6 oz shortbread cookies
  • 3 Tbsp unsalted butter, melted
  • 1/2 tsp lemon zest
  • 2 pints vanilla ice cream, softened slightly
  • confectioners' sugar, for dusting
Cooking Directions
  1. Make the lemon curd first. In a saucepan, combine the egg yolks, sugar and lemon juice.  Cook over medium heat until it begins to thicken. 
  2. Add in chunks of butter until smooth and let thicken until it covers the back of a wooden spoon. Remove from heat.
  3. Strain through a fine mesh seive.  Then add the lemon zest and salt and let cool. 
  4. Spray a 9x9 or 8x8 inch dish with cooking spray.  Line it with aluminum foil so there is over hang on the sides, then spray again. 
  5. In a food processor, add all the cookies and pulse it until they are all crushed.  Slowly add in the melted butter and and lemon zest and  pulse a couple more times. 
  6. Press the cookie mixture into the bottom of the prepared dish, use your hands to make it even and press down firmly. 
  7. Press the lightly softened ice cream on top of the cookie crust.  Press down and even out the top as much as possible. 
  8. Pour the lemon curd over the top and smooth out.  Lay a sheet of plastic wrap over the top and place in freezer for a minimum of 4 hours. 
  9. When ready to serve, grab the ends of the aluminum foil and lift out of dish. Cut into squares and serve. 

February 8, 2017

Panera Bread Macaroni and Cheese


As part of my ongoing quest to make homemade macaroni and cheese that my daughter will actually eat, I tried this new one last night. 

I figured this was a sure winner, since she loves Panera Macaroni and Cheese. 

I was wrong about her liking it, but I LOVED it. 

Is it wrong that I'm actually happy she didn't like it, so I can have the rest? Her reasons for not liking it were: The consistency was thicker than the store version.  So, the flavor was a match but because I let it cool down (and it thickened) she wouldn't eat it. This is the story of my life.  Do you feel sorry for me? 

Well, obviously you just have to add a little more milk to get the consistency to thin out but she'd already determined that it wasn't right and therefore nothing would change her mind. 

It's OK, I'll eat it. 

Panera Bread Macaroni and Cheese
Recipe from Food Folks and Fun


Ingredients
  • 16 oz rigati pasta
  • 1/4 cup unsalted butter
  • 1/4 cup all-purpose flour
  • 2 1/2 cups milk (2% or whole)
  • 6 slices American cheese (white) cut into strips
  • 8 oz extra sharp cheddar (white) grated
  • 1/2 tsp dijon mustard
  • 1 tsp kosher salt
  • 1/4 tsp hot sauce
Cooking Directions
  1. Boil the pasta according to package directions.
  2. Meanwhile, in a medium saucepan melt the butter. Add the flour and whisk constantly for 1 minute. Add the milk and whisk until thick. Add the cheese and stir until melted. Now turn off the heat and add the mustard, salt and hot sauce.
  3. Add the cooked, drained pasta and stir well.
  4. Serve hot

December 28, 2016

No-Bake Avalanche Cookies


So, this recipe was recently going around Facebook, and I thought, man those look good. And they're no bake, it was like they were begging me to make them. 

I'm really, really glad I did. 

These cookies are the bomb.  Easy to make and they stay delicious for a while after you make them too.  No stale cookies here, no sir, these taste just as good as they did the day they were made.  Oh, and I already had all the ingredients in the house, so Win! Win!


These Avalanche cookies have a soft texture, like fudge.  But they also have the wonderful texture of the Rice Krispies and the marshmallows. The peanut butter flavor is mild because it's mixed with white chocolate, but still noticeable.

Just an all around awesome cookie in my book, this one is going in "my favorites" section.  Yum!

No-Bake Avalanche Cookies


Ingredients
  • 16 oz vanilla flavored almond bark/CandiQuick
  • 15 oz creamy peanut butter
  • 2 cups Rice Krispies cereal
  • 1 1/2 cups mini-marshmallows
  • 1/2 cup + more for sprinkling mini chocolate chips
Cooking Directions
  1. In a large microwavable bowl, melt the almond bark in 30 second increments in your microwave until smooth.
  2. Add the peanut butter and stir until smooth.
  3. Add the Rice Krispies, marshmallows and chocolate chips and stir until evenly distributed.
  4. Line 2 cookie sheets with wax paper and then scoop a large amount (about the size of a small orange) of the mixture into a ball shape and place on the wax paper.
  5. Sprinkle more mini chocolate chips over the top if desired.
  6. Let sit in a cool area until hardened, you can also refrigerate until set.

November 23, 2016

Sugared Cranberries


You might be wondering what you would use sugared cranberries for.  Well, snacking for one thing.  They are delicious.  You may or may not know that cranberries are tart when eaten fresh by themselves.  They aren't very many people's snack.  Plus, they are hard to find during the rest of the year when it's not Thanksgiving time. But sugared, they are devine.  You still get the tart bite and then the sugar coats your tongue with sweetness and you go back for more.

As it turns out, this year I found a recipe for a cheesecake that needed some sugared cranberries on top for decoration and for deliciousness.  So, I had these for two purposes and I've still got some left that I'm snacking on.  I love them.  Now I wish fresh cranberries were available all year.

Sugared Cranberries
Recipe from Damn Delicious


Ingredients
  • 2 cups sugar (divided)
  • 1 (12 oz) bag fresh cranberries
Cooking Directions
  1. Place 1/2 cup of sugar and 1/2 a cup of water in a medium saucepan and cook over medium heat until sugar dissolves.
  2. Pour in the bag of cranberries and stir around to cover.
  3. Place the cranberries on cooling racks with wax paper underneath and let dry for at least an hour.
  4. Use the other 1 1/2 cups of sugar to coat the cranberries in. Set aside to dry for another hour.

October 26, 2016

Gluten Free Carrot Cake


I'm completely in love with this recipe.  It's seriously delish.  You can't even tell it's gluten free I swear to you.

Moist (sorry for those of you who hate that word), delicious cinnamon notes and the cream cheese frosting is just yum.  I think I need to make another one ASAP.

After my husband went gluten free I was thinking I'd miss out on all those yummy carbs, but you can still eat yummy carbs this way too.  No loss of flavor here.  Easy to throw together and yummy.  You can't beat it.


Gluten Free Carrot Cake
Recipe from About Food


Ingredients
  • 2 cups granulated sugar
  • 4 whole eggs
  • 1 1/2 cups light olive oil or vegetable oil
  • 2 tsp vanilla extract
  • 2 cups all-purpose gluten free flour mix
  • 2 tsp baking soda
  • 2 tsp baking powder
  • 2 tsp cinnamon
  • 1 tsp salt
  • 1 cup chopped nuts or raisins (optional)
  • 3 cups freshly grated carrots
Frosting: 
  • 4 Tbsp unsalted butter, softened
  • 3 ounces cream cheese, softened
  • 1 tsp vanilla extract
  • 2 1/2 cups gluten free powdered sugar
Cooking Directions
  1. Preheat the oven to 350ยบ
  2. You will need either 2-9" round cake pans, 1-9x13 inch dish or 36 muffin cups. Spray with non-stick cooking spray. If using cake pans, line the bottoms of each with parchment paper and then spray with non-stick spray. Set aside.
  3. Add the sugar and eggs to a stand mixer and blend until smooth, then add the oil and vanilla extract. Mix until smooth. 
  4. In a separate bowl add the dry ingredients: Flour, baking soda, baking powder, cinnamon and salt. Slowly add this to the wet mixture and mix just until smooth. 
  5. Stir in the carrots and raisins or nuts or neither. 
  6. Pour into the prepared pan and bake. Bake for 45-55 minutes for all pans other than the muffins.  For the muffins bake for 30-35 minutes. Insert a toothpick in the middle to check for doneness. 
  7. Let cool on a rack before frosring. 
  8. To make the frosting, combine all the ingredients together and mix until smooth. 

October 19, 2016

Quick Gluten Free Lasagna


A chill in the air means I break out the comfort food and lasagna is one of our favorites.  My daughter only recently started liking lasagna, and after 8 years of not eating it she requests it often.  I'm only too happy to oblige of course.  I mean, how could I say no? This recipe is very simple to throw together on a busy week night and tastes amazing.

Everything is already cooked when you throw the layers together so it's just a matter of melting the cheese.  Gluten free is such a big deal right now that it's not problem at all finding Rotini noodles. And most pasta sauce is gluten free but just check the label to make sure.

I have used both sliced mozzarella and shredded for this recipe but the slices to tend to be a bit stringier (which I like) so that's what I use mostly. Feel free to substitute your favorite meat sauce for the jarred sauce and meat, since you're making this you can add whatever your family likes best.  I love this recipe and my family does too.

Quick Gluten Free Lasagna
Recipe from FlippenDelicious


Ingredients
  • 1 pound gluten free rotini
  • 1 pound hamburger
  • 1 (32 oz) jar pasta sauce (gluten free)
  • 1 (24 oz) container cottage cheese
  • 1/2 cup grated Parmesan cheese
  • 1 1/2 tsp Italian seasoning
  • 2 1/2 cups shredded mozzarella cheese
Cooking Directions
  1. Preheat the oven to 375ยบ
  2. Follow the package instructions to cook the pasta. Set aside.
  3. Brown the ground beef, drain off the excess fat.
  4. In a bowl, combine the cottage cheese, Parmesan cheese and Italian seasoning.
  5. Pour just enough pasta sauce on the bottom of a 9x13 inch dish to cover the bottom.
  6. Pour the cooked pasta on top of that, followed by the cooked hamburger.
  7. Top all that with the remaining pasta sauce.
  8. Spoon the cheese mixture over the top of all that and spread around evenly and then sprinkle with mozzarella cheese.
  9. Bake for 20 minutes or until the cheese is melted.

October 3, 2016

Mongolian Beef


Mongolian beef is a fast, easy item to make for dinner.  It takes no time at all and yet tastes like you spent all night making it.  

The beef is cut in pretty thin slices so it's easy to chew and has great flavor.  The sauce is yummy yet not overly strong. The onions add a nice crunch and a bit of color.  I served mine over rice to keep it gluten free but it would also be delicious over egg noodles.

Perfect dinner for a busy week night.  


Mongolian Beef
Recipe from My Recipes


Ingredients
  • 2 Tbsp low sodium soy sauce
  • 1 tsp granulated sugar
  • 1 tsp cornstarch
  • 2 tsp dry sherry
  • 2 tsp hoisin sauce
  • 1 tsp rice vinegar
  • 1 tsp chili paste with garlic
  • 1/4 tsp salt
  • 2 tsp peanut oil
  • 1 Tbsp minced fresh peeled ginger
  • 1 Tbsp fresh garlic, minced
  • 1 pound sirloin steak, cut against the grain
  • 16 medium green onions, cut into 2 inch pieces
Cooking Directions
  1. Combine the first 5 ingredients and whisk until smooth.
  2. Over medium high heat, heat the peanut oil in a large skillet or wok.
  3. Add the ginger, garlic and meat. Cook for 2 minutes.
  4. Add the green onion pieces and cook for 30 seconds.
  5. Add the soy sauce mixture and cook for 1 minute or until thick. Serve hot.

September 21, 2016

Fudgy Flourless Chocolate Brownies


Continuing my flourless obsession, meet the flourless brownie.  I'd like to just add that I had to make two pans of these back to back because the first pan of them disappeared so fast I couldn't photograph them.  With the second pan, I had to threaten lives not to touch them before I could take a picture. That worked but they didn't last long after that.

So, flourless desserts are yummy, easy to make, and gluten free.  I'd eat these even if they weren't gluten free.  The outside is very much like a normal flour type brownie but the middle is much softer. Sort of like eating a cookie straight out of the oven (but without all that pain).

This, being the third flourless recipe I've tried is not going to be the last.  I just love them.  Don't get me wrong, they aren't any healthier for you.  There is still sugar and butter in them.  But, sugar and butter mixed with chocolate equals deliciousness. :)

Flourless Fudgy Chocolate Brownies
Recipe from Life Made Simple


Ingredients
  • 6 Tbsp unsalted butter
  • 3/4 cup granulated sugar
  • 8 oz semi-sweet chocolate
  • 2 whole eggs at room temperature
  • 1 tsp vanilla extract
  • 1 Tbsp unsweetened cocoa powder
  • 3 Tbsp cornstarch
  • 1/4 tsp salt
Cooking Directions
  1. Preheat the oven to 350ยบ
  2. Line a 8x8 or 9x9 inch square pan with tin foil and then spray with non-stick spray. Set aside.
  3. In a medium saucepan, over low heat melt the butter and then add the sugar. After the sugar is incorporated add the chopped chocolate. Stir until melted and smooth and then remove from the heat and beat with a hand mixer for 2 minutes.
  4. Add the eggs one at a time and then add the vanilla extract.
  5. Whisk until smooth.
  6. Use a mesh sieve to add the cocoa powder and cornstarch into the mixture. Then add the salt. Use a hand mixer to beat for another 2 minutes.
  7. Pour the batter into the prepared pan and bake for 22-30 minutes. Insert a toothpick into the middle to check for doneness. Do not overtake.
  8. Remove from the oven and let cool in the pan for at least 45 minutes before cutting.
  9. Use the tin foil to lift out of the pan and cut.

September 12, 2016

Flourless Chocolate Cake


You're looking at the reason my diet isn't going well.   My husband had a hankering for a piece of chocolate cake, so I indulged him and made this.  The great thing is that it's gluten free because it's completely flourless.  The bad thing is that it tastes amazing.  Like, thank goodness it's pretty rich or I would have eaten the whole thing myself, amazing. 

Don't confuse Gluten Free with healthy.  Just because there isn't any flour doesn't make this health food. 


It's obviously a different texture than cake.  But, because you're not substituting other flours for the wheat flour you already sort of have the expectation of a texture difference.  Instead, it's creamy all over.  It's smooth, chocolaty, and rich.  It's sort of like eating a big chocolate chip. 

Then, you add the chocolate ganashe on top (which I topped with mini chocolate chips) and it takes you into a chocolate induced coma. 


My family LOVED this cake.  In fact, I sent a piece over to my neighbor, so she made it, and her family loved it too. I'm loving all the flourless recipes I've found on Pinterest.
Grab a big glass of your favorite milk and a little piece of this heaven on a plate and enjoy!

Flourless Chocolate Cake
Recipe from Melanie Cooks


Ingredients
  • 1 cup semi-sweet chocolate chips
  • 1/2 cup (1 stick) unsalted butter
  • 3/4 cup granulated sugar
  • 3 whole eggs
  • 1/4 cup unsweetened cocoa powder
  • 2 tsp espresso powder (optional)
Chocolate Ganache
  • 1 cup semi-sweet chocolate chips
  • 1/2 cup heavy cream
Cooking Directions
  1. Preheat the oven to 375ยบ
  2. Use a 9 inch round cake pan. Spray with non-stick spray, then line with a piece of parchment paper that has been cut to fit the bottom of the cake pan. Then spray the top of the parchment paper.
  3. Put the butter and the chocolate chips in a microwave safe bowl and heat for 1 minute, stir and keep heating in 30 second increments until smooth. This can also be done over low heat in a saucepan.
  4. Pour the chocolate mixture into a mixing bowl and add the sugar, eggs, cocoa powder and espresso powder if using. Whisk until smooth.
  5. Pour the batter into the prepared cake pan and bake for 20 minutes.
  6. Remove from the oven and let cool for 10 minutes.
  7. Run a knife around the edges of the pan to loosen, then put a plate on the top of the cake pan and flip the cake over quickly.
  8. Peel off and discard the parchment paper.
  9. Now make the ganache. Heat the chocolate chips and heavy cream in a small saucepan over medium heat, whisking until smooth.
  10. Pour over the still warm cake and use a knife to cover it completely.
  11. Refrigerate the cake for at least an hour before cutting.

September 6, 2016

Flourless Peanut Butter Chocolate-Chip Cookies


I'm totally digging flourless recipes.  I can't tell you how much easier they are to make, and they taste amazing, and they are gluten free. I've recently jumped on the Gluten Free bandwagon (not 100%, but I'm about 95% there) and I'm loving how much less bloated I feel.  The only hard part for me has been the comparisons to standard bread products and gluten free since they are different flour flavors and textures. I just need to get used to it.  That's why I'm loving the flourless recipes.  There isn't anything to "get used to" because the flavor of whatever you're baking are just more intense.

For example, this peanut butter chocolate chip cookie has great peanut butter flavor.  You don't get the chewy cookie that you might with a regular flour recipe but they're still moist with a tiny bit of chewiness around the edge.  I love them.

This is the second recipe I've made that was flourless.  I'll post the first one I made soon but I have loved them both so much.  Don't get me wrong, just because they don't have any flour doesn't make them healthy.  But if you're gluten free, sometimes you just want a great tasting treat.

I'd eat these flourless desserts even if I wasn't trying to avoid gluten, they are that good.


Flourless Peanut Butter Chocolate-Chip Cookies
Recipe from Southern Living


Ingredients
  • 1 cup creamy peanut butter
  • 3/4 cup granulated sugar
  • 1 large egg
  • 1/2 tsp baking soda
  • 1/2 tsp salt
  • 1 cup semi-sweet chocolate chips
Cooking Directions
  1. Preheat the oven to 350ยบ
  2. Mix the peanut butter and sugar together in a mixing bowl until smooth. Add the remaining ingredients and stir until smooth.
  3. Use a cookie scoop or two spoons to dollop dough onto the cookie sheet about 2" apart.
  4. Bake for 12-14 minutes. Let cool for 5 minutes before moving to a cooling rack.

July 27, 2016

Guavaberry Colada


I was lucky enough to get to travel to St. Maarten at the end of March of this year, with my daughter. We fell in love with the island, the people, the food and especially the drinks.  Tropical drinks are my favorite anyway, I love fruit flavored drinks that you can't really taste the alcohol in.  I had several great drinks but I was only able to get the recipe for a couple of them.  This one was by far my favorite.

Now I'm kicking myself for only bringing back one bottle of this rum.  Is is SO good.  I was able to find some American locations that carry this rum but sadly none of them are near me.  I guess another trip to St. Maarten is necessary.  I wonder how many bottles I can bring back without getting arrested.

This drink is a little hard to describe unless you've had Guavaberry Rum.  It's sweet but not overly sweet, fruity but not necessarily a guava flavor as you might expect. It's sort of creamy due to the coconut cream. You don't necessarily taste the pineapple juice either, all the flavors just blend together so well that it's sort of a nondescript fruit flavor.  Sorry, that's the best I can describe it.

If you ever see a bottle of this rum, do yourself a favor and grab a bottle or six.

Guavaberry Colada
Recipe from Guavaberry.com


Ingredients
  • 2 oz. St. Maarten Guavaberry Rum
  • 1 oz. coconut cream
  • 3 oz. pineapple juice
  • ice
Cooking Directions
  1. Place all ingredients in a blender and blend until smooth. Garnish with fresh pineapple

July 20, 2016

Brooke's Best Bombshell Brownies


These brownies were a late night decision by my family after dinner.  As usual, I named off the not so appealing items we could have for an after dinner treat.  And, as usual, my family named something they wanted in which we didn't already have, but needed to be made.

I should probably mention that when they asked for brownies, my mouth almost immediately started drooling.  But, I put my wrist to my forehead and threw my head back very dramatically and said "yes, of course I will whip up a batch of brownies, even though I just slaved for hours making dinner".  That probably would have actually worked, had we not just had salad for dinner.

Anyways, never one to turn down a request from my family, I jumped online to find my next brownie recipe.  This one jumped out at me for a couple of reasons.  First of all, it was made in a 9x13 inch dish which means there would be plenty....for my family. Second, the description said "chewy" which is a key word for me.  I love chewy brownies and chewy cookies.

I have to say, the recipe was easy to throw together.  There's plenty of chocolate in there with the addition of the chocolate chips (you could frost them if you really wanted more chocolate). They are chewy, the edges get nice and firm, and the flavor is very chocolaty.  Exactly what you're looking for in a brownie.  Most of us have these ingredients in our pantry, so whip some up tonight.


Brooke's Best Bombshell Brownies
Recipe from AllRecipes


Ingredients
  • 1 cup unsalted butter, melted
  • 3 cups granulated sugar
  • 1 Tbsp vanilla extract
  • 4 whole eggs
  • 1 1/2 cups all-purpose flour
  • 1 cup unsweetened cocoa powder
  • 1 tsp salt
  • 1 cup semi-sweet chocolate chips
Cooking Directions
  1. Preheat the oven to 350ยบ
  2. Spray a 9x13 inch dish with non-stick cooking spray
  3. In the bowl of your stand mixer with the paddle attachment add the sugar and butter and mix well.
  4. Add the eggs one by one blending after each addition.
  5. In a separate bowl add the flour, cocoa powder and salt and whisk together.
  6. Slowly add the dry ingredients into the wet with the mixer on low until thoroughly incorporated.
  7. Add in the chocolate chips and mix briefly.
  8. Pour the batter into the prepared dish, even out and bake for 35-40 minutes or until a toothpick inserted into the center comes out clean.
  9. Let cool on a cooling rack and serve.

June 29, 2016

Peach Blueberry Pie


It's peach season in the South so naturally we've been eating all we can.  I love to can peaches but haven't had time this year, so we've just been eating them fresh.  However, to change things up a bit I decided to try a pie.  Blueberries are my husbands favorite so when I saw this recipe I thought it was perfect.  Also, I had a handful of raspberries in my refrigerator so I threw those in too.

I loved the flavor of this pie.  Sweet and interesting because of the multiple fruit flavors.  The mixture is perfect and held up very well when sliced and served up. Perfect with some ice cream or whipped cream.

I just used a store bought crust which is not what I normally do, but it was still delicious.  If you make a homemade crust it'll be the hit of dessert!  I hope you can try this one this summer with some of your local peaches.

Peach Blueberry Pie
Recipe from Taste of Home


Ingredients
  • 1 cup sugar
  • 1/3 cup all-purpose flour
  • 1/2 tsp ground cinnamon
  • 1/8 tsp ground allspice
  • 3 cups peaches, sliced and peeled
  • 1 cup blueberries, fresh or frozen
  • pastry for double crust 9 inch pie
  • 1 Tbsp butter, at room temperature
  • 1 Tbsp milk
  • cinnamon sugar
Cooking Directions
  1. Preheat the oven to 400ยบ
  2. Make the pie crust and put it in the pie plate (or use pre-made)
  3. In a large bowl, mix together the sugar, flour, cinnamon and allspice and whisk. Add the fruit and stir to coat.
  4. You can either top the pie with a full pie crust and cut to ventilate or create a lattice top.
  5. After you've added the top crust, cut off the excess crust around the edges leaving about 1/2 an inch overhand so you can tuck it under the bottom crust and seal with your fingers or a fork.
  6. Use a brush to spread milk over the top and then sprinkle with cinnamon sugar.
  7. Bake for 40-45 minutes, until golden. Let cool slightly before serving.

June 14, 2016

Baja Shrimp Taco


This is one meal that I fell in love with.  It's not overly spicy but just enough to give you a slight heat and tons of flavor. This is also one of those meals I need to cook for myself.  My husband is from New England and yet isn't much of a seafood eater.  Isn't that strange? Maybe not, but I guess I always assumed that people who lived near seafood should like it. I guess that's not always the case.  Although I grew up in beef cattle country and beef is one of my favorites....who knows.

Anyway, This meal does take some preparation because of the breading and frying of the shrimp but other than that it's totally easy.  And, leftovers are delicious. I think that they fish fry breading has a lot of flavor anyway but when you combine it with that spicy ranch it really takes it over the top.

I enjoyed this recipe tremendously.  I got it from my local grocery store (Publix), they have a section called Apron's where they let you sample a meal idea and if you decide to try it they have all of the needed ingredients right there waiting for you, so you don't have to wonder all over the store trying to find stuff.  Great concept and obviously it worked!

Baja Shrimp Tacos


Ingredients
  • 2 Tbsp fresh cilantro
  • 2 Tbsp mayonnaise
  • 2 limes (tested and juiced)
  • 2 cups shredded three-color coleslaw mix
  • 3 Tbsp spicy ranch dressing
  • 1 lb shrimp, peeled and deveined (thawed if frozen) Medium size should work
  • 1/2 cup fish fry mix
  • 1/4 cup vegetable oil
  • 8 small flour tortilla's
  • 1 avocado, sliced
Cooking Directions
  1. In a small bowl add the chopped fresh cilantro, mayonnaise and 1 tsp of lime zest, 2 Tbsp lime juice, whisk until smooth. Add the slaw, stir and set aside.
  2. Coat the shrimp in the ranch dressing, then coat in the fish fry mix.
  3. Add the oil to a pan and heat on med-high. Add the shrimp and cook for 3-4 minutes on each side until shrimp are opaque and coating is golden. Drain on paper towels.
  4. To build a burrito add the slaw to the bottom, then a couple of thin sliced avocado and then shrimp. Roll up and enjoy.

May 17, 2016

Sugar Free Chia Jam


By far the easiest jam recipe you'll ever make.  No cooking, no pectin, no sugar.  Only two ingredients and you can eat it straight out of the jar if you want to. Seriously. Crushed fruit and chia seeds and that's it.

The chia seeds thicken up the fruit so it can become spreadable for peanut butter and jelly or topped on your hot cereal's in the morning.  Also great scooped into your morning smoothie. And chia seeds are super healthy for you, so that's a plus. Noted as one of the most nutritious foods on the planet they have ton's of fiber, protein, Omega-3's and various other nutrients.  You can buy them most places these days, they usually come in a see through container and are dry and very tiny. You can also find them online. And best of all they are usually reasonably priced.

I loved this recipe because clearly, it's very easy.  But also very healthy AND it tastes exactly like the fruit itself, the chia seeds don't add any flavor, just texture.

Chia Jam
Recipe from Time


Ingredients
  • 1 cup crushed fruit
  • 1 Tbsp chia seeds
Cooking Directions
  1. Mix together and place in the refrigerator for a day or two in order for the chia seeds to plump up. Enjoy.

May 11, 2016

Cheesy Stuffed Shells


If you're looking for some hot cheesy deliciousness, look no further.  This dish is the definition of comfort food.  Hot, melty and delicious. It requires a little bit of time to stuff the shells but honestly, it doesn't take that long once you get a system down.

I decided to try this one out when I saw that it was a little unusual in that it doesn't have a red sauce.  Don't get me wrong.  I love me some red sauce, but I wanted different. I wanted cheese! Oh boy did I get it.

I am in love with this recipe and I can't wait to make it again soon.

Cheesy Stuffed Shells
Recipe from Delish


Ingredients
  • 15 jumbo pasta shells
  • 1 1/2 cup ricotta
  • 1 cup + more for sprinkling Italian cheese blend
  • 1 whole large egg
  • salt
  • pepper
  • 1 stick butter
  • 1 cup heavy cream
  • 1/2 cup Parmesan cheese
  • fresh basil for topping (optional)
Cooking Directions
  1. Preheat the oven to 350 degrees.
  2. In a large pot of boiling, salted, water - cook the shells until al dente and then let cool.
  3. Meanwhile, in a large bowl, mix together the ricotta, cheese blend, egg, and salt.
  4. Stuff the mixture into the shells.
  5. In the saucepan over medium low heat, melt the butter. Add the cream and bring to a simmer. Add the Parmesan cheese and whisk until smooth. Season with pepper.
  6. Pour 2/3 of the cheese sauce into a baking dish or oven safe pan. Top with the stuffed shells and then pour the remaining sauce over the top of the shells. Sprinkle with some more of the blended shredded cheese.
  7. Bake for 15-20 minutes until hot and bubbly.
  8. Garnish with basil if desired.

April 28, 2016

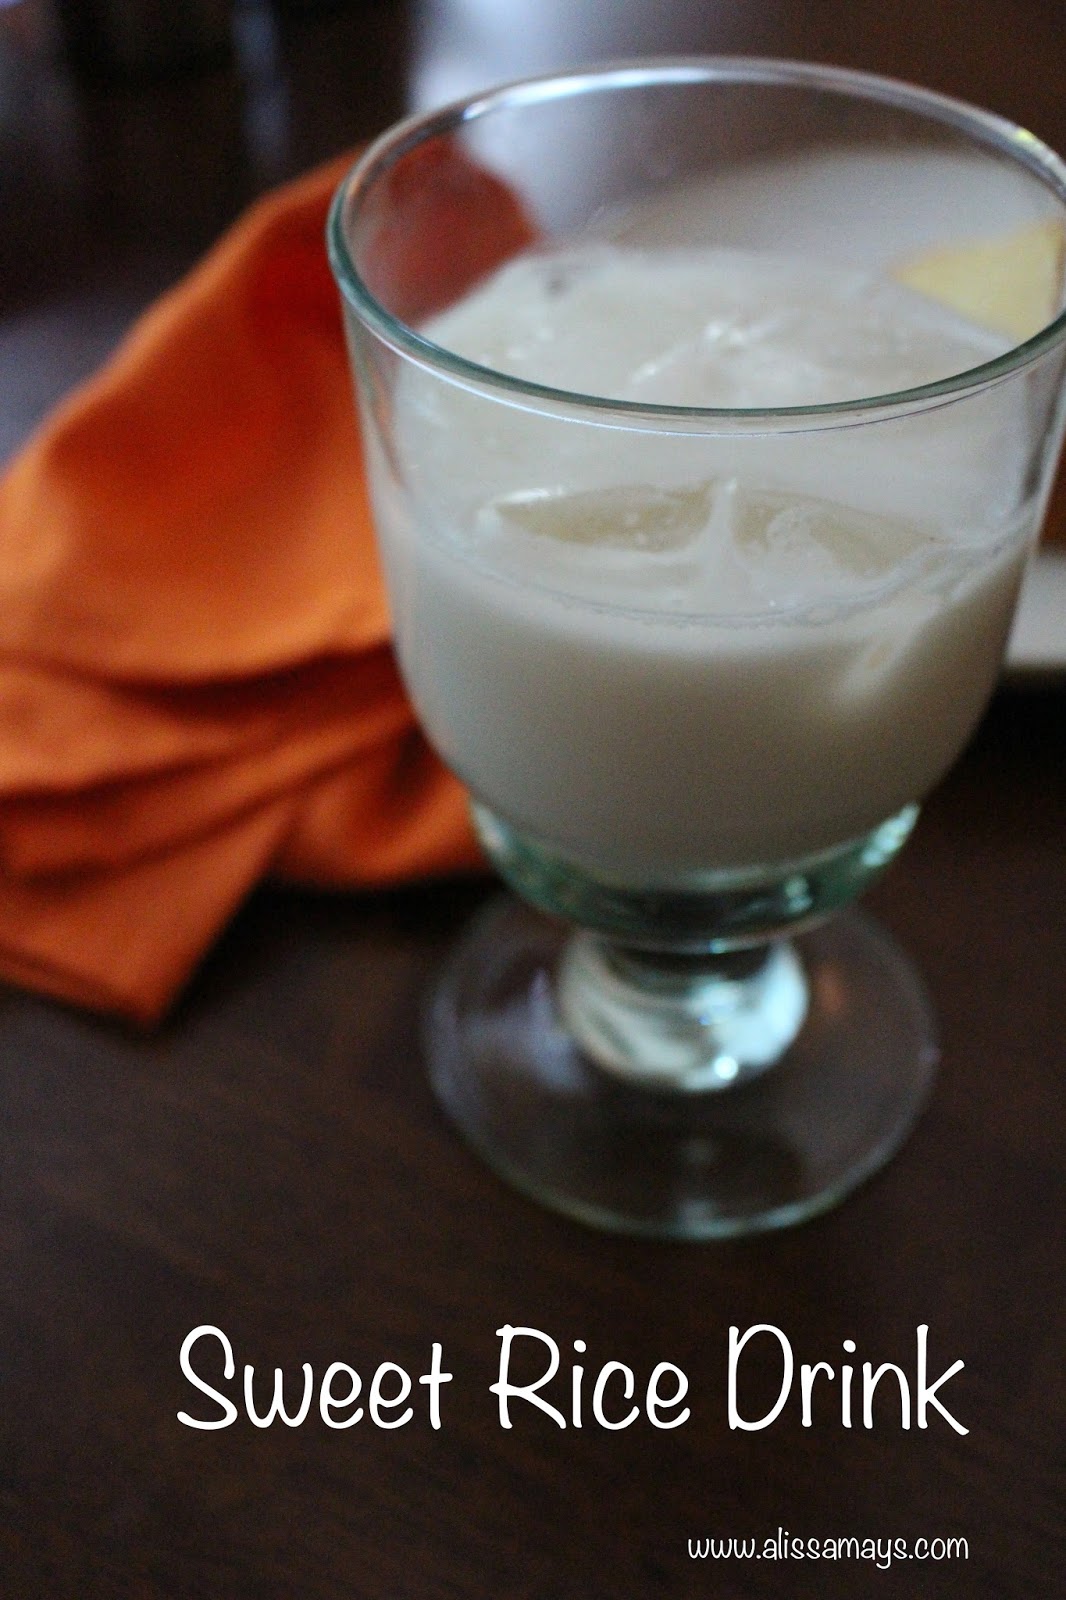
Sweet Rice Drink


If you're lucky enough to live near a Public grocery store then you'll understand me when I say, their Apron's meals are amazing.  They make some for you to sample, then have all of the ingredients that you need right there next to the display so you don't have to run around the grocery store searching for it all, and they give you the free recipe card to keep.  I love it.  

This recipe was paired with a yummy Baja Shrimp Taco recipe that was delicious and I do plan to make it eventually, however, this drink had my attention quickly. It's so dreamy.  The cinnamon really sets it apart. It reminds me of a drink for the holidays probably because of the cinnamon but I had to run home and whip it up.  

It's easy to make and comes together quickly (30 minutes) and all you need is a blender and a fine mesh strainer. I loved it.
Sweet Rice Drink
Recipe from Publix Aprons


Ingredients
  • 1 cup uncooked white rice
  • 5 cups water
  • 1 (14 ounce) can sweetened condensed milk
  • 1 tsp ground cinnamon
  • 2 tsp vanilla extract
Cooking Directions
  1. In a blender, combine the rice and water and blend for 1 minute.
  2. Chill for 30 minutes or up to 3 hours.
  3. Add the remaining ingredients and mix together with a spoon until combined.
  4. Refrigerate leftovers.

February 15, 2016

Billion Dollar Bar's


How's everyone holding up out there? Ready for Spring? Me too.  I never thought I'd say that since I'm a cold weather kind of girl but I really am ready.  We've been getting really cold weather and no snow to show for it, so it seems like we could really just skip the cold part now.

But I digress.

I recently made these bars for a girls night that I went to at a neighbors house. There are multiple steps to making them but the finished product was amazing.  I love the little butterscotch hint in the chocolate layers.  They remind me of a dessert my gramma used to make but these are smooth and dreamy.

After you make each layer you have to refrigerate for about 30 minutes in order to prepare for the next layer.  The layers themselves aren't complicated to make, you just have to allow enough time to get it finished before you plan to serve them.

This bar is basically just one big candy bar.  One big delicious candy bar. I would compare it mostly to a milky way however the flavors are different.  The texture is sort of the same though. You have some added peanut butter and butterscotch flavors which set it apart from anything else that you can buy.  I loved it.

I hope you can make this soon, if you do, let me know what you think of it.


Billion Dollar Bar
Recipe found on FoodPinsNow via Food.com


Ingredients

Bottom chocolate layer
  • 1 cup milk chocolate chips
  • 1/3 cup butterscotch chips
  • 1/3 cup peanut butter chips
Nougat layer
  • 4 Tbsp butter
  • 3/4 cup granulated sugar
  • 1/4 cup light brown sugar, packed
  • 1/4 cup evaporated milk
  • 1 1/2 cups marshmallow cream
  • 1/3 cup creamy peanut butter
  • 1 1/2 cups salted peanuts (optional)
Caramel layer
  • 14 oz package caramel pieces, unwrapped
  • 1/4 cup heavy cream
  • 1 Tbsp butter
Top chocolate layer
  • 1 cup milk chocolate chips
  • 1/3 cup peanut butter chips
  • 1/3 cup butterscotch chips
Cooking Directions
  1. Lightly spray a 9x13 inch pan or double line it with plastic wrap with some hanging over the sides.
  2. For the bottom chocolate layer: In a medium saucepan over low heat, melt all three types of chips and stir until smooth and melted.  Spread out on the bottom of the pan and then refrigerate for 30 minutes. 
  3. For the Nougat layer, use a medium saucepan to melt the butter over medium heat.  Add both sugars and the evaporated milk and stir until it begins to boil.  Boil and stir for 5 minutes. Remove from the heat and add the peanut butter and the marshmallow cream.  Stir and spread on top of the chocolate layer.  If using peanuts, spread them over the top. Refrigerate for another 30 minutes. 
  4. For the caramel layer: Add all of the ingredients into a medium saucepan and cook over low heat while stirring until the mixtures has melted and is smooth. Pour over the nougat layer. Refrigerate for 30 minutes. 
  5. For the top chocolate layer: Use a medium saucepan to melt the three types of chips over low heat until melted and smooth. Spread over the caramel layer and refrigerate for at least 1 hour before cutting into squares. 

February 1, 2016

One Ingredient Ice Cream


As you might already know, I'm always on the lookout for recipes to use up the one's I have sitting on my counter getting browner and browner.  My daughter thinks the brown spots are poison and therefore will not touch them.  Oh sure I can sneak it into a smoothie for her but at her age now she likes to help me make the smoothies so this trick doesn't always work.

Banana ice cream works.

I was so amazed at how creamy this is with just banana's.  I mean I had no idea it would turn out this good! I'm probably going to purposely let the banana's get brown now just so I can make this.  There are so many different flavor combinations I want to try.  I'm so excited!  Heck, it's just banana's so have it for breakfast if you want.  Ice cream for breakfast!!

I love these little tricks.  I hope you love it as much as I do.

One Ingredient Ice Cream
Recipe from OneIngredientChef


Ingredients
  • 4 (or more) banana's starting to brown.
Cooking Directions
  1. Peel the banana's and place into a zip lock bag, then place in the freezer.
  2. Freeze overnight.
  3. Remove from the freezer and cut into 1/2" chunks and place into a food processor.
  4. Blend for about 60 seconds until smooth and creamy.
  5. At this point you can eat it, freeze it or add other flavors.
Mint Chocolate Chip  (shown above) - add a couple of drops of peppermint extract and a handful of chocolate chips.  Blend until combined. 

Check out the website link above for a couple more flavor options. 

January 27, 2016

Bacon Wrapped Tater Tots


This appetizer is one that I brought to a New Years party that I attended.  They were a huge hit and lots of people asked me for the recipe.  So, here is is.  Very simple to put together.  The ingredients aren't hard to find and if you've got yourself a little time for assembly they aren't complicated.

I've made them several times since that night and I've discovered that cooking them on a rack vs directly on a pan really helps with two things.  First: you don't get the pooling of melted brown sugar and bacon fat around each tater tot, which in turn makes them difficult to get off the tin foil.  Second: They crisp up better and aren't as gooey.

The combination of sweet and salty, combined with a yummy tater tot is delicious. Prepare yourself for a lot of people asking how they're made.

Bacon Wrapped Tater Tots
Recipe from Damn Delicious


Ingredients
  • 2 cups tater tots, at room temperature
  • 4 slices (or more) thin sliced bacon, cut into quarters
  • 1 ounce sharp cheddar cheese, cut into 1/4" pieces
  • 1/4 cup brown sugar
Cooking Directions
  1. Preheat the oven to 400ยบ
  2. Line a jelly roll pan with tin foil and place cooling racks on top the tin foil.
  3. Take a tater tot, place a piece of cheese on top, wrap in bacon, roll in brown sugar and place on the prepared pan.
  4. Continue until all are wrapped.
  5. Bake for 20-25 minutes. The bacon should have started to get crisp around the edges and be golden in color.
  6. Let cool a little before removing from the pan.
  7. Serve hot or at room temperature.