Showing posts with label Ice Cream. Show all posts

March 4, 2017

Lemon Ice Cream Bars


Sorry for the delay in posting this week.  We had our house painted, as well as my kitchen cabinets.  So needless to say, I was out of the way for most of the week.  Then I unplugged my internet and had to have my husband help me fix it.  So, luckilyI'm back in business now, a week later.

So, I was going through all of my old Food Network Magazine's and I discovered I had some pages marked, so I finally got around to making these.

I'm telling you, theses are g.o.o.d.  The lemon curd is nice and tart but easily gets sweetened up by the ice cream.  The crust is crumbly and delicious, a good combination of sweetness with a little hint of lemon.  Great recipe to have for the upcoming summer!


Lemon Ice Cream Bars
Recipe from Food Network Magazine. Jan/Feb 2014 page 64


Ingredients
  • 6 large egg yolks
  • 1 cup granulated sugar
  • 1 cup fresh lemon juice
  • 12 Tbsp unsalted butter, cut into small pieces
  • 1/2 tsp lemon zest
  • pinch of salt
  • cooking spray
  • 2 5-6 oz shortbread cookies
  • 3 Tbsp unsalted butter, melted
  • 1/2 tsp lemon zest
  • 2 pints vanilla ice cream, softened slightly
  • confectioners' sugar, for dusting
Cooking Directions
  1. Make the lemon curd first. In a saucepan, combine the egg yolks, sugar and lemon juice.  Cook over medium heat until it begins to thicken. 
  2. Add in chunks of butter until smooth and let thicken until it covers the back of a wooden spoon. Remove from heat.
  3. Strain through a fine mesh seive.  Then add the lemon zest and salt and let cool. 
  4. Spray a 9x9 or 8x8 inch dish with cooking spray.  Line it with aluminum foil so there is over hang on the sides, then spray again. 
  5. In a food processor, add all the cookies and pulse it until they are all crushed.  Slowly add in the melted butter and and lemon zest and  pulse a couple more times. 
  6. Press the cookie mixture into the bottom of the prepared dish, use your hands to make it even and press down firmly. 
  7. Press the lightly softened ice cream on top of the cookie crust.  Press down and even out the top as much as possible. 
  8. Pour the lemon curd over the top and smooth out.  Lay a sheet of plastic wrap over the top and place in freezer for a minimum of 4 hours. 
  9. When ready to serve, grab the ends of the aluminum foil and lift out of dish. Cut into squares and serve. 

April 12, 2016

Orange Cream Frozen Yogurt


More Greek yogurt deliciousness.  This one is so good for the hot summer days that are quickly approaching.

This yogurt is so fresh tasting, yet creamy.  I loved how I felt guilty for eating it until I realized it's not that bad for me.  It's WAY better than the store bought alternatives.  The orange flavors are blended perfectly with the vanilla yogurt.  It's not too sweet, it's just perfect.

Very much like those orange creamsicle's we had as kids, only healthier.


Orange Cream Frozen Yogurt
Recipe from Food Network magazine


Ingredients
  • 3 cups plain Greek yogurt
  • 1/2 cup granulated sugar
  • 1/2 cup low fat milk
  • 2 Tbsp orange juice
  • 1 1/2 tsp orange zest
  • 1 tsp vanilla extract
Cooking Directions
  1. In a large bowl, whisk together all of the ingredients until smooth.
  2. Pour the mixture into your ice cream maker and process according to the manufacturers instructions until soft-serve texture is reached.
  3. Freeze

March 15, 2016

Greek Yogurt Fudge Pops


This past weekend I decided to try making my own Greek yogurt, and guess what? It worked.  It also made PLENTY of yogurt.  I've been searching for recipes where I can use some of it up (since I read that freezing yogurt changes the texture and makes it separate).

I'll post the recipe for the yogurt soon, but I wanted to share this one with you since my daughter totally loves it. It might help that I used these cute Popsicle molds, but she loves the flavor too. What a great way to use up some extra yogurt!

Creamy, not too sweet, with lots of chocolate flavor.  I think I'll make yogurt again soon just so I can make some more of these for summer. :)


Greek Yogurt Chocolate Fudge Pops
Recipe from Baker By Nature


Ingredients
  • 1 1/2 cups semi-sweet chocolate chips
  • 1 cup chocolate almond milk
  • 2 tsp vanilla extract
  • 1 1/2 cups vanilla Greek yogurt (full fat is best)
Cooking Directions
  1. In a medium saucepan, melt the chocolate chips over low heat until smooth and completely melted.
  2. Remove from the heat and whisk in the almond milk until smooth.
  3. Let sit for 5 minutes to cool slightly before adding the vanilla extract and Greek yogurt. Whisk until smooth.
  4. Strain the mixture through a fine mesh strainer.
  5. Pour the strained mixture into your Popsicle molds and freeze for several hours. 

February 1, 2016

One Ingredient Ice Cream


As you might already know, I'm always on the lookout for recipes to use up the one's I have sitting on my counter getting browner and browner.  My daughter thinks the brown spots are poison and therefore will not touch them.  Oh sure I can sneak it into a smoothie for her but at her age now she likes to help me make the smoothies so this trick doesn't always work.

Banana ice cream works.

I was so amazed at how creamy this is with just banana's.  I mean I had no idea it would turn out this good! I'm probably going to purposely let the banana's get brown now just so I can make this.  There are so many different flavor combinations I want to try.  I'm so excited!  Heck, it's just banana's so have it for breakfast if you want.  Ice cream for breakfast!!

I love these little tricks.  I hope you love it as much as I do.

One Ingredient Ice Cream
Recipe from OneIngredientChef


Ingredients
  • 4 (or more) banana's starting to brown.
Cooking Directions
  1. Peel the banana's and place into a zip lock bag, then place in the freezer.
  2. Freeze overnight.
  3. Remove from the freezer and cut into 1/2" chunks and place into a food processor.
  4. Blend for about 60 seconds until smooth and creamy.
  5. At this point you can eat it, freeze it or add other flavors.
Mint Chocolate Chip  (shown above) - add a couple of drops of peppermint extract and a handful of chocolate chips.  Blend until combined. 

Check out the website link above for a couple more flavor options. 

December 31, 2013

Top 5 of 2013


Crockpot Ham and Bean Soup

I couldn't get enough of this soup when I made it.  Very simple and totally delicious, this was my most viewed recipe of 2013.  With the weather so chilly right now, I think I'll go make some.


Samoa Brownies

I fell in love with this recipe the moment I dumped a truckload of caramel coconut over the top and then drizzled it with chocolate.  How can you not love this?


Baked Potato Casserole

Everyone should keep this recipe in their recipe box for those unexpected visitors.  No strange ingredients and in fact you probably have them all available right at this very moment. Combine them together and you get a sure fire hit at the dinner table.


Pineapple Gelato

Number four most viewed recipe from my blog is this Gelato.  I'm thrilled that people were so drawn to it because it is mighty tasty.  Very cool and refreshing on a hot day.


Baked Old Fashioned Donuts

Last but not least, one of my favorite recipes for an old fashioned cake donut that is baked in my very own oven.  I used the baking part as an excuse to eat more.


Thanks to all of you who visit my blog, pin it on Pinterest or share it on Facebook.  I appreciate all of your support and hope to see you and all your friends in 2014!

August 21, 2013

Fig and Apple Ice Cream


So there I was, with a bunch of fresh figs to use.  What to do, what to do? I have a bread recipe that I love that is fig, applesauce and almonds and I really like the combination. I don't love nuts in my ice cream however, so that's why there aren't any almonds in this recipe.  This is a fantastic use for fresh figs.  I know I've mentioned before that fresh figs and dried figs have entirely different tastes.  Fresh figs are more of a mild flavor and the apple really becomes the prominent flavor in the ice cream.  The area's of plain vanilla ice cream just add to the overall flavor.


Fruity, creamy, slight hint of cinnamon but not overly sweet.  I'm a fan for sure.  Even though fresh figs aren't as easy to find as dried, I would definitely go out of my way to find some for this recipe, which does limit it to a seasonal recipe but that's OK with me.  Plus, fresh figs give this awesome pink color! Give it a try and let me know what you think.


Fig and Apple Ice Cream
Adapted from Brown Eyed Baker's Apple Pie Ice Cream

Apple

Ingredients
  • 1/4 cup brown sugar
  • 1 Tbsp unsalted butter
  • 1 medium apple, peeled, cored and petite diced
  • about 18-20 small fresh figs, stem removed and petite diced
  • 1/2 tsp ground cinnamon

Custard

Ingredients
  • 5 large egg yolks
  • 1/3 cup granulated sugar
  • 1 3/4 cups heavy cream
  • 3/4 cup whole milk (I used 1%)
  • 1/4 tsp kosher salt
  • 1 tsp vanilla extract
Directions
  1. In a medium saucepan, add the butter and brown sugar.  Melt and combine together, then add the apples, figs and cinnamon.  Cook until the liquid is mostly absorbed. Stirring occasionally over medium low heat. When thick, remove from the heat and put into a bowl, cool to room temperature and then refrigerate until ready to use. 
  2. Mix the egg yolks and sugar together in a small bowl, set aside. 
  3. In a medium sized saucepan, add the cream, milk and salt.  Bring to a simmer over medium heat then lower the heat to a simmer and ladle some cream into the egg yolks and whisk together.  Add another ladle of cream into the egg yolks and whisk. 
  4. Pour the egg yolk/cream mixture back into the saucepan with the rest of the hot cream.  Cook until the mixture coats the back of a spoon (or about 170º to 175º)
  5. Put a fine mesh sieve over a medium sized bowl and pour the cream mixture through the sieve.
  6. Put the bowl into an ice bath and let cool to room temperature.  When cool, cover and put into the refrigerator overnight. 
  7. When ready to process into ice cream, pour the cream mixture into the ice cream maker and process based on the manufacturers instruction.  
  8. Pull the apple and fig mixture out of the refrigerator and add the vanilla, stir. Set aside. 
  9. When the ice cream has turned into a soft ice cream consistency, pour into a freezer proof container and slowly mix in the fig and apple mixture without mixing it in completely.  You want there to be swirls of flavor but you also want sections of just plain vanilla ice cream.  
  10. Freeze until ready to serve, remove from the freezer about 5-10 minutes prior to serving so it can soften a little. 

June 28, 2013

CopyCat Eskimo Bars


Happy Birthday to me!  Yes I did make my own birthday dessert in case you are wondering.  I did try to convince my husband that he could make these for me and I would talk him through it, but I don't think he heard it over the laughing and rolling on the floor that ensued. Yea, so I made them myself.

My inspiration for this dessert came about from The Food Network's show called "The Best Thing I Ever Ate". Giada was talking about her time in Jackson Hole Wyoming at a place called Snake River Grill.  After watching that episode I could think of nothing else but getting my hands on these babies.  Sadly, this isn't the kind of thing I would just whip up for myself so I waited,  and I waited, and I waited some more and finally my birthday rolled around and decided that my big day was a perfect time to celebrate with this unique dessert.  It encompasses all the things I love.  It does take some time and planning ahead so give yourself a day to prepare it.

They might not be very pretty, but looks aren't everything.


They aren't difficult to make but they are time consuming.  Totally worth it.


These little gems would be a show stopper at a dinner party for dessert.


Kids LOVE them!


My daughter skipped the caramel dipping but the rest of us were in love with the combination. 

I hope you're noticing the wonderful nail polish in my thumb there, I let me daughter paint them. Looks nice doesn't it? 

I need a manicure. 


For this first attempt I used boxed brownie mix (Ghirardelli Double Chocolate) and store bought ice cream (Breyer's Natural Vanilla).

I promise you that these are so worth the effort.

CopyCat Eskimo Bars
From the Alissamay's kitchen


Ingredients
  • 1 Box Brownie Mix (just a basic one)
  • 1/2 gallon ice cream, softened
  • 1 bag chocolate chips (I used Hershey's special dark)
  • 1 tsp shortening
  • 1 recipe or jar of caramel sauce
Cooking Directions
  1. Spray a 9x13 inch pan with cooking spray or line it with parchment paper.
  2. Bake the brownie mix according to the manufacturers instructions but use the 9x13 inch pan instead and bake for about 20 minutes. My pan was metal, cooking times might vary using glass.
  3. Let the brownies cool to room temperature and then freeze for about 30 minutes or until completely cold.
  4. Soften the ice cream until it's soft serve consistency. Empty the contents of the vanilla ice cream on to the top of the brownies. Spread out and smooth out on top so it's as flat an even as possible.
  5. Freeze again for about 30 more minutes or until the ice cream is completely frozen.
  6. While the ice cream is hardening in the freezer, use a double boiler to melt the chocolate chips. Add the shortening and stir into the melted chips until smooth.
  7. Let the chocolate cool to room temperature, keep stirring so it remains soft.
  8. Once cool, bring the brownie/ice cream out of the freezer and use a very sharp knife to cut them into the size bar you want.
  9. Freeze the bars on a cookie sheet so they are very cold.
  10. Remove about half the bars from the freezer - hold onto the brownie portion of the bar and dip the ice cream part in the chocolate. Move quickly because they melt fast.
  11. Once dipped immediately put back onto the freezer and continue with the remaining bars until all have been coated.
  12. Keep in the freezer until right before you are ready to serve. Serve with caramel for dipping.

Make this caramel sauce slightly ahead of when you plan to serve it, you want it to be at room temperature. 

May 6, 2013

Homemade Fudge Pops


It's been a hectic day, I'm sure you know what I mean.  Like a Monday, oh wait it is Monday.  Well anyway, that's my excuse for not publishing this first thing this morning like usual.  I am happy to report that we're seeing the sun today.  I never thought we'd miss it so much but it's May and you're supposed to have nice sunny cheerful spring days, right? We were getting so much rain that it's been impossible to go outside and enjoy much of anything.  Well, those days are over for a little while and I'm very grateful!

It's a great day for a fudge pop!

My daughter and I share an addiction to chocolate so I knew she'd love these.  I was right. They are very chocolaty and creamy and just right on a nice hot day.  I didn't have to change anything about this recipe, it was perfect just as it is!

Homemade Fudge Pops
Recipe from Brown Eyed Baker


Ingredients
  • 1/4 cup semi-sweet chocolate chips
  • 2/3 cup granulated sugar
  • 2 Tbsp cornstarch
  • 3 Tbsp unsweetened cocoa powder
  • 2 1/2 cups whole milk
  • 1 tsp vanilla
  • 1 Tbsp unsalted butter
  • 8 Popsicle sticks
Cooking Directions
  1. In a small microwavable dish, melt the chocolate chips by cooking at 50% power in 30 second increments. Stir after each heating until smooth.
  2. Stir the melted chocolate, sugar, cornstarch, cocoa powder and milk together in a medium saucepan. Heat over medium heat until it begins to thicken, about 10 minutes., stirring frequently.
  3. When thick, turn off the heat and add the vanilla and butter.
  4. Let cool until the mixture is warm but won't burn you if you touch it.
  5. Pour into Popsicle trays and freeze for 30 minutes before inserting the Popsicle sticks. Freeze until hard.

April 12, 2013

Pineapple Gelato


It's the time of year when we all start to think about beaches and pools and cool drinks.  Most of us will try our hardest to stop baking so the oven doesn't make the kitchen any hotter and all the while we're sweating it out at the gym so we can look just right in our bathing suits.  It's a vicious cycle but we do it every year.

Speaking of things we do every year, I am in love with my ice cream maker.  Making ice cream is so easy and I love trying out new recipes. I've posted a picture of my ice cream maker at the bottom of this post.  I'm sure there are a million different options out there but I sure do like this one.


This is a very mild flavored ice cream.  Pineapple isn't necessarily the strongest taste anyway but it's oh so good on a hot day when you're just trying to relax. 

If some of you are wondering what the differences are between ice cream and gelato here it goes.  Any "gelato" that you make in an ice cream maker in the comfort of your own home is most likely going to be ice cream and not gelato.  Gelato is churned at a slower speed so it becomes more dense then an ice cream churner.  Gelato is also less fat then a typical ice cream.  Ice cream usually has about 10% fat content where as Gelato is around 7-8% fat.  Another big difference is the temperature in which the Gelato is cooled.  It's not frozen at the same temperatures we have in our freezers and is in fact warmer and therefore the Gelato doesn't get completely frozen and is served sort of halfway between frozen and refrigerator temperature.  I hope that clears things up.  Essentially my "gelato" is really more like ice cream.  I guess if you want the authentic gelato you'll probably have to visit an ice cream shop, specialty shop or Italy. :)  If you're really set on making your own authentic gelato there are gelato makers out there, since I haven't tried any of them I wouldn't be able to give my opinion. 

Pineapple is one of those classic summer fruits so I find that this gelato/ice cream is perfect!  If you're in the mood for something slightly different check out the link below for the original recipe which includes rosemary!


Pineapple Gelato
Recipe modified slightly from Bakingdom


Ingredients
  • 1 cup milk
  • 2 cups heavy whipping cream, divided
  • 3/4 cup granulated sugar
  • 3 large egg yolks
  • 1 - 15.5 ounce can crushed pineapple with the juice (or use fresh like I did)
Cooking Directions
  1. In a large bowl, pour 1 cup of heavy cream and place a mesh sieve on top.
  2. In a medium saucepan, add the other 1 cup of heavy cream and the milk and sugar and cook over medium heat until the sugar has dissolved and the mixture is right below the boil point.
  3. In a separate bowl whisk the egg yolks and slowly add some hot milk mixture (about a cup) while whisking constantly.
  4. Now add the tempered egg yolks back into the milk mixture and bring to a low boil until the mixture has thickened and can coat the back of a spoon.
  5. Pour the hot milk/egg mixture through the mesh sieve into the cream and mix well. Add the crushed pineapple and mix.
  6. Place some plastic wrap over the mixture (touching the mixture) until it has cooled to room temperature.
  7. Refrigerate overnight.
  8. Put the mixture in your ice cream maker; following your manufacturers instructions.
  9. Freeze.

August 29, 2012

Mocha Ice Cream


I love how cool those people look when they walk around with their Starbucks cups.  I wish I were one of them.  Sometimes I go to Starbucks and get a coffee free frozen drink or a hot cocoa and I cherish the opportunity I have to strut myself around with a coffee cup. 

I wish I liked coffee. 

Here's the funny thing about me and coffee.  On the rare occasions that I have drunk coffee my personality changes and I turn into a real cranky pants.  Yes, cranky pants is the nicest way I could think to put the personality I am transformed into with coffee.  I don't know why.  It's weird. It's a caffeine thing I guess. 

Here's another funny thing.  I love the way coffee smells.  I love having my Hazelnut scented wax melting in my house.  It makes me happy. 

OK, there's the last funny thing.  I love slightly coffee flavored ice cream.  Like this Mocha ice cream.  I love everything about it.  It's a good thing too because this recipe makes a lot of ice cream! Not sure if you know this or not but coffee does tend to bring out chocolate flavors even more.  Often times you'll see brownie recipes with some coffee added.  Usually you can't really taste the coffee but you can in this ice cream.  It's not a strong flavor but it mixes perfectly with the chocolate flavors.  I love it! My husband loves it! My daughter loves it! Winner!


 Enjoy!

Mocha Ice Cream
Recipe from Taste of Home


Ingredients
  • 2 1/4 cup sugar
  • 3/4 cup baking cocoa
  • 1/3 cup all-purpose flour
  • 1 Tbsp instant coffee granules
  • dash salt
  • 3 cups milk
  • 4 eggs, beaten
  • 2 cups heavy whipping cream
  • 3 Tbsp vanilla extract
  • 4 cups half and half
Cooking Directions
  1. In a large heavy bottomed saucepan, combine the sugar, cocoa, flour, coffee and salt. Add the milk and eggs gradually and stir until smooth.
  2. Cook and stir over medium heat until the mixture thickens enough to coat the back of a metal spoon. Mixture should be about 160 degrees and should take about 15 minutes. Refrigerate until chilled.
  3. Stir in the remaining ingredients. 
  4. Fill your ice cream maker 3/4 full and freeze according to the manufacturers instructions. Refrigerate any remaining mixture until you're ready to freeze.
  5. Freeze until 10 minutes before you're ready to serve.

June 26, 2012

Strawberry Ice Cream


Wow, what a busy week I had last week.  A big event at my job, some parties to attend, a Tim McGraw/Kenny Chesney concert on Sunday.  I'm beat!  Did I mention this is my last week at my job also?  Well it is.  I'm going to stay home with my little girl and be a mommy.  That's quite the change for me, I've worked since I was 14 so this new step is a little scary for me.  The plus side is that I'll get to keep up on this blog much better than I have lately.  I'll also get to start making a meal plan which has been on my to-do list for way too long.  I usually run home and just throw something together so we can eat at a reasonable hour before the night time rush of bath's and bedtime.  I'm really looking forward to this change.

Along those lines comes this ice cream.  My daughter basically likes all ice cream so if I could figure out how to make broccoli ice cream I might be onto something. Just kidding, that sounds gross.  She's been asking for strawberry ice cream lately because I've been bringing home all these wonderful strawberries for us to snack on.  I finally gave in (she really had to twist my arm)!  She loved helping me make the custard for this ice cream and she also loved giving it a taste test once it was in the ice cream maker and starting to freeze.  She's a great help.


First off, you need to wash your berries.


Hull them and put them into a food processor.


Process with several small pulses.  You want it to have some chunks but be mostly ground up. This looks perfect.


Now start making your custard.


Strain the custard to remove any cooked egg pieces.


Add in the strawberry mixture.


Stir and refrigerate overnight.


Process in your ice cream maker for about 20-25 minutes and then move to a container you can freeze it in.  Let harden before scooping, or eat it as soft serve out of the ice cream maker.


I love the flavor of this ice cream.  You can really taste the fresh strawberry taste and it's creaminess makes it unbeatable.  I recommend you let sit on your counter for a few minutes before scooping as it did get pretty hard in the refrigerator.

Enjoy!

Strawberry Ice Cream
Found at Brown Eyed Baker

1 quart strawberries, hulled and sliced.  (32 ounces)
1 cup granulated sugar, divided
1 Tbsp lemon juice
2 cups heavy cream, divided
1 cup whole milk (I used 1%)
pinch of salt
1 whole vanilla bean
6 egg yolks
3/4 tsp vanilla extract

Wash and hull your berries, then place in a food processor with 1/4 c of the sugar and the lemon juice and pulse several times until most of the berries are broken up but there are still chunks left.  Transfer to a dish and refrigerate for 1 hour.

Start the base by adding 1 cup of the cream to a medium saucepan, add the milk, the remaining 3/4 cup of sugar and the salt.  Warm the cream mixture and stir to dissolve the sugar.  Once warm you can turn off the heat and add the vanilla bean.  Cover and let steep for 30 minutes.

Pour the remaining 1 cup of heavy cream in a bowl and place a strainer on top of the bowl.  Set aside.  In a smaller bowl, whisk the egg yolks.  Add some of the hot cream mixture from the stove to the egg yolks a little at a time to temper the eggs.  When you've added about 1 cup of the warm cream mixture to the eggs and whisked thoroughly you can then pour the egg/cream mixture back into the rest of the warm cream that is still in the sauce pan.

Turn the heat back on under the saucepan and warm the egg/cream mixture using a spatula to stir and scrape the bottom. Cook until the mixture thickens and coats the back of the spatula.  The temperature should be 170 degrees.  Pour the heated cream mixture through the mesh strainer into the remaining heavy cream.  Use your spatula to push the mixture through the strainer.  Pour in the chilled strawberry mixture and mix to combine.  Chill the mixture in an ice bath and then refrigerate overnight in a covered container.

When chilled, remove the vanilla bean and run the mixture through your ice cream maker for about 20-25 minutes. Freeze until hard.


April 20, 2012

Orange Ice Cream


So there I was making all of these candied orange peels (to be posted about later) and using all these orange skins and not really thinking about what I was going to do with the actual oranges.  Basically I did it backwards.  I should have decided to make orange ice cream and then thought about the candied orange peels so I wouldn't be wasting anything. Even better, I shouldn't have told anyone the truth about me being a backwards thinker and just let you all think that I'm not wasteful. Yep, that's what I should have done. 

If only there was a delete button or something.

Oh there is?  It's too late now.  I'm too far in.

I really enjoyed this ice cream.  I'm really more of a custard based ice cream lover but this one was pretty creamy for not having eggs.  The flavor was very good, fresh orange juice is the key here. 


Orange Ice Cream
From "Joy of Baking" found here
1 1/2 cups heavy cream
1/2 cup half and half
2 cups freshly squeezed orange juice
1/2 cup granulated sugar
1 Tbsp. lemon juice
1 Tbsp. orange zest
1 tsp. vanilla extract
Mix all of the ingredients in a bowl and refrigerate until very cold, overnight is best.

Place the mixture into your ice cream maker and follow the manufacturers instructions.

April 4, 2012

Banana Chocolate Chip Ice Cream


As usual I found myself staring at 6 banana's that were a little too far beyond the yellow color that I usually like.  I think I've mentioned before that I seem to always be buying banana's at the grocery store but then they just sit on the counter.  I'll eat one and my husband might eat one but that's usually it.  Unless I'm making smoothies or banana bread there they sit.

Summer has officially arrived here in the south (about a month early) so ice cream seemed like a safe bet.  There was only one problem, my daughter doesn't like banana's.  She does like chocolate however so that's why I decided to make this a chocolate chip variety.  It worked.  She loves it.  I also shared some with her daycare and those kids loved it too so I'd say we have a winner on our hands.


I doubled the recipe and it turned out just great.


When my dad was visiting one time he made a wonderful stove top banana dessert that had all of the ingredients you see above.  The only difference was that he cooked just cut the banana in half first and mine are cut in little pieces.  He also cooked his in a frying pan on the stove and these are baked.  But still, same idea.

Makes your house smell really good.


After the oven.  The butter and brown sugar have made a yummy sauce.


Pour the banana mixture into your blender and add the milk, sugar, vanilla, lemon juice and salt. Puree until nice and smooth.


Pour this mixture into a bowl with a  cover and refrigerate overnight.


Now just pour the mixture into your ice cream maker and follow the manufacturers instructions.  Add the chocolate chips at the end. Enjoy!


Banana Chocolate Chip Ice Cream
modified slightly from "Brown Eyed Baker" found here

3 medium-sized ripe bananas, peeled 
1/3 cup light brown sugar
1 tablespoon butter (salted or unsalted), cut into small pieces
1½ cups whole milk
2 tablespoons granulated sugar
½ teaspoon vanilla extract
1½ teaspoons lemon juice
¼ teaspoon coarse salt

1/2 cup semi sweet chocolate chips


Pretheat the oven to 400 degrees. 


Cut up the banana's in small pieces and place them into a heat proof dish.  Add the brown sugar and butter and bake for 40 minutes stirring once halfway through. 


Pour the mixture (hot is fine) into a blender and add the milk, sugar, vanilla, lemon juice and salt.  Puree the mixture until smooth.  Pour the mixture into a dish with a cover and refrigerate overnight. 


Pour the cold mixture into your ice cream maker (stir a little if it seems thick).  Follow the manufacturers instructions.  Add the chocolate chips the last 5 minutes of processing or just stir them in at the end.  Freeze. 

February 22, 2012

Gingerbread Ice Cream


I'm not sure if you noticed the ice cream kick I've been on lately.  I have no idea why other than it seems like there are an endless number of recipes out there and I feel like I have to put in an effort to keep up.  Having said that, this recipe seemed time sensitive since when I think of gingerbread I think of the holidays.  I also think of cold weather.  I also just like gingerbread.

I knew I would love this recipe when I read it on "Tracey's Culinary Adventures".  I thought it was just different enough to make an interesting blog post and just common enough to appeal to people.  I'm really happy with how this recipe turned out.  So rich and creamy.  So rich in fact that a little goes a long way but I consider it diet food for that reason.  OK, maybe that's a stretch.


I figured I'd better post this before winter turns into spring - which has already happened here it seems.  Feels like we just skipped winter this year.   I might have to take a drive to the mountains soon just so my little girl can play in the snow.  Yep, I think that's just what we'll have to do!

Gingerbread Ice Cream
Found at Tracey's Culinary Adventures


  • 1 1/2 cups heavy cream
  • 1 1/2 cups whole milk (I used 1%)
  • One 3-4 inch piece fresh ginger, peeled and roughly chopped
  • 6 large egg yolks
  • 1/2 cup packed light brown sugar
  • 1/4 cup molasses
  • 2 teaspoons ground ginger
  • 2 teaspoons ground cinnamon
  • 1/2 teaspoon ground cloves
  • 1/2 teaspoon freshly grated nutmeg
  • 1/4 teaspoon salt
  • 2 teaspoons vanilla extract


Use a medium sauce pan to combine the cream, milk and fresh ginger.  Bring to a boil over medium high heat and then turn the heat off and set aside for about 30 minutes to an hour.  This will allow the ginger to infuse with the milk mixture.  Strain the mixture and discard the ginger.  Bring the milk mixture back to a simmer. 

In a heatproof bowl, whisk the egg yolks, brown sugar, molasses, ginger, cinnamon, cloves, nutmeg and salt. Whisking constantly pour some of the simmering milk mixture in with the egg yolk mixture to temper the eggs.  Once the eggs have been heated slowly with the milk mixture add the egg mixture back into the saucepan and whisk until smooth and thickens enough to coat the back of a wooden spoon.  Strain the mixture into a heatproof bowl and add the vanilla. 

Let the mixture cool to room temperature in a bowl with a lid or plastic wrap and then refrigerate overnight or thoroughly chilled. 

Freeze your ice cream in your ice cream maker following the manufacturer's instructions.  Transfer to an airtight container and freeze until firm or at least 1 hour. 


February 13, 2012

Lemon Ice Cream


 I know, I know.  This is one of those recipe's you would make this summer but certainly not in the throws of winter.  Here's the thing.  It's not very winter like here.  Well, at least it hasn't been up until recently and I've still got my fingers crossed for snow.  We'll see.

Who am I kidding, I'll eat ice cream year round.

Just being honest.

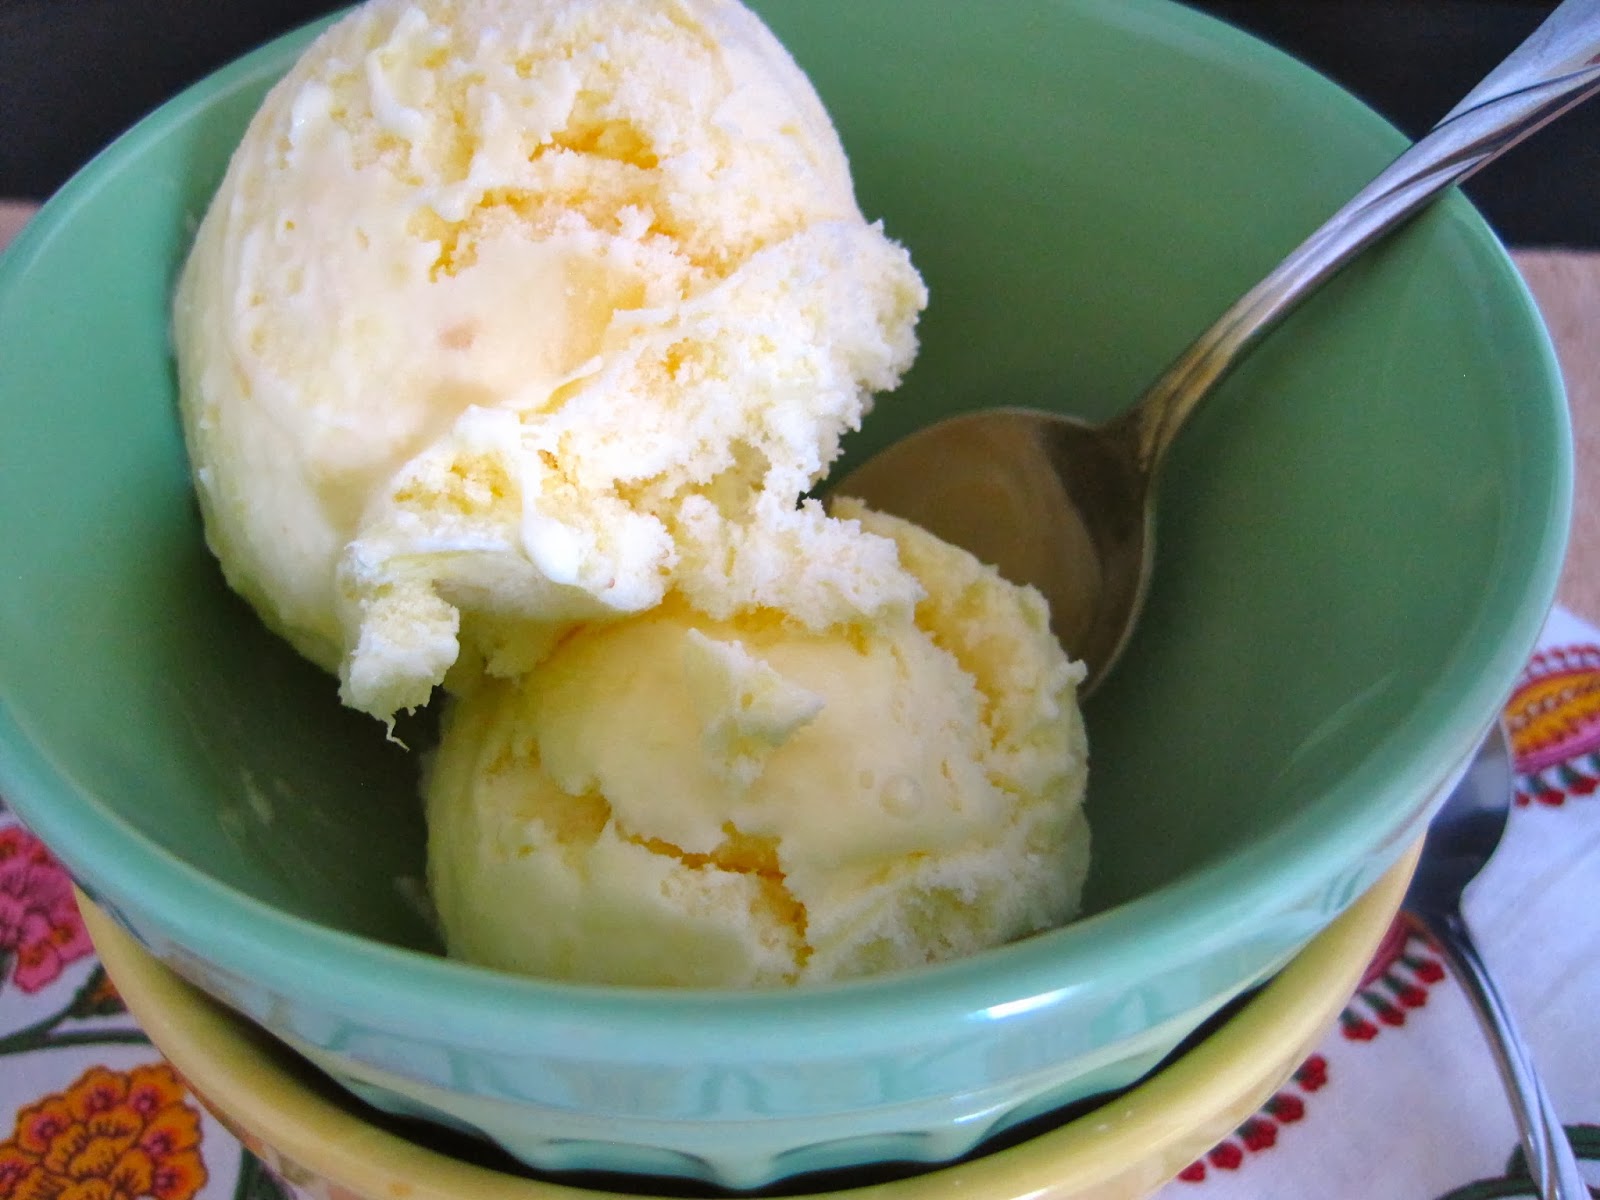
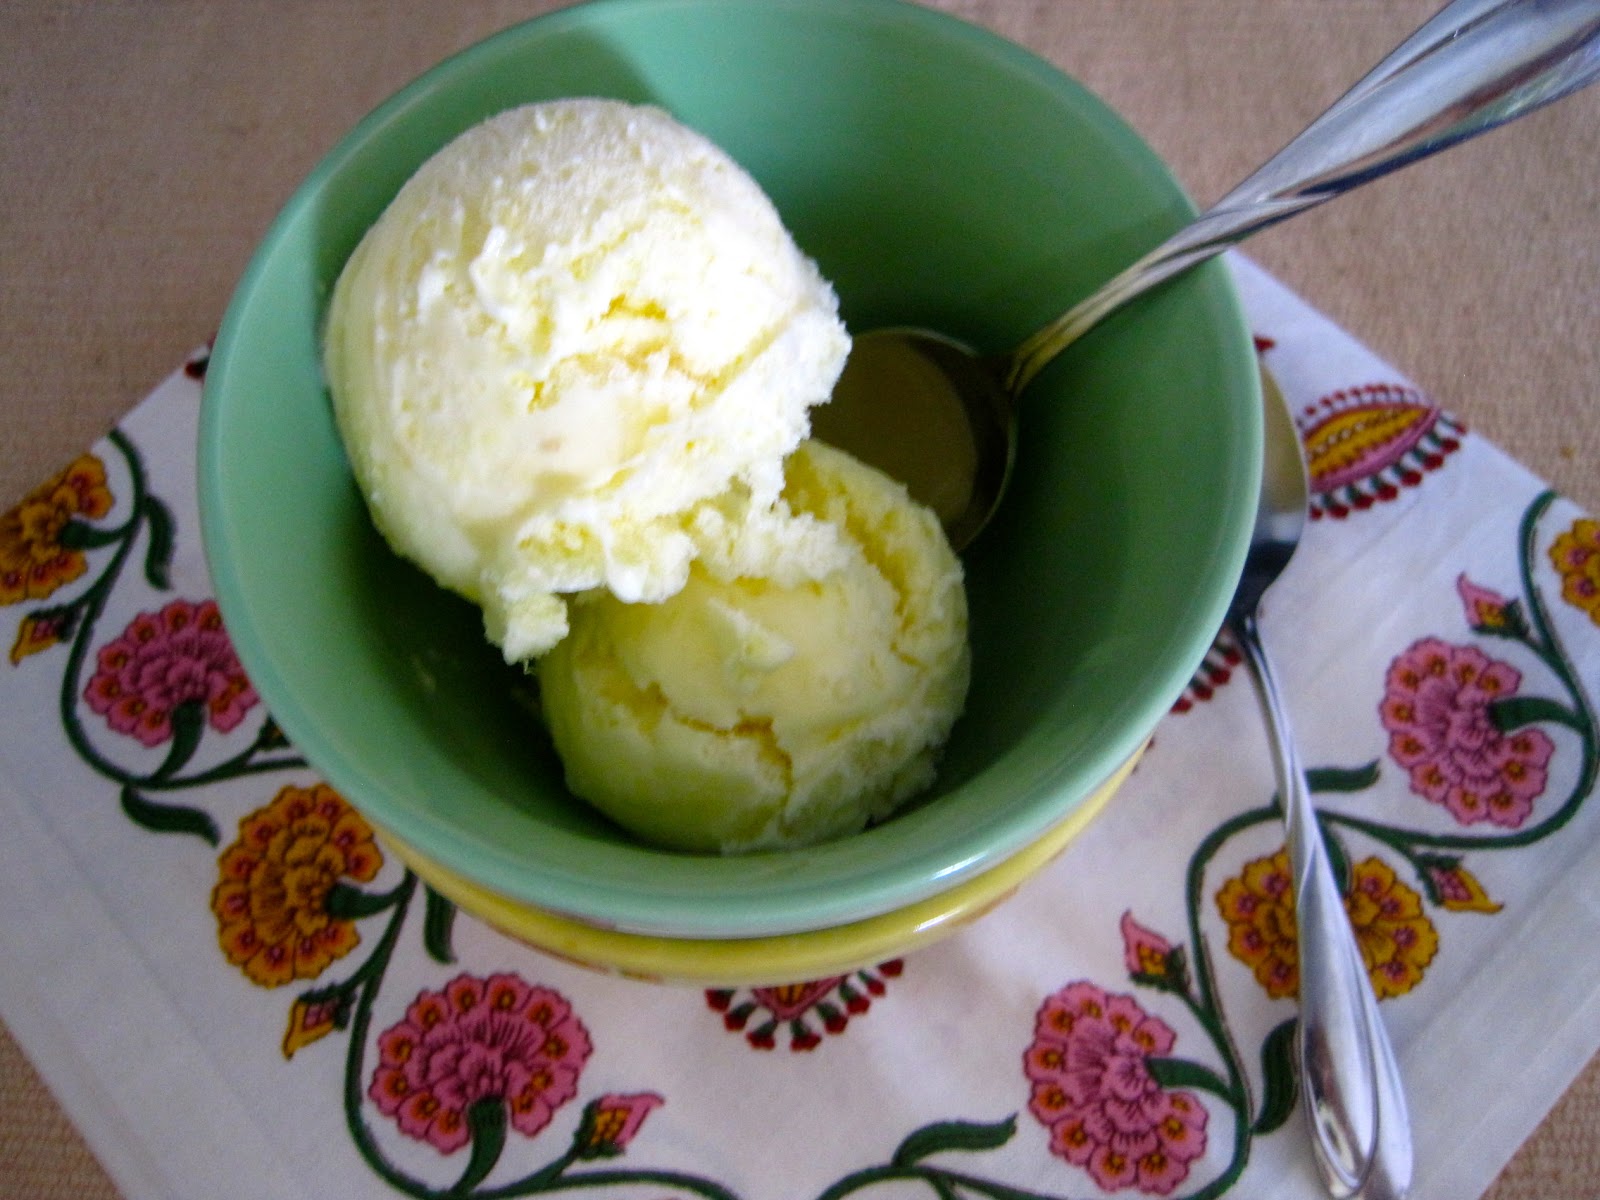
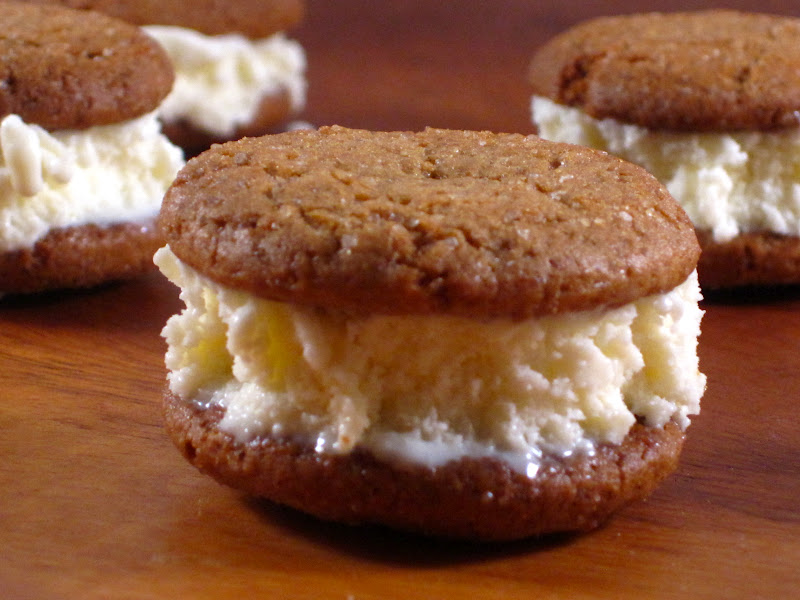
Save this recipe for this summer if you'd like, it's very refreshing, perfectly lemony, and lovely sandwiched between two gingersnap cookies.


 Here's a tip about the sandwich variety.  Make your sandwiches and put them in an airtight container in the freezer for a while.  The cookies tend to be quite crunchy and they soften a bit in the freezer.


Lemon Ice Cream
Recipe found at Epicurious here

1 tablespoon freshly grated lemon zest
1/2 cup fresh lemon juice
1 cup sugar
3 large eggs
2 cups half-and-half
1/2 teaspoon vanilla


In a saucepan, combine the zest, lemon juice, sugar and eggs and whisk until smooth.  Add 1 Cup of the cream and whisking constantly bring to a simmer.  Remove from the heat and strain through a fine mesh sieve and then let cool to room temperature.  Refrigerate until cold.  When cold, add the remaining 1 cup of half and half and vanilla and process in your ice cream maker according to the manufacturers instructions. 


February 6, 2012

Blood Orange Sorbet


I was at the grocery store the other day and found these delicious Blood Oranges.  I grabbed a bag not really knowing what I would use them for, so I hopped on the Internet and quickly found this Blood Orange Sorbet recipe from David Lebovitz and knew I'd found the right recipe. If you're not familiar with Blood Oranges they are slightly smaller than a regular orange and their skin can sometimes be multicolored (light and dark patches).  They are usually harder to peel than a regular orange as well.  As far as taste goes, I've read it described as a slight raspberry flavor.  The color is created when the fruit develops with low temperatures during the night.

I love using these oranges, they are delicious and so pretty to use in drinks, desserts or just to snack on.


Cut and juice the oranges.  I used about 2 cups of juice but you can use as little or as much as you want in 1 cup increments.


Using the appropriate amount of sugar, place it in a saucepan and add just enough juice to saturate the sugar. Cook over medium heat until the sugar has dissolved.


Pour the sugar/juice mixture back in with the rest of the juice and let cool.  After it's down to room temperature you can transfer it to the refrigerator.  I put mine in overnight. I also left the pulp in, if you don't like the pulp you can strain in before refrigerating.


When cold, add the mixture to your ice cream maker and follow the manufacturers instructions for processing times.

I found this recipe here from David Lebovitz. I recommend going to the link and checking out his other suggestions and tips for these oranges.

Juice the oranges and measure the juice.

For each 1 cup of juice you'll need about 1/4 cup of sugar.  I used 2 cups of juice and used 1/2 cup of sugar.

Use a small non-reactive sauce pan.  Pour in the sugar and just enough juice to saturate the sugar.  Cook over medium to medium low heat until the sugar has dissolved.

Pour the sugar/juice mixture in with the remaining juice and bring back to room temperature, then chill it in the refrigerator.

When cold, process in your ice cream maker using your manufacturer's instructions.