July 20, 2010

Elephant and Giraffe


I recently made these two wall decorations for my friends daughters one year old birthday. I had a lot of fun doing it and I think I'll try to make some others for some friends to build up a portfolio and put them on Etsy. Let me know if you like them or if you have ideas of other items you'd like me to attempt painting.

July 18, 2010

Homemade Honey Wheat Bread


This is the second post about this bread, but I wanted to add some more pictures just in case this process intimidates you as it did me. Maybe the visual will make you feel better about trying it. This bread is really good so I really hope you'll give it a try.

First things first; mix the water, yeast, and sugar in a dish. The water has to be warm for the yeast to activate but I just use my finger to test it. I've never gotten out a thermometer. Just make it about the temperature you'd give a small child a bath in.


When you mix it together, it'll look something like this. Funny looking but after a few minutes it'll start to grow.


While the yeast does it's thing, mix your first round of ingredients together in a mixer. I used my paddle attachment for this first part. In this bowl is the shortening, water, honey, salt, evaporated milk, and the wheat flour. Mix together until well blended.


Yummy bubbly yeast mixture.


Now add the yeast to the flour mixture until well blended and let rest for 15 minutes.


It doesn't look much different after 15 minutes, buy hey that's what the directions say to do and who am I to argue.


Now pour in the bread flour and begin to mix. This is when I switched to a dough hook for my mixer.


The bread will begin to come together and pull away from the sides of the bowl - mix for 80 seconds longer then shut off.


Place the dough in a buttered bowl and top with plastic wrap. Put in a warm area for about 45 minutes or until doubled in size.


Now that it's doubled in size, remove from the bowl and cut in half.


You'll want to punch it to get the air out and place the two pieces of dough in buttered loaf pans.


Smear butter on top of each loaf.


Place plastic wrap over each loaf pan and let rise again for about 30 minutes or until doubled in size.


Place a dish of water in the bottom of the oven and preheat to 375. Once the bread is doubled in size, remove the plastic wrap and put in the oven for about 25 to 35 minutes or until the crust is a dark golden brown.


Add more butter to the crust as soon as it comes out of the oven. This is the part where you're supposed to wait until it cools before cutting. Good luck with that.


Your house is going to smell wonderful! Enjoy!

Honey Wheat Bread
Recipe from AllRecipes


Here's what you'll need:

1 (.25 ounce) package rapid rise yeast
1 tsp white sugar
1/2 C. warm water (110 degrees F/45 degrees C)
1 12-ounce can evaporated milk
1/4 water
1/4 melted shortening
1/4 honey
2 tsp. salt
2 C. whole wheat flour
3 C. bread flour
2 Tbsp butter

1. Dissolve yeast and sugar in 1/2 cup warm water.
2. Combine milk, 1/4 cup water, shortening, honey, salt and wheat flour in food processor or bowl. Mix in yeast mixture, and let rest 15 minutes. Add white flour, and process until dough forms a ball. Knead dough by processing an additional 80 seconds in food processor, or mix and knead by hand 10 minutes. Place the dough in a buttered bowl, and turn to coat. Cover the bowl with plastic wrap. Let dough rise for 45 minutes, or until almost doubled.
3. Punch down, and divide dough in half. Roll out each half, and pound out the bubbles. Form into loaves, and place in buttered 9x5 inch bread pans. Butter the tops of the dough, and cover loosely with plastic wrap. Let rise in a warm area until doubled; second rise should take about 30 minutes.
4. Place a small pan of water on the bottom shelf of the oven. Preheat oven to 375 degrees F (190 degrees C).
5. Bake for 25 to 35 minutes, or until tops are dark golden brown. Butter crusts while warm. Slice when cool.

July 16, 2010

Homemade Cheese Crackers


Ya know the cheese crackers you buy at the grocery store? You know the one's you can't stop eating and are a huge hit at parties? OK, well I decided to make some of those. The reason you ask? Not really sure, other than I like to challenge myself. Actually, I really wanted to see if they were difficult because I was thinking perhaps they'd be a better snack option for my daughter. Turns out I was right. These have a ton fewer ingredients then the box from the store and they taste pretty darn good. I took them to work and had my co-workers try them and they all seemed to like them. I think the next time I make these I'll add some salt to the tops right as they come out of the oven. One of my other co-workers suggested making them spicier, like a cheese straw which I think would be delicious. As you can see in the picture above, my friend Amanda located some cheese powder from a Farmers Market a couple of hours from here and picked it up for me. I've seen cheese powder you can order online too, next time I'm going to get white cheese powder and see if it makes any difference in flavor.


The dough is very simple. Just add some flour, cheese powder, baking soda and salt together and combine. Next add the cold unsalted butter and use either a fork or a pastry blender until they look like wet sand. Next add the vinegar and the water until a dough forms. I did like the recipe said and used my hands to really get this mixed together as the flour didn't seem to want to combine very well at the bottom of the bowl.


Next, wrap the dough in plastic wrap and refrigerate for at least one hour.


After the dough is chilled, take it out and cut it in half. Now roll one half out as thin as possible on a floured piece of parchment paper. These will puff up a little once baked so thinner is better. I used a pizza cutter to cut them into approximately 1 inch squares. Now poke the tops with a fork so the air can escape and they don't blow up like balloons! Now repeat with the second half of the dough.


Bake the squares in a 375 degree oven for about 10 - 14 minutes keeping a careful eye on them as they will burn quickly. This is the part where I'll probably add some additional salt on top just as they come out of the oven. I hope that you like this recipe and make them often.

Here is where you can find the original recipe, but I've copied it below also:
http://kitchenilliterate.wordpress.com/2009/01/12/homemade-cheese-crackers/

1 1/4 C. all purpose flour
1/3 C. cheese powder
3/4 tsp. baking powder
1/4 tsp. salt
4 Tbsp. cold unsalted butter
1 tsp. vinegar
3-5 Tbsp. water

Mix the first four ingredients together, then add the cold butter and mix with a fork or a pastry blender until it resembles a fine wet sand.
Add the vinegar and water until a dough can be formed. Wrap the dough in plastic wrap and refrigerate for at least an hour.
Roll the dough out on a floured surface until very thin, cut into 1 inch squares and bake in a 375 degree oven for 10 - 14 minutes.

July 12, 2010

Sesame Noodles


Warning: These noodles are totally addicting! I got this recipe from one of my favorite food blogs and will post below. The reason I didn't add very many pictures is because the original recipe has a ton of them. I did a few things differently which I will indicate in the recipe just so my daughter would eat them; otherwise they would have been too spicy. Please try these soon!

This recipe can be found here:
http://thepioneerwoman.com/cooking/2009/09/simple-sesame-noodles/

Here's what I used in this recipe which differs slightly from the original:
1-14 oz box of angel hair pasta
1/4 C. Soy Sauce
2 Tbsp. sugar
4 Cloves Garlic, Minced
2 Tbsp. Rice Vinegar
3 Tbsp. Sesame Oil
4 Tbsp. Vegetable Oil
2 Tbsp. hot water

Whisk together all the ingredients except the noodles, add the hot noodles on top an stir well. I found it best to let this sit for just a little while to absorb the liquid.

July 11, 2010

Macaroni and Cheese


I'm pretty sure I could eat macaroni and cheese every single day,I'm just sayin. I'm addicted to cheese, but that's a story for another time. I have tried a million different recipes but promise to post only the best. You can pretty much do anything or add anything to macaroni and cheese so there will probably be several on here eventually!


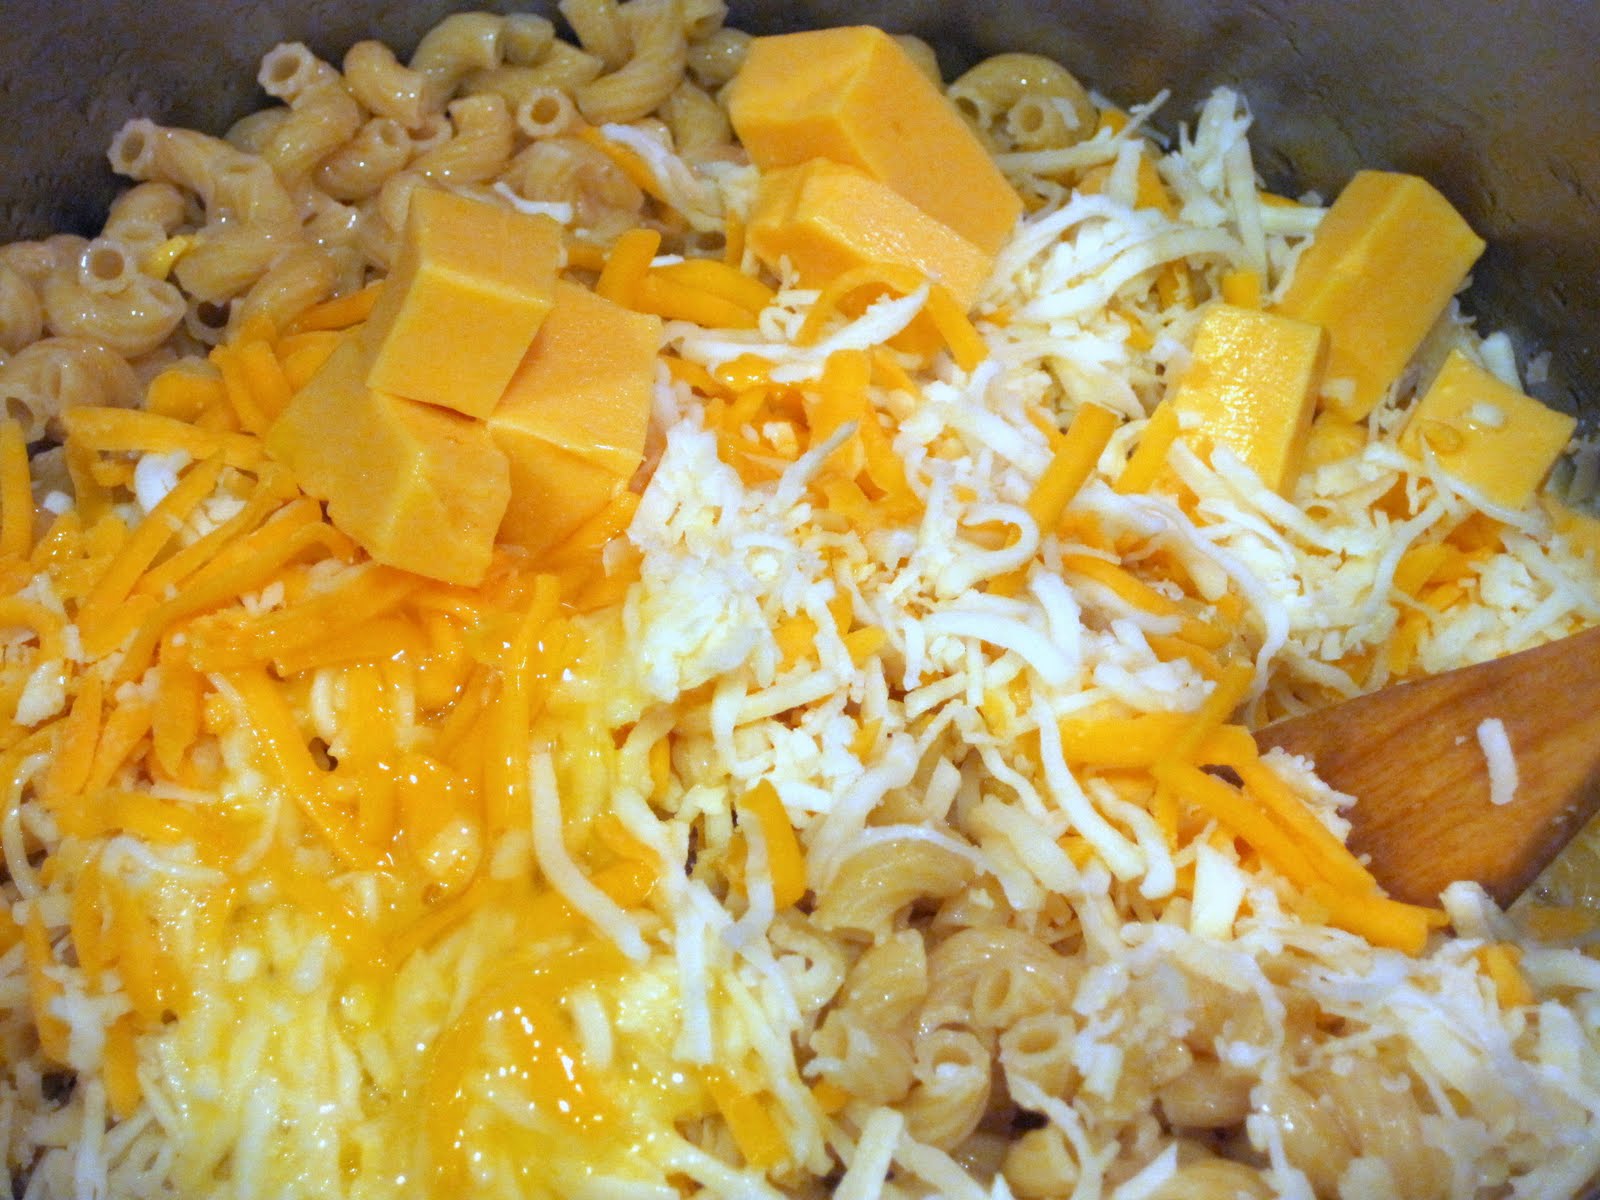
This recipe was a four cheese macaroni and cheese but I sort of used what I had so bear with me. Shredded above is mild cheddar, sharp cheddar, mozzerella, and asiago. The original recipe calls for about 1/2 C. of each but I added more....because I'm crazy like that. You should probably also know, that this is the combination of cheeses that I had on hand, use whatever you like.


Then, cut up some processed cheese like Velveeta (I guess that doesn't count as a cheese since techically this is the 5th cheese). Stir your eggs and melt your butter and measure out your half and half (not shown). This can all be done while you're boiling your noodles. You will also want to spray a 9x13 inch dish right about now.


When your noodles are done and drained, mix all these ingredients together (reserve about 1/2 C of the shredded cheese to put on top later) in the hot pan you used to boil your noodles. Try to get the Velveeta to melt as this is important for the creaminess factor. Add some salt and pepper and preheat your oven to 350.


Now add the reserved shredded cheese on the top.


Bake for about 35 minutes or until the sides are all bubbly.


It's probably best to let this sit and cool for about 5 to 10 minutes, but since I don't value the skin on my tounge I dived in.


It's ok to stare at it for a minute, that's what I do.

The original recipe is from Allrecpes.com and can be found here:
http://allrecipes.com/Recipe/Four-Cheese-Macaroni/Detail.aspx

July 8, 2010

So many tomatos!!


I have about a million tomatos. Seriously I have no idea what to do with them all. Yesterday I made salsa, this weekend I think I'll try to make tomato sauce that I can freeze or can. I hate for them to go to waste, so I photographed some in order to remember this problem in December when I'm desperate for a good tomato!

July 6, 2010

Strawberry Shortcake Cookies


What dessert can be made for the 4th of July that can sit outside in the heat and not melt to pieces? Well, several things actually but since I had several parties to go to this past weekend I needed to branch out. I'd made these cookies once before on a recommendation from my cousin and they were delicious! It's easy and patriotic - because of the red and white, I guess you could serve them on a blue dish and that would cover all your bases!

Get yourself some yummy strawberries and heavy cream, the rest of the ingredients you probably already have. Cut the berries into small pieces.


Add the sugar and lemon juice and stir.


While the strawberry mixture is getting happy, mix together the remaining dry ingredients and then pour the strawberries into it. Fold the strawberries into the mixture while attempting not to crush the little cuties. They've already been through so much.


Form the mixture into cookie globs (that's a technical term) and then sprinkle them with sugar. Bake for about 25 minutes or until they're golden brown.


The bad news is that you need to eat these fairly quickly, the good news is it won't be a problem!
The sprinkling of sugar on the top before baking gives these cookies the perfect little crunch on top while the insides are moist and fruity.  Great for a hot summer day when you're looking for something a little sweet but not too heavy!

Strawberry Shortcake Cookies
This recipe is from Martha Stewart and can be found here.

Ingredients:


  • 12 oz. strawberries, hulled and petite diced (about 2 cups)
  • 1 tsp lemon juice
  • 1/2 cup + 1 Tbsp granulated sugar
  • 2 cups all purpose flour
  • 2 tsp baking powder
  • 1/2 tsp kosher salt
  • 6 Tbsp (3 oz) cold unsalted butter, cut into small cubes.
  • 2/3 cup heavy cream
  • extra sugar for sprinkling

Directions

  1. Preheat the oven to 375 degrees.
  2. In a bowl, mix the strawberries, lemon juice and 2 Tbsp sugar. 
  3. In a separate bowl combine the flour, baking powder, salt, 7 Tbsp of sugar. 
  4. Cut in the butter with a pastry cutter or use your fingers until the mixture resembles wet sand. 
  5. Add in the cream until a dough forms and then add in the strawberry mix. 
  6. Line a cookie sheet with parchment paper and then using a cookie scoop or a Tbsp drop balls of dough about 2 inches apart. 
  7. Sprinkle with sugar and bake for 24-25 minutes, they will be golden brown. 
  8. Transfer to a wire wrack to cool completely. 
  9. Eat immediately or store in an airtight container at room temperature for 1 day.