March 31, 2011

Smokey Cheddar and Bacon Macaroni and Cheese


So there I was, minding my own business in the supermarket when I stumbled upon smoked cheddar.  Self I said, what could we do with this here treasure? Macaroni and Cheese would be delish with a smoky twist don't you think? Yes, I do think. 

Isn't it facinating to get a glimpse of the conversations I have in my head?  Doesn't it make you want to run the next time you see me? :)

I just put this together using the standard proceedures for mac and cheese, but you could heat this up a bit by adding some jalepino's if you wanted.  I'm not a huge heat fan, so I'll just stick with the way I made it.


I didn't take a lot of pictures, I apologize.  I bet you can figure it out though.  I have faith in you.


This is very flavorful, nice and smoky.  The texture is wonderful especially when you get a bit of the crispy bacon sprinkled on top. I hope you like it.

What you'll need.

Bacon - half a package - cut into pieces.
1 lb uncooked elbow noodles
Salt
1 quart milk
6 Tbsp butter
1/2 C. flour
4 C. grated smoked cheddar
4 C. grated sharp cheddar
Pepper
1/2 tsp. ground nutmeg

Preheat the oven to 375 degrees.

Cook the cut up bacon in a skillet until crispy.  Let the oil drain off by putting the cooked bacon onto a plate with a papertowl.  Let sit until needed in a few minutes.

Bring a large pot of water to a boil, add salt and stir in the uncooked noodles.  Cook until al-dente (about 6-8 minutes).  Drain.

While the pasta is cooking; melt the butter in a large pot over medium heat.  When melted add the flour and cook for about a minute or so.  Use a whisk so there are no clumps.  Slowely add the milk while whisking to ensure no lumps.  Bring back up to a bubble and stir constantly until thickened.  Add the grated cheese and stir until smooth.  Mix in the nutmeg and pepper and a little more salt if needed.

When the noodles are done and drained, stir them into the cheese mixture. Stir in about half of the crispy bacon.  Pour this mixture into a 9x13 dish and bake for 30 minutes or until the cheese is bubbling and beginning to brown.  Remove from the oven and let sit for a few minutes before serving.  When serving, add more crispy bacon on top.

March 28, 2011

Meyer Lemon Sticky Rolls


Meyer Lemons - what are they?  They are a cross between a Lemon and a Mandarin Orange.  The skin is very smooth, and more orange then a regular lemon.  The flavor is less tart then a regular lemon and I've read that the skin is edible.  Other then zesting it, I didn't put that last part to the test.
Recently I was shopping at a grocery store I don't usually go to and they had a bin of these.  I've read several recipes that use these so I picked some up just to give them a try.  I'm so glad I did.  I really enjoyed the taste and I'm always excited to try something new!
The idea of making sticky rolls was intimidating to me.  I've never done it.  My mom used to make cinnamon rolls all the time but I spent most of my time eating them; rather then watching her go through the process.  Apparently I made a  much bigger deal about it in my head then it actually true.  These were very simple to make and the lemon flavor was a really nice change up to the regular cinnamon variety.  Nice and moist in the middle, perfectly sweet and light (strange for a sticky roll). I'm a fan of these for sure! Now I want to try more recipes with Meyer Lemons!


Start by heating up some milk in your mixer bowl and sprinkling the yeast over the top.  Let sit for a few minutes.


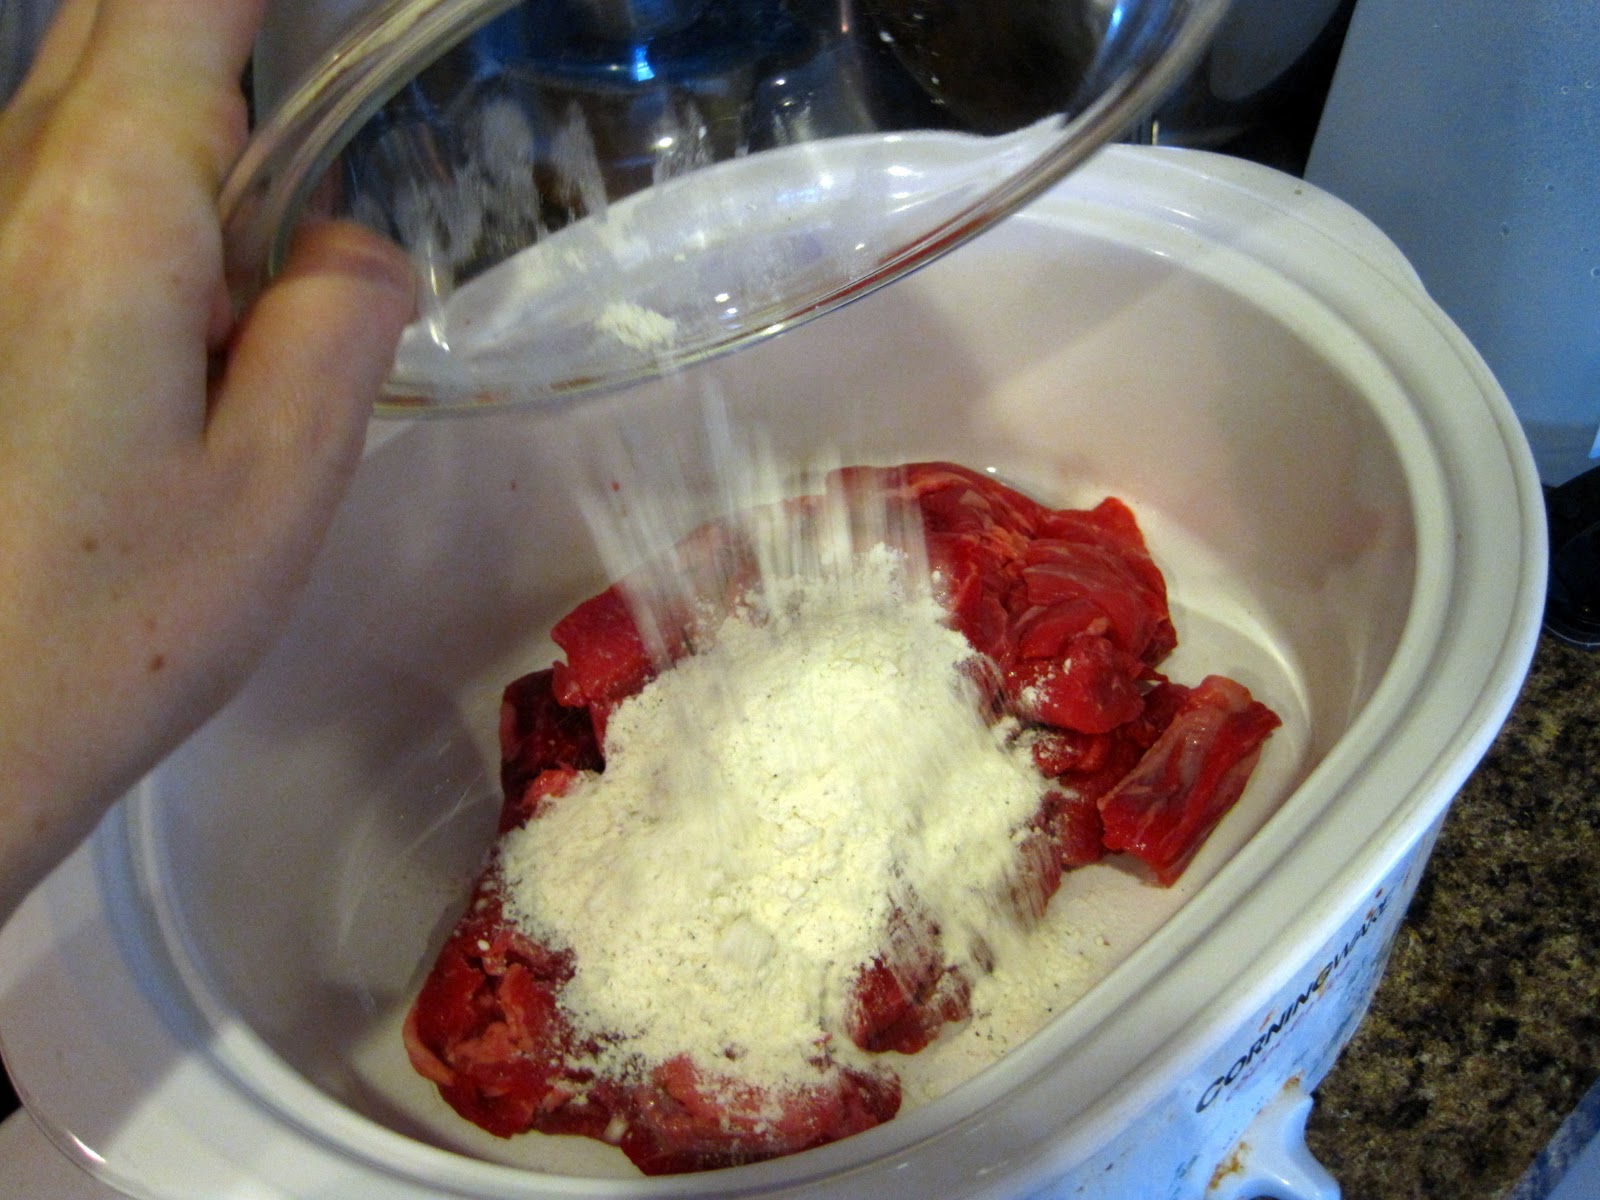
Using the paddle on your mixer add the lemon zest, sugar, butter, vanilla, salt and eggs. Add 1 cup of flour and mix just until combined. You should have a sticky dough at this point. Now switch to the dough hook and add the rest of the flour.  You're looking for a nice elastic yet smooth dough.  Once you've got the dough mixed let it knead for about 5 minutes. Grease a bowl and then dump the dough into it, turning once to cover with grease.  Cover for about an hour, set in a warm spot and let rise for about an hour or until about doubled in size.


Meanwhile, mix up the filling mixture.  Above is the sugar, lemon zest, nutmeg and lemon juice.


Once the dough has doubled in size, put it on a well floured work surface and roll out to about 10x15. Grease a 9x13 inch pan in preparation for the rolls. Smear the softened butter on the dough, covering all areas.


Now smear the sugar mixture over the top of the butter.


Roll the dough tightly together starting with the longest side closest to you and roll away from your body.  Pinch the seam together.


Cut the roll into 12 pieces.  It's easiest if you cut the roll in half, then cut each half in half and then each section into thirds.


Place each roll cut side up in your prepared dish.  you might need to shape them back into a circle.  Cover with plastic wrap and put back into a warm spot for about an hour.


All the edges should be touching now.  Place in a 350 degree oven for 25-35 minutes.  While these cook, make the glaze.


The tops should be a nice golden brown and the internal temperature should be 190 F. 


Put the glaze on while the rolls are still hot.


Serve warm. YUM!

I found this recipe here: Meyer Lemon Sticky Rolls

Here is the recipe exactly as I found it from Tracey's Culinary Adventures.

Dough


2 1/2 teaspoons active yeast

3/4 cup warm milk (about 100-110 F)
1/2 cup (1 stick) unsalted butter, at room temperature
1/4 cup sugar
2 teaspoons vanilla extract
3 1/2 - 4 cups all-purpose flour
1/2 teaspoon salt
1/2 teaspoon nutmeg
2 lemons, zested
2 eggs, at room temperature

Filling

1 cup sugar
1/4 teaspoon freshly grated nutmeg
zest of 2 lemons
2 tablespoons lemon juice
2 tablespoons unsalted butter, at room temperature

Lemon Cream Cheese Glaze

4 oz cream cheese, softened
Juice of 1 lemon
1 cup confectioners' sugar
1 lemon, zested (optional, for garnish)


In the bowl of a stand mixer fitted with the paddle attachment, sprinkle the yeast over the warmed milk and let it sit for a few minutes. Add the butter, sugar, vanilla, salt, nutmeg, lemon zest, and one cup of the flour and mix briefly to combine. Add the eggs and enough of the remaining flour to make a soft yet sticky dough. Switch to the dough hook and knead the dough for about 5 minutes, or until the dough is smooth and elastic. (Alternatively, you could turn the soft dough out onto a floured work surface and knead by hand for 7-10 minutes until the dough is smooth and elastic.)

Lightly grease a large bowl with cooking spray. Add the dough and turn to coat. Cover the bowl with plastic wrap and set in a warm spot. Let the dough rise until nearly doubled, about an hour.

To make the filling, mix the sugar with the nutmeg, then work in the lemon zest with the tips of your fingers until the sugar resembles wet, soft sand. Stir in two tablespoons of lemon juice.

Lightly grease a 13x9 inch baking dish with cooking spray. On a floured surface, roll the dough out into a rectangle that is approximately 10x15 inches. Spread the dough evenly with the softened butter, then spread the lemon-sugar filling mixture over top. Starting with a long end facing you, roll the dough up tightly. Pinch the dough at the end to seal the seam. Cut the dough into 12 even rolls (I like to halve the roll, then halve each piece and finally, cut each piece into thirds), and place them, cut side up, in the prepared baking dish.

Cover the rolls with a towel and let them rise for an hour or until puffy and nearly doubled. (You can also refrigerate the rolls at this point. Cover the pan tightly with plastic wrap, and place it in the refrigerator for up to 24 hours. When you are ready to bake the rolls, remove the pan from the fridge, and let them rise for an hour.)

Heat the oven to 350 F. Bake for 25-35 minutes, or until the rolls are lightly browned and a thermometer inserted into the center of a roll reads 190 F.

While the rolls are baking, prepare the glaze. Whip the cream cheese (using a mixer or even by hand with a whisk) until light and fluffy. Add the lemon juice and blend until well combined. Mix in the powdered sugar until the glaze is smooth and creamy.

When the rolls finish baking, smear them with the cream cheese glaze, and, if desired, sprinkle the lemon zest over the top to garnish. Serve while warm. 

March 27, 2011

Homemade Peppermint Patties


Homemade Peppermint Patties.  Easy to make, and yummy.  I saw this recipe while browsing other food blogs and thought they'd be fun to try.  I really thought there would be more involved but it's pretty simple.


You'll need a can of sweetened condensed milk.


Powdered Sugar, and an assistant to take pictures with her Barbie camera.  Apparently I take a lot of pictures while I'm cooking - I have a mini food blogger in training.

You'll add the peppermint extract and some of the powdered sugar and combine it, then slowly add the rest of the powdered sugar until a pliable dough forms.  You want it to stay together so you can roll it into balls, but not so dry that it falls apart.


Use a spoon to scoop out a small amount to roll into a ball.  I rolled mine into balls about the size of a green grape.


Now is when you're supposed to flatten them out slightly.  I didn't do that because I liked how they looked when they were rounded on the top.


You will want to put the patties in the freezer for no longer then 30 minutes.  These unthaw quickly so separate them onto two trays and keep one frozen while you dip the others in chocolate.  Make the chocolate while the dough is in the freezer so you can work quickly.


Drop a patty into the chocolate


Use a fork to cover the chocolate and then pick it up and let the excess chocolate to drain off.  Scrape the bottoms a little before putting on the waxed paper.


Wax paper will help to keep these from sticking.  Once the chocolate is dry to the touch they are ready to eat.


The inside just melts in your mouth.  You get hit with that cool peppermint flavor, combined with the creaminess of the filling texture.  Just like the store bought kind.


This recipe makes quite a few, which I will share.  But I plan to eat most of them.

This recipe was found here: Homemade Peppermint Patties

March 23, 2011

Buttermilk Wheat Berry Yeast Bread


I need to start off by telling you this, the top of this bread looks different then yours will.  You probably won't leave the bread to rise and then go shopping and return 3 hours later to a sticky mess of bread that has overflowed from your loaf pan and spilled out onto the table.  You probably won't let that happen, but I did.  So the top of this bread looks funny.  But yours won't.

Aside from the drama of the rising bread; it was delicious.  What bread, with chewy little bits of wheat berries that give a nutty taste and pleasant texture.  When my husband and I shared a bite of it for picture taking purposes we were both very happy with the taste and texture and appearance.  However, I gave one loaf to a friend and brought the other loaf in to work and got really nice comments about it.  I will be making this one again.

This is easy to put together; keep in mind you need to cook the wheat berries a couple of hours in advance so you might want to do that the day before if you need this bread the same day.


What is a wheat berry?  Wheat berries are the whole grain that wheat flour is milled out of.  You can buy hard or soft wheat berries from health food stores usually.

To prepare them: Bring a large pot of berries covered in water (lots of water) up to a boil.  After it begins to boil you can reduce the heat and simmer with a lid on for 2 hours.  Check frequently to ensure water is still in there, these little suckers drink a LOT of water.  After they are cooked you can drain off the water and let sit until they are room temperature.  For this recipe you need 1/2 Cup of uncooked wheat berries.


Add some honey to the yeast in a mixing bowl.


Warm up some buttermilk until just warm - either in a pot or the microwave. Mine took about 1 minute in total in the microwave.


Add the egg, salt, oil and flour into the buttermilk, honey and yeast mixture and mix with the dough hook attachment for about 5 minutes or until the dough pulls away from the sides.  Mine only took a couple of minutes for this to start happening. Now turn off your mixture and add the wheat berries.  Turn the mixer on low and mix until combined. The dough will be sticky.


Cover with plastic wrap and let rise for about an hour or until doubled in size.


Put the dough on a well floured surface and cut into two even pieces.


Roll the dough out into an 8x12 inch piece. 


Now roll the dough up and pinch the seams together.


Put the dough roll into a well greased standard sized loaf pan. You'll need another well greased pan ready as well.


Now do the same with the remaining dough ball.


Cover loosely with plastic wrap and let rise again until doubled in size. This is where you do NOT want to go shopping and return 3 hours later.  This last rise should take about an hour.


Bake in a 350 degree oven for about 35 to 40 minutes or until golden brown.  The tops should be hard and sound sort of hollow when tapped. I slathered the tops with salted butter right out of the oven. I think you should do that too.

Let cool before cutting.


You can find this recipe here: Buttermilk Wheat berry Bread

Recipe from the Seattle Times

Makes 2 loaves (about 10 slices each)

1/2 cup wheat berries (both soft and hard will work)
2 cups buttermilk
2 teaspoons instant yeast
2 tablespoons honey
1 egg
2 teaspoons salt
1/4 cup vegetable or canola oil
6 cups bread flour

1. In a medium saucepan, cover the wheat berries with water. Bring to a boil and simmer for 2 hours, or until tender, adding more water as needed. Drain off any excess water, and cool to room temperature.
2. In a microwave safe container, or a small saucepan, heat the buttermilk until just warm to the touch.
3. In the bowl of a stand mixer, combine the warmed buttermilk, yeast and honey. Add the egg, salt, oil and flour. Mix with the dough hook on low until combined and then for 5 minutes on medium speed. The dough should be soft and slightly sticky but come clean from the sides of the bowl. Add the wheat berries and mix until combined.
4. Cover with plastic wrap and let rise for 1 hour, or until doubled.
5. Coat 2 standard loaf pans with cooking spray.
6. Turn the dough out onto a lightly floured surface and divide in half. Flatten each into an 8-by-12-inch rectangle. One rectangle at a time, start with a short end and roll up the loaf, pinching to seal. Place each loaf in a prepared pan with the pinched edge at the bottom.
7. Cover loosely with plastic wrap and allow to rise again until doubled in size.
8. Heat the oven to 350 degrees.
9. Using a sharp knife, make deep diagonal slashes across the tops of the loaves. Bake 35 to 40 minutes, or until deep golden brown and hollow sounding when tapped. The interior temperature should read 200 degrees. Remove the loaves from the pan and let cool before slicing.

March 21, 2011

Slow Cooker Beef Stew


It's starting to get warmer here.  Every so often we'll still get a chilly night and it was on just such a night that my husband requested some good ol' fashioned beef stew.  Of course, how could I say no to such a simple request.  Especially when all you do with this recipe is cut up a few things, throw it in a crock pot and wait 6 hours.  Easy.  Delicious!


Add the beef, flour, salt and pepper into your crock pot and stir together so the beef is coated.


Now add the garlic, bay leaf, paprika, Worcestershire sauce...


Potatoes, I used Yukon Gold.  They're my favorite.


Celery, carrots, onion, beef broth.


Now cover, set the crock pot to high for 4 to 6 hours of cooking, or low for 10 to 12 hours.


After 6 hours, looks yummy.  Smells insane!


I served with some nice hot biscuits.  Enjoy.

I found this recipe here: Slow Cooker Beef Stew

2 pounds beef stew meat, cut into 1 inch cubes
1/4 cup all-purpose flour
1/2 teaspoon salt
1/2 teaspoon ground black pepper
1 clove garlic, minced
1 bay leaf
1 teaspoon paprika
1 teaspoon Worcestershire sauce
1 onion, chopped
1 1/2 cups beef broth
3 potatoes, diced
4 carrots, sliced
1 stalk celery, chopped

1.Place meat in slow cooker. In a small bowl mix together the flour, salt, and pepper; pour over meat, and stir to coat meat with flour mixture. Stir in the garlic, bay leaf, paprika, Worcestershire sauce, onion, beef broth, potatoes, carrots, and celery.

2.Cover, and cook on Low setting for 10 to 12 hours, or on High setting for 4 to 6 hours.