December 31, 2012

Top 5 of 2012

2012 was delicious! I've compiled the top 5 of 2012 in the order of the most views on the internet.  I hope you've enjoyed these recipes as much as I have making them!  2013 will be even better!

Happy New Year!


Orange Ice Cream

The fresh orange taste in this ice cream is a hit!  Creamy and full of flavor.  This is a must have for this summer's menu.


Frozen Chocolate Covered Banana Bites

Frozen treats have never been easier than this one, or more delicious.  Very easy to make and they last a long time in the freezer.  Great for a quick chocolate craving and you'll feel good about giving this to your kids!


Baked Pork Chops

A delicious change of pace for your typical pork chop recipes.  I loved the creamy gravy and how juicy the pork stayed.


Ina Gartens Homemade Granola Bars

Just in time for those New Year's resolutions, these homemade granola bars are so good I could barely stop eating them.  Chewy and full of oats, nuts and fruit you can customize these to fit your personal tastes!


Chocolate Mint Cupcakes with Mint Frosting

This cupcake was the perfect holiday party dessert!  Easy to hold and eat with one hand, no plate needed.  Cool mint flavor that everyone loves and a moist wonderful chocolate cake. Best of all there is a hidden surprise at the bottom of the cupcake!

December 28, 2012

Buffalo Chicken Bites


Is everybody ready for 2013? I am!  Bring it on!

Before we get used to writing a 3 instead of a 2 you should whip up some of these Buffalo Chicken Bites for whatever New Years Eve party you might be attending, or hosting!  

I made these recently for some friends that came over for diner and they were yummy.  I'm pretty sure everyone liked them since I only had about 6 left, which I ate for breakfast the next day. I'm healthy like that. 

The dough is homemade but you could certainly buy a pre-made dough if you're short on time. The homemade version is very light and compliments the filling nicely, if you have time. 


Roll the dough out, as you can see a perfect rectangle is not necessary.


Spread the filling down the bottom portion of the dough.


Roll it up tightly.


Cut into 12 even sized pieces.


Dipped in some creamy blue cheese dressing and you've got yourself a home run!

Have a wonderful, safe and Happy New Year!

Buffalo Chicken Bites
Recipe from Tracey's Culinary Adventures

Ingredients
  • 1 cup cooked shredded chicken 
  • 1/2 cup shredded cheddar cheese
  • 1/4 cup hot sauce 
  • 4 tablespoons unsalted butter, melted and cooled
  • 2 tablespoons packed light brown sugar
  • 1 cup warm milk (about 110 F, I used 1%))
  • 2 1/2 cups all-purpose flour
  • 2 1/4 teaspoons instant yeast
  • 1/4 teaspoon salt
Directions

  1. Make the buffalo chicken mixture by combining the chicken, cheese, hot sauce and butter in a bowl. Mix well to combine.  
  2. Prepare the dough by combining the warm milk and brown sugar in a measuring cup and stir until the sugar dissolves. 
  3. Add the flour, yeast and salt to the bowl of your stand mixer.  Use the paddle attachment and beat on low just to combine. Gradually pour the milk/sugar mixture into the bowl with the flour mixture and mix until a rough dough forms. 
  4. Switch the paddle attachment to the dough hook and knead for about 5 minutes or until smooth and elastic. The dough should be clearing the sides of the bowl, if it's not, add a Tbsp of flour until it does. 
  5. Turn the dough onto a lightly floured surface and shape into a ball.  Spray a large bowl with nonstick cooking spray and turn to coat. Cover the bowl with plastic wrap and let rise until doubled in size.  This should take about 90 minutes. 
  6. You can tell the dough is done if you can press a finger into it and the imprint remains. 
  7. Preheat the oven to 400 degrees.  Line a jelly roll pan with parchment paper. 
  8. Transfer the dough to a lightly floured surface and cut into 4 equal pieces.  Work with one piece at a time and roll into a 12 inch rope.  Flatten the rope into a 12x4 inch rectangle using a rolling pin.  Add 1/4 of the buffalo mixture to the lower third of the dough and then roll into a tight rope.  Cut the rope into 12 even pieces and place on the sheet pan. 
  9. Repeat with the remaining dough and buffalo chicken mixture until all have been completed. 
  10. Let the bites rise for about 20-30 minutes more. 
  11. Bake the bites for about 15 minutes or until they are lightly browned.  Transfer to a wire cooling rack.  If desired, brush with melted butter. 
**If you would like to make them a couple of hours ahead of time.  Reheat in a 350 degree oven for about 5 minutes. **


December 26, 2012

Sausapot Balls


My dad is quite an inventor of new recipes.  Every so often he will send me a new recipe to try out and this is one of his.  Mine and his differ slightly because I used what I had in my pantry but they are essentially the same.  And you can make this your own as well, there are many possibilities here.

There shouldn't be much here that you need to run to the grocery store for.  This would make a nice appetizer, lunch or even breakfast.  


Start by browning your sausage, drain off the excess grease.  Mix with the prepared mashed potatoes.


Dredge in the milk/egg mixture and then the seasoned bread crumbs and then place gently in the hot oil.


Gently turn so all sides are golden brown and then move to a plate lined with a paper towel.


Sausapot Balls
Recipe by my dad, John F.

Ingredients

  • 1 pound ground sausage, browned and drained  (My dad used Italian sausage and I used breakfast sausage)
  • 4 cups mashed potatoes (My dad used instant and I made mine from russet potatoes)
  • 1 egg
  • 1/4 cup milk
  • 1 - 1 1/2 cups seasoned bread crumbs (I crushed up buttery crackers and added seasoned salt)
  • 1/2 cup vegetable oil, divided into 1/4 cups

Directions

  1. If you are preparing your own mashed potatoes, make sure to make them as usual except a little tighter than usual.  You want them to hold their shape when formed into a ball. 
  2. Mix the mashed potatoes and sausage that has been browned and drained together in a  large bowl. 
  3. Use two bowls, one for the egg and milk (mix together well) and the other for the bread crumbs. 
  4. Heat 1/4 cup oil in a large fry pan on medium heat.  
  5. Use a cookie scoop or a tablespoon to scoop out a golf ball sized amount. 
  6. Roll the ball in the egg/milk mixture and then in the bread crumbs and place in the hot fry pan. Add enough to fill the pan with room in between each ball. 
  7. Do not crowd the Sausapot balls and be very gentle when turning them to brown the other side as they will fall apart easily.  When all the sides are browned remove them to a plate lined with a paper towel. 
  8. When the oil starts to get absorbed and there isn't much left in the pan you can scrape the pan with a spatula and then add the other 1/4 cup of oil and start cooking the next batch. 
  9. Let cool slightly before serving. 

December 24, 2012

Mocha Chocolate Icebox Cake


Merry Christmas Eve everyone!  Are you losing your minds trying to get dinner ready tonight, breakfast tomorrow, dinner tomorrow? I'm not.  It's just me and my hubby and daughter this year and it's very relaxing here.  Well I should also note that my husband is working Christmas day so we're not even sure if he'll be home until late so our dinner isn't planned until the 26th.  Not much pressure here but in recent years I've been as stressed out as you all are now.  

I made this cake for my husbands birthday on the 20th.  Not only was it SUPER easy it was SUPER delicious.  My husband says it's his favorite cake so far!  The only thing you need is some time for the cake to set up in the refrigerator.  It only takes like 15 minutes to put together and then you need to let it set up for at least 6 hours or overnight.  

The crispy cookies get softer when covered up by this delicious whipped cream and the mascarpone cheese gives the whipped cream layers some added creaminess.  It's not too late to serve this with your Christmas dinner!


Layer the bottom of the springform pan with the cookies.


Top the cookie layer with a whipped cream layer.


Repeat


End with a whipped cream layer and cover with plastic wrap.  Refrigerate.  Eat.


Merry Christmas to you all!!


Mocha Chocolate Icebox Cake
Recipe modified slightly from Ina Garten's


Ingredients

  • 2 cups heavy cream
  • 12 oz Italian mascarpone cheese
  • 1/2 sugar
  • 2 Tbsp cocoa powder
  • 1 heaping tsp of instant coffee granules
  • 1 tsp vanilla extract
  • Thin and crisp chocolate chip cookies (homemade about 20 cookies)
  • Shaved chocolate for garnish (optional)
Directions

  1. In the bowl of your stand mixer, mix the cream, mascarpone, sugar, coffee granules and vanilla. 
  2. Mix on low to combine and then raise the speed until stiff peaks form. 
  3. To assemble the cake, use whole cookies to line the bottom of a 8 inch springform pan.  Break other cookies as needed to fill in the gaps. 
  4. Spread 1/5 of the mocha cream on top of the cookie layer.  Repeat this process until five layers have been made. 
  5. Cover the pan with plastic wrap and refrigerate overnight or for at least 6 hours. 
  6. Run a small knife around the edges of the cake and sprinkle the top with chocolate shavings if you desire before serving. 
  7. Cut into wedges and serve cold. 

December 23, 2012

Apple Cider Caramels


My husbands birthday was this past Thursday and some of our neighbors came over to help us celebrate it.  We have so much fun with them, I love living in a neighborhood where we all can do things together.  The best part is that we can all just walk home at the end of the night.  Yes, that is how lazy I have become. His birthday has nothing to do with these caramels.  I just thought I'd share.  

Well these caramels would make a lovely homemade Christmas gift, and his birthday does fall just five days before Christmas so I guess these two things are related after all. Sort of. 


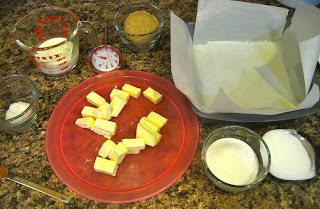
Here is the line up of things you will need.  The only item missing from the picture above is the apple cider and that's because it's bubbling away on the stove at this point.


See? There it is, bubbling. Reducing nicely.


Now I've added the sugars, butter and heavy cream.


Perfect temp, it's ready.


After the cinnamon and salt is added you can pour into the prepared pan. You have really hot caramel at this point.  Now leave it alone for two hours, it will be hard but you must try.


See? Wasn't it worth it? Now you get the glorious task of cutting and wrapping each piece.

Here's what I love about these caramels.  Everything. You can definitely taste the apple flavor and the cinnamon but it's blended perfectly with a smooth caramel flavor.  The texture is perfect, nice and soft yet it will hold it's shape.  Great homemade gift idea here. Aren't you glad I posted this like two days before Christmas? Plenty of time!

Apple Cider Caramels
Recipe by Smitten Kitchen

Ingredients

  • 4 cups apple cider (not apple juice and not hard apple cider)
  • 1/2 tsp ground cinnamon
  • 2 tsp flaky sea salt - I used Fleur de Sel
  • 8 Tbsp unsalted butter, cut into pieces
  • 1 cup granulated sugar
  • 1/2 packed light brown sugar
  • 1/3 cup heavy cream
  • Neutral oil for the knife
Directions

  1. Boil the cider over high heat until it has reduced to a thick dark syrup.  This takes about 35-40 minutes or so.  It should be about 1/3 to 1/2 cup in volume. Stir occasionally.
  2. Get all of your other ingredients ready to go because you won't have much time when the cider has reduced.  
  3. Line an 8x8 inch square medal pan with parchment paper that crosses in each direction (like the picture above) and spray the parchment paper with non stick spray. 
  4. When your apple cider is ready, remove it from the heat and stir in the butter, sugars and heavy cream. Return the pot to a medium high heat until a candy thermometer reads 252 degrees. Watch it carefully, it doesn't take long. 
  5. Immediately remove the caramel from the heat and stir in the cinnamon and salt.  Stir to distribute evenly and then pour into the prepared pan. Let sit until cool, about 2 hours. 
  6. When the caramel is cool, pick up the parchment paper ends and lift it out of the pan.  Move it to a cutting board.  With a well oiled knife begin cutting 1x1 inch squares, oiling the knife in between each cut. Wrap each caramel in a 4 inch square piece of wax paper. 
  7. Caramels keep in an airtight container at room temperature for two weeks. 

December 22, 2012

Cocktail Sauce


Do any of your holiday plans call for seafood? Shrimp perhaps? I have to admit that I have a slight obsession with cocktail sauce.  I could literally eat it with anything.  I've been known to dip potato chips in it.  I know, there's something wrong with me.

Recently we had some friends over for some appetizers and drinks and this sauce was a hit.  My husband said it was one of the best he's tasted and I would agree.  Totally potato chip dip worthy, or shrimp, whatever.

This cocktail sauce has all the classic flavors you love in a good sauce.  The horseradish is prominent but not so overwhelming that you need to slam the nearest drink.  The chili sauce adds a bit of sweetness and the ketchup and Worcestershire just compliment all of the flavors.  Perfect!


Cocktail Sauce
Recipe from Ina Garten

Ingredients

  • 1/2 cup chili sauce
  • 1/2 cup ketchup
  • 3 tablespoons prepared horseradish
  • 2 teaspoons fresh lemon juice
  • 1/2 teaspoon Worcestershire sauce
  • 1/4 teaspoon hot sauce 

Directions

  1. Mix all of the ingredients together and serve at room temperature with shrimp. 
  2. Store leftover's in an airtight container in the refrigerator. 

December 20, 2012

Chocolate Surprise Cookies


I love cookies that you can change up to fit a holiday or event.  These surprise cookies are supposed to have marshmallows inside but I have yet to even try that option.  I've made them twice and the first time I used caramel filled chocolate candies and the second time I used peppermint patties.  the possibilities are endless. 


Press the candy or marshmallows into the hot cookie while they are still on the cookie sheet.


After they've cooled you can frost them. Sorry for the lack of picture for that step.


Yum! These caramel filled cookies were so good.


The cookie portion is not overly sweet so you won't get sugared out when you eat these.  The sweetness is in the candy or marshmallow and the frosting.  I cooked these on the lower end of the suggested time.  12 minutes worked perfectly for me but your oven might be different.

Chocolate Surprise Cookies
Recipe by Martha Stewart

Cookie Dough
  • 1 3/4 cups all-purpose flour
  • 3/4 cup cocoa powder
  • 1/2 tsp baking soda
  • 1/2 tsp salt
  • 1/2 cup (1 stick) butter, softened
  • 1 cup sugar
  • 1 large egg
  • 1/2 cup milk
  • 1 tsp vanilla extract
  • marshmallows or candy of your choice
Directions

  1. Mix the first four ingredients in a bowl and set aside. 
  2. In the bowl of your stand mixer, add the softened butter and sugar.  Beat until light and fluffy, about 2 or 3 minutes. 
  3. Add the egg, milk and vanilla extract. Mix until combined. 
  4. Slowly add the flour mixture to the wet ingredients and mix until combined. 
  5. Bake on a parchment lined cookie sheet for 12-15 minutes.  The cookies should feel slightly firm to the touch. 
  6. Press the candy of your choice or a mashmallow that has been sliced onto the top of the hot cookie.  Move the cookie to a cooling rack and frost when completely cool. 

Frosting
  • 2 cups confectioners sugar
  • 4 Tbsp (1/2 stick) unsalted butter, melted and cooled to room temperature
  • 1/4 cup cocoa powder
  • 1/4 cup milk
  • 1/4 tsp vanilla extract
Directions

  1. Mix all of the ingredients on low speed until everything is combined.  Gradually increase the speed to medium until the mixture is smooth. 

December 19, 2012

Baked Crab Rangoon


We're finally getting some cold weather around here, I'm extremely happy about that. There is even a promising glimmer of hope that we might get a small snowfall here soon.  I hate to get my hopes up about that but they kinda already are. 

It's also full fledged holiday season here which means lots of parties and great food.  I've already made these Baked Crab Rangoon's twice! 

They are super flavorful, in fact I could probably just sit down and eat the crab filling with some saltine crackers and be completely happy, but in an effort to seem more dignified I went ahead and baked these in won ton wrappers as suggested.  


This is a won ton wrapper just in case you've never seen one before.  You can find them in the produce section of most supermarkets.


You'll be tempted to fill this up with a heaping spoonful but don't, you won't be able to seal the edges if you do that. We're trying to avoid leakage here.


Wet two sides of the won ton wrapper by dipping your finger in some water. Fold over the other two edges so you end up with a little triangle.  Press down to seal.


Bake until golden brown on the edges, the middle will remain sort of pale in color.

Baked Crab Rangoons
Recipe from Food.com

Ingredients

  • 1 can (6 oz) crabmeat, drained and flaked
  • 4-5 green onions, sliced thin
  • 1 clove garlic, minced
  • 2 tsp Worcestershire sauce
  • 1 tsp soy sauce
  • 1 package won ton wrappers (about 48)
  • 1/4 to 1/2 cup melted buter
Directions

  1. In a medium sized bowl, combine all the ingredients except for the won ton wrappers and the butter. 
  2. Spray two cookie sheets with non-stick cooking spray. 
  3. Preheat the oven to 425 degrees. 
  4. Add about a tsp of mixture to the middle of a won ton wrapper, wet two of the edges of the wrapper. Fold the won ton wrapper so it makes the shape of a rectangle and press down firmly on the wet edges to they seal. 
  5. Continue until all the wrappers are filled and folded. 
  6. Brush the tops of the won ton's with melted butter and bake for 12-15 minutes.  The corners will be golden brown and crispy and you might have some slight coloring on the tops of the rangoons as well. 
  7. Serve hot with a dipping sauce of your choice.  I used Sweet and Sour dipping sauce. 

December 17, 2012

Hockey Pucks


Recently a couple of friends and I had a baking day to get ready for Christmas.  In doing so I think we all collectively kept sugar companies in the green for the year.  This is the second year we've done this and we usually make one or two items, and then share a little of what ever we made with everyone else.  Basically we come home with a large assortment of baked and candied goodness.

I think that we each try to do one thing baked in the oven and one thing that does not require any oven time just so everyone else has a chance to use the oven.  In my preparation for this day I scanned all of my old cookbooks that I got from the town I'm from.  I picked this recipe from one called "Breaking Bread" from St. Mary's, St. Margaret's, and St. William's.  My gramma and aunt and other family members, along with many neighbors I've known my whole life have recipes in this book.  It's one of my favorites.  It makes me homesick too.

When I was making these candies I was thinking that all of the ingredients seems yummy but I wasn't sure how they'd all be together in one bite.  I was actually most hesitant about coating the Ritz cracker with chocolate....I have no idea why since I've coated saltine crackers with chocolate and they are delicious.  Much to my relief, these little things are wonderful.  The Ritz cracker adds the salt that we all love with the chocolate.  The peanut butter marshmallow cream inside is perfect.  It's not so strong that all you're tasting is peanut butter but it's perfect paired with the crunchy salty cracker and chocolate.

This would be a great treat that your kids can help you make.

Hockey Pucks
Recipe from Gertrude O'Connor from the "Breaking Bread" cookbook 

Ingredients
  • 1 cup creamy peanut butter
  • 7 oz marshmallow cream
  • 1 box (4 rolls) Ritz crackers
  • 1 1/2 package chocolate flavored bark
  • 1 package milk chocolate chip's
  • 1/2 block gulf wax or 1/3 cup shortening (optional)
Directions
  1. Mix the peanut butter and marshmallow cream together in a medium bowl.  You can microwave briefly (30 seconds) if you need to soften up the mixture enough to combine. 
  2. Spread the peanut butter mixture between two crackers and sandwich together.  Freeze for about 30 minutes.  (I didn't freeze mine and they were OK, I think the chocolate shell will be more firm if you freeze the crackers first).
  3. In a medium microwave safe bowl, combine the two chocolates and the gulf wax or shortening if you are using it.  Melt in 1 minute increments until smooth and lump free. 
  4. Dip the frozen sandwiched crackers into the chocolate mixture, use a fork to pull the cracker out of the chocolate and scrape off the bottom with another utensil so you have less chocolate dripping off the cracker.  Place the dipped cracker sandwich onto wax paper until the chocolate has set and is no longer soft to the touch. 

December 14, 2012

Panettone


I've discovered recently that finding Panettone in stores is getting harder and harder.  I bought some that I loved at Trader Joe's and then when I went back they were sold out.  I was heart broken because it was really good.  What's a girl to do right? Make your own that's what!  

This was my first attempt at making this type of bread and I thought it turned out really nice and flavorful.  I wish I had of gotten the fruit worked throughout the bread more then I did but it was still yummy.  

From what I've read, it's pretty difficult to make "authentic" Panettone.  I've read things stating that some of them are baked upside-down to more reasonable things like the flour has to be warm and you need a special paper that will allow the bread to rise very tall like the store bought versions, not to mention the amount of time it takes to mix it in order to get the proper distribution of the fruit.  

Basically I'm trying to say that this bread that I made here is much easier then all that.  It's not exactly the same as the store bought kind but it's good and it's available in your very own kitchen. 


I used candied orange peel because I'm a rebel like that.


This is active yeast, it's all foamy and stuff.


This is a dough ball, no fruit has been added yet. This is before the first rise cycle.


After the first rise cycle, before the fruit is added.


After the fruit is added, before the second rise cycle.


Ready to bake, see the fruit in there?


Right out of the oven.  Looks good, smells amazing.  It has a citrus smell because of the fruit and zest added.

This is a moist cake that is light and airy and full of bites of fruit.  I've heard of some people making a baked french toast out of this and I'm dying to try it.

Panettone
Recipe modified from AllRecipes.com


Ingredients
  • 1 package active dry yeast
  • 1 cup water, warm (110 degree's F)
  • 1/4 cup white sugar
  • 2 eggs
  • 1/2 cup low-fat vanilla yogurt or plain yogurt. 
  • 1 tsp vanilla extract
  • 1 Tbsp grated orange zest
  • 1/4 tsp salt
  • 4 cups all-purpose flour, plus more for kneading
  • 1/4 cup candied orange peel
  • 1/4 cup raisins
  • 1 Tbsp confectioners' sugar
  • 1 Tbsp melted butter (optional)
Cooking Directions
  1. In a small bowl combine the water, yeast and sugar. Let sit for 10 minutes or until foamy.
  2. In the bowl of your stand mixer add the eggs, vanilla, yogurt and salt. mix well. Pour in the yeast mixture.
  3. Slowly add the flour 1/2 cup at a time until the dough forms into a manageable ball. Dump the dough onto a well floured surface and knead for 5-10 minutes. Keep adding flour to keep it from getting sticky. You might need to add up to 1 more cup of flour.
  4. Spray a large bowl with non-stick cooking spray and then form the dough into a ball. Place the dough into the bowl and cover with plastic wrap. Let rise in a warm place for about an hour until doubled in size.
  5. Use a small bowl to combine the raisins and candied orange peel and mix in 1 Tbsp of confectioners' sugar. Make sure they are well covered.
  6. When the dough has doubled in size, dump onto a well floured surface and knead in the raisins and candied orange peel. Form the dough into a ball.
  7. Spray a 8 inch (I used a 9 inch) round cake pan with non-stick spray and put the dough ball into it. Cover with a clean towel and let rise for another 30 minutes. The dough will rise over the edges of the pan.
  8. Preheat the oven to 350 degrees.
  9. Brush the dough with melted butter if desired and bake for 45 minutes. The dough should look golden brown and a toothpick inserted in the middle should come out clean.