October 28, 2014

Paleo Lemon-Blueberry Muffins


As you may or may not know, I've been doing an eating plan called Whole30.  Whole30 is slightly different from Paleo, but it's close enough that you can use many of the same recipes. So, I happen to have a Paleo cookbook in my possession.  Lucky for me, because some mornings I just don't have time to cook an omelet or make some bacon.

Coconut flour is the key to this recipe.  If you're not having any luck finding any it's because it depends on your grocery store as to it's placement. I bought the Bob's Red Mill brand and I saw that some grocery stores had it in the flour section while others had a gluten free section and still others had a Bob's Red Mill section of some random isle. I'd just ask when you first walk in and save yourself some frustration.

There was some unapproved Whole30 ingredients in this recipe that I want to reveal to you now. You aren't supposed to have maple syrup or vanilla extract.  I've already done my 30 days and so I didn't feel that the minor cheats in this recipe would hurt that much.

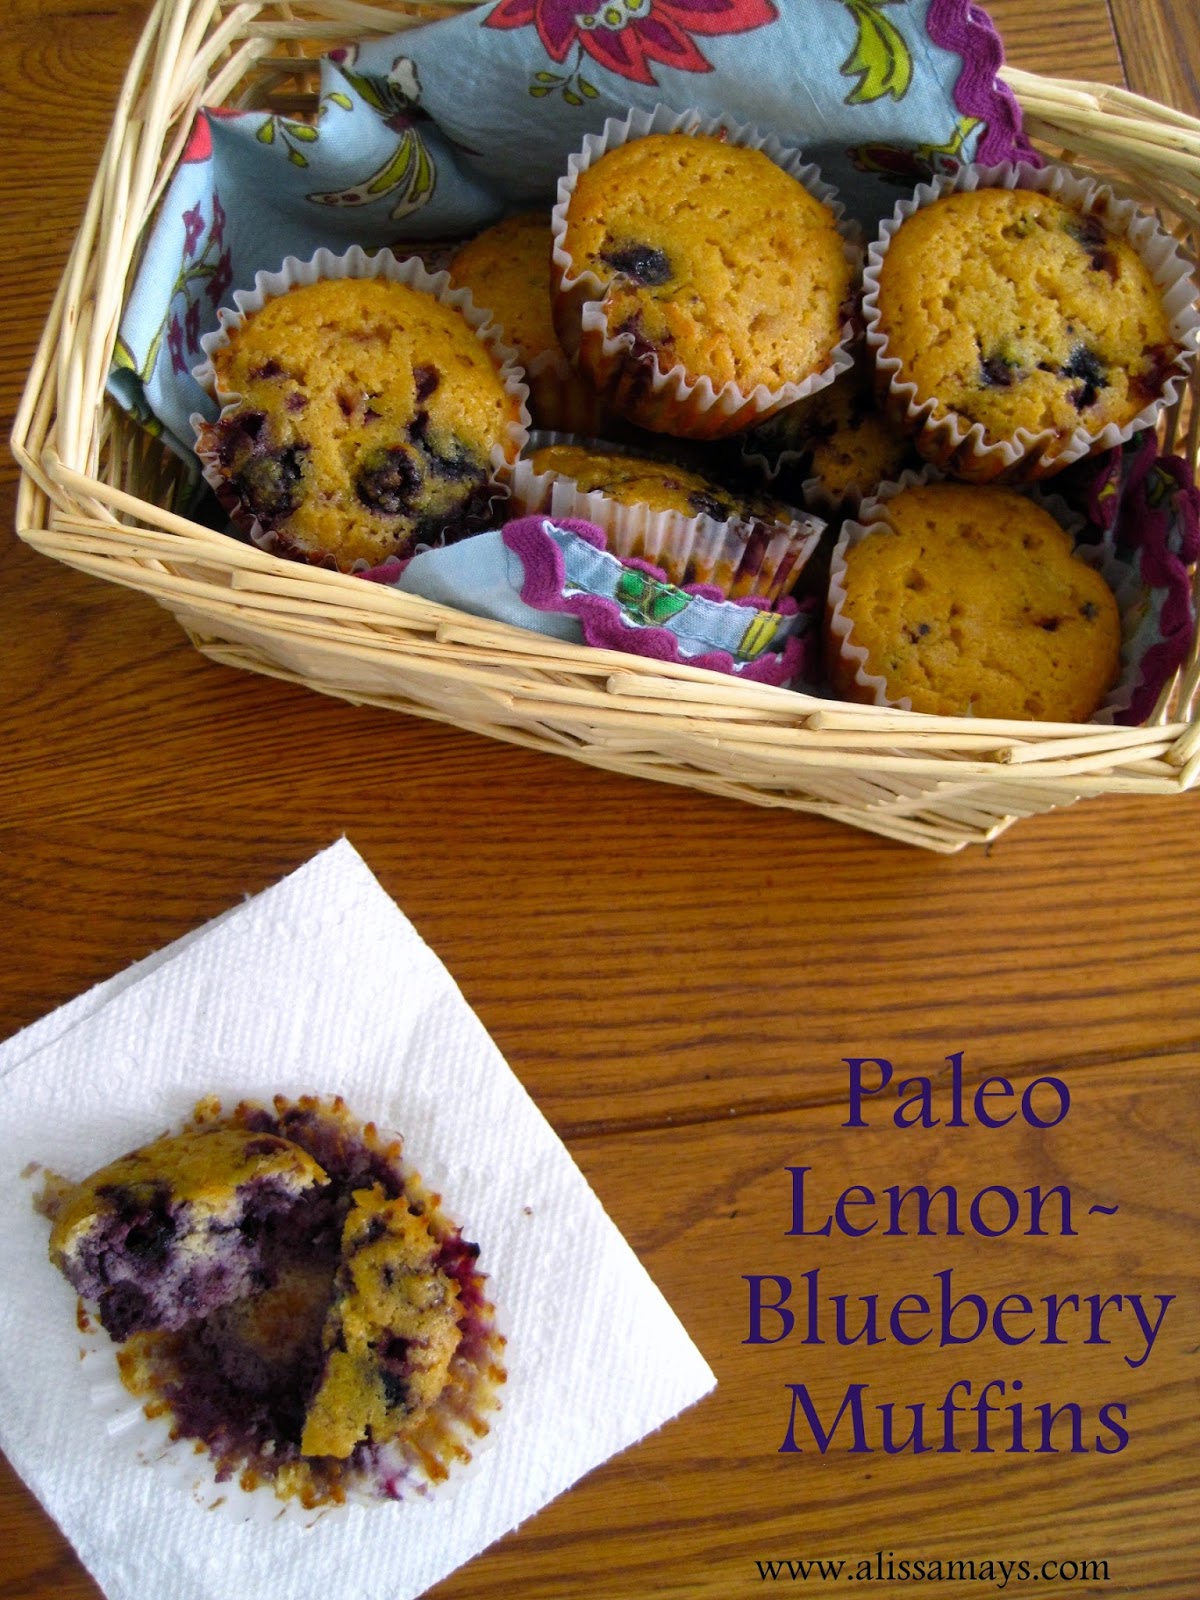
This recipe is very different from a traditional lemon-blueberry muffin.  Good, but very different. We get so accustomed to the sweet flavors and the taste of all-purpose flour of regular muffins that sometimes it takes a while to get ourselves off those flavors.  The good news is that in my opinion this muffin had a nice sweet flavor, and the blueberries were perfect.  The lemon flavor was very mild and the texture is different but not in a bad way from a regular muffin. Not as fluffy but still moist.

Great alternative to the meat or eggs I have gotten used to with this eating plan.


Paleo Lemon-Blueberry Muffins
Recipe from Practical Paleo page 246


Ingredients
  • 6 whole eggs
  • 1/2 cup butter or coconut oil, melted
  • 1 tsp vanilla extract
  • 1/4 cup grade B maple syrup
  • 1 whole lemon, juiced and zest
  • 1/2 cup coconut flour
  • 1/2 tsp sea salt
  • 1/4 tsp baking soda
  • 1 cup fresh blueberries
Cooking Directions
  1. Preheat the oven to 350º
  2. In the bowl of your stand mixer with the whisk attachment, whisk the eggs, butter, coconut oil, vanilla extract, maple syrup, lemon juice and lemon peel.
  3. Sift in the coconut flour, sea salt and baking soda and stir until well combined.
  4. Fold in the blueberries.
  5. Line a muffin pan with muffin papers (natural parchment muffin papers work best) and use a 1/4 cup scoop to fill each muffin cup. Bake for 35-40 minutes.

October 23, 2014

Frosted Pumpkin Cake


It's that time of year for pumpkin everything!  Believe it or not I am not a fan of pumpkin pie but I do like all other things pumpkin. This cake was calling my name when I got my weekly email from MyRecipes. 

The cake is amazing and the frosting brings it over the top.  The cake is moist and full of pumpkin and cinnamon flavor, the cream cheese frosting is exactly what you'd expect.  Creamy and delicious.  My husband suggested that next time I add some raisins or apples and I couldn't agree more.  I love this cake the way it is but I might experiment next time. 

This is a perfect alternative to pumpkin pie this holiday season, if you're like me and don't care for it that much.  I can't wait to share this one with my friends!

Frosted Pumpkin Cake
Recipe from MyRecipes


Ingredients
  • 10.1 ounces (about 2 1/4 cups) all-purpose flour
  • 2 1/2 tsp baking powder
  • 2 tsp ground cinnamon
  • 1/4 tsp salt
  • 1 cup light brown sugar, packed
  • 1/4 cup butter, softened
  • 1 tsp vanilla extract
  • 2 large eggs
  • 1 (15 ounce) can pumpkin puree
  • cooking spray
Frosting
  • 2 Tbsp butter, softened
  • 1/2 tsp vanilla extract
  • 1 (8 ounce) package 1/3 less fat cream cheese, softened
  • 2 cups powdered sugar, sifted
Cooking Directions
  1. Preheat the oven to 350º
  2. In a small bowl, whisk together the flour, baking powder, cinnamon and salt.  Set aside. 
  3. In the bowl of your stand mixer, add the brown sugar and butter and cream together.  Add the vanilla and the eggs one at a time, mixing after each addition. 
  4. Add the can of pumpkin puree and mix well. 
  5. Slowly incorporate the flour and fold in. 
  6. Spray a 9x13 inch dish with cooking spray and then dump the batter into the prepared dish. 
  7. Bake for 25 minutes or until a toothpick inserted in the center comes out clean. 
  8. Let the cake cool before frosting. 
  9. To make the frosting, add the first three ingredients into the bowl of your stand mixer and blend together.  Slowly add the powdered sugar and mix until smooth. 
  10. Frost the cooled cake and serve. 

October 20, 2014

Apple Cobbler


I've had many different types of cobbler in my life, but I don't think I've ever had apple.  I got this recipe from and old cookbook I was given.  I love it because it's a New England cookbook and my husband is from there, so a lot of these recipes really bring back memories for him. This particular recipe hails from New Hampshire.

I absolutely loved the "cobbler" portion of this recipe.  The almond extract makes it more like a yummy bread on top of delicious apples.  I think the next time I make this recipe I will double the apple portion because they seemed to sort of disappear beneath the yummy cobbler.  I also loved how easy this was to throw together, much easier then making an apple bread or an apple pie.

Great fall/winter dessert.

Apple Cobbler
Recipe from The New York Times New England Heritage Cookbook, page 227


Ingredients
  • 2 cups thinly sliced, peeled and cored apples (I think you can add more if you want to)
  • 1/2 cup light brown sugar
  • 1/4 tsp almond extract
  • 1/2 tsp cinnamon
  • 1/2 tsp nutmeg
  • 1 1/2 cups all-purpose flour
  • 3 tsp baking powder
  • 3 Tbsp granulated sugar
  • 1/2 tsp salt
  • 1/3 cup shortening
  • 1/2 cup milk
  • 1 whole egg, well beaten
Cooking Directions
  1. Preheat the oven to 400º
  2. Grease and 8x8 or 9x9 inch square baking dish.
  3. Arrange the apples on the bottom of the dish.
  4. In a small bowl, combine the brown sugar, almond extract, cinnamon and nutmeg. Sprinkle over the apples and put into the oven.
  5. In a medium bowl add the flour, baking powder, 1 Tbsp of the sugar and salt. Use a pastry blender, two forks or your fingers to add in the shortening and work until it looks like wet sand.
  6. Add the milk and egg but only stir until the ingredients are moist.
  7. Take the dish out of the oven and carefully spread the dough over the apples. Sprinkle with the remaining 2 Tbsp of sugar and put in the oven for 35-40 minutes.
  8. The top should be golden brown. Let sit for 5-10 minutes before serving.

October 15, 2014

Slow Cooker Texas Chili


Tis chili season!  Finally, I love chili and I loved this recipe because: 

1) It can be cooked all day in the slow cooker. 
2) If you get rid of that tiny bit of brown sugar it's compliant with my Whole30 plan. 
3) It's SPICY, I dig spicy. 

There is something about chili that is both comforting and energizing for me.  Probably because I eat it most often when there is a game of some sort on TV. 

I wanted to try this new recipe because I was having dinner club at my house this past weekend and it was going to be a super crazy day, so I needed a slow cooker recipe. I literally threw this together in about 20 minutes before I had to run off to a soccer game.  When I got home my house smelled so good!  I just had to clean up a little and change for the dinner club crew and I was done.  Slow cookers are a brilliant invention. 

There is definitely some kick to this recipe but not so much that you can't enjoy the taste of it. The meat just falls apart and the spices have cooked into the meat and the veggies. Great cold weather meal!

Slow Cooker Texas Chili
Recipe from The Food Network


Ingredients
  • 2 1/2 pounds beef chuck, cut into 2 inch cubes.
  • 2 Tbsp packed light brown sugar
  • kosher salt
  • 2 Tbsp vegetable oil
  • 1 small onion, finely chopped
  • 5 cloves garlic, smashed
  • 2 - 4.5 ounce cans chopped green chilies, drained
  • 1 Tbsp ground cumin
  • 3/5 cup chili powder
  • 1 - 14 ounce can diced tomatoes with chilies
  • 1 - 2 Tbsp green hot sauce
  • scallions, fresh cilantro, sour cream or shredded cheese for topping
Cooking Directions
  1. Add the oil to a large frying pan and heat on high heat.
  2. Toss the meat with 1 Tbsp of brown sugar and 1 Tbsp of salt.
  3. Cook the meat until browned on all sides in the hot fry pan. Do not crowd the meat, do this in several batches.
  4. Transfer the cooked meat to the slow cooker.
  5. In the pan you used to cook the meat, add the onion and saute for about 5 minutes.
  6. Add in the garlic and cook an additional minute. 
  7. Add the green chilies, cumin, chili powder, diced tomatoes and 1 1/2 cup of water and let simmer for about 3 minutes. 
  8. Add the tomato mixture into the slow cooker with the meat and cook on low for 7 hours. 
  9. Add the hot sauce and the remaining 1 Tbsp of brown sugar. 
  10. Serve with suggested toppings or corn chips. 

October 13, 2014

Chocolate Lasagna


I recently made this for my neighborhood "Dinner Club" party.  While I wait for some of those recipes to roll in, I'll share this one with you.

Chocolate Lasagna has been a popular item for a while and I'm just now getting around to actually making it.  It's easy to throw together and doesn't require any skill at all.  Not to mention, it is always loved.  You really can't go wrong with it (unless your crowd doesn't like chocolate).

I personally love the Oreo crust.  I mean, I'm a little bit of an Oreo addict so for me this dessert is heaven. The little mini chocolate chips on top are also a must in my opinion, they just add a great texture since the middle layers are all smooth.

This is a fun and easy dessert.  It's a classic for good reasons.  It also disappears quickly so if you're looking for leftovers you'll have to act quickly.

Chocolate Lasagna
Recipe from Center Cut Cook


Ingredients
  • 1 package Oreo cookies (regular, not double stuff)
  • 6 Tbsp butter, melted
  • 1 - 8 ounce pkg cream cheese, softened
  • 1/4 cup granulated sugar
  • 2 Tbsp cold milk
  • 1 - 12 ounce tub cool whip, divided
  • 2 - 3.9 ounce packages instant chocolate pudding mix
  • 3 1/4 cup cold milk
  • 1 1/2 cups mini chocolate chips
Cooking Directions
  1. Crush the Oreo's. You can use a food processor or you can put them in a gallon zip lock bag and crush them with a rolling pin or fry pan. :)
  2. Transfer the Oreo's to a large bowl and add the melted butter, stir together so the butter is well distributed. Press them into the bottom of a 9x13 inch pan. Refrigerate while you work on the remaining ingredients.
  3. In a medium bowl, or the bowl of your stand mixer, add the cream cheese and blend until light and fluffy. Add 2 Tbsp of milk and the sugar and mix again until well combined. Add 1 1/4 cup of the cool whip and blend together. Set aside.
  4. In another medium bowl, combine the chocolate pudding mix with 3 1/4 cups of milk and whisk until smooth and beginning to thicken. Set aside. 
  5. To assemble layers: Take the 9x13 inch dish from the refrigerator and spread the cream cheese mixture over the crust. 
  6. Spread the chocolate pudding mixture over the cream cheese layer. 
  7. Spread the remaining cool whip over the top of the pudding mixture. 
  8. Sprinkle liberally with the mini chocolate chips. 
  9. Refrigerate for 4 hours or freeze for 1 hour.

October 8, 2014

Spaghetti Squash Bolognese


How is your week going so far? Mine is busy but I'm very happy to get out and enjoy the nice fall weather. The leaves are just starting to turn and the nights are cool.  It makes me happy.

Time to start breaking out some of the recipes I've been wanting to try.  This one is also compliant with my diet so it's a win win.

I've tried spaghetti squash in the past and just didn't like it that much, but this time I really enjoyed it.  I'm glad I tried it again.  My husband is a big squash eater and he ranked this one up there with his favorite butternut squash.

Spaghetti squash is sort of a pain to cut in half.  I wish I could give you some ideas about how to make it easier but I struggled with it myself.  Luckily you only have to cut this one in half lengthwise and then you're done. I especially loved the bolognese.  Full of big flavors that melded together perfectly.  Great, healthy dinner that feels like you're splurging.  Definitely a keeper.

Spaghetti Squash Bolognese
Recipe from Practical Paleo page 280


Ingredients
  • 1 spaghetti squash
  • sea salt and black pepper to taste
  • 2 Tbsp bacon fat or butter
  • 1 medium onion, finely diced
  • 1 large carrot, finely diced
  • 1 stalk celery, finely diced
  • 1 clove garlic, minced
  • 1/2 pound ground beef
  • 1/2 pound ground pork
  • 4 slices bacon, chopped
  • 1/2 cup full fat coconut milk
  • 3 oz (half a small can) tomato paste
  • 1/2 cup dry white wine (optional)
  • sea salt and black pepper to taste
Cooking Directions
  1. Heat the oven to 375º
  2. Cut the spaghetti squash in half lengthwise and clean out the seeds from the middle.  Sprinkle with salt and pepper and lay face down on a baking sheet and bake for 30-45 minutes.  It's done when the the flesh can easily be pulled away from the skin. Place the cooked spaghetti squash in a bowl and set aside until the bolognese is done. 
  3. While the squash is cooking, start the bolognese. 
  4. In a large skillet, add the bacon fat or butter to the pan, then add the diced onion, carrots and celery.  Cook until the vegetables are slightly translucent and beginning to become tender.  Add the garlic and cook for about 1 minute. 
  5. Add the beef, pork and bacon and cook until browned. 
  6. Add the coconut milk and tomato paste (and white wine if using). 
  7. Simmer for about 20-30 minutes.  Taste and then add salt and pepper as needed. 
  8. To serve, add some spaghetti squash "noodles" to a dish and top with the bolognese. 

October 6, 2014

Apple Praline Bread


One of my families favorite things to do is pick seasonal fruit.  Apples are particularly fun because we usually make a day trip out of going to the mountains to our favorite orchard.  This year we've been to two different orchards already.  I could seriously go every single weekend, I love it. 

This bread is full of apples and it's topped off with a sweet praline sauce that is to die for. I had to tear myself away from licking the pan.  My husband loved this bread and so did my friends when I brought it to our kickball game to share. Bread like this is not safe alone in the house with me.  Way to tempting. 


Easy to throw together without any unusual ingredients.  Very moist with chunks of apple.  The topping was my favorite.  I have a sugar addiction problem so this was right up my alley.


Apple Praline Bread
Recipe from Just A Pinch


Ingredients
  • 1 cup sour cream*
  • 1 cup brown sugar
  • 2 whole eggs
  • 2 tsp vanilla extract
  • 2 cups all-purpose flour
  • 2 tsp baking powder
  • 1/2 tsp baking soda
  • 1/2 tsp salt
  • 1 1/2 cups Granny Smith apples, peeled, cored and finely chopped
  • 1 cup nuts (walnuts, pecans or a combo)
Praline Sauce
  • 1/4 cup brown sugar
  • 1/4 cup butter
Cooking Directions
  1. Preheat the oven to 350º
  2. Grease a 9x5x3 inch loaf pan, set aside. 
  3. In the bowl of your stand mixer (or using a hand mixer) beat together the sour cream, sugar, eggs and vanilla on low speed until blended. 
  4. In a separate bowl add the flour, baking powder, baking soda and salt.  Whisk together. 
  5. Slowly combine the flour mixture in with the wet ingredients and beat on low until combined. 
  6. Use a spatula or spoon to add in the apples and half the nuts by hand. Incorporate well. 
  7. Pour the batter into the prepared loaf pan and press the remaining nuts into the top. 
  8. Bake for 60 minutes or until a toothpick inserted in the center comes out clean. 
  9. Cool in the loaf pan for about 30 minutes before removing from the pan and cooling the rest of the way on a wire rack. 
  10. For the praline sauce, add the brown sugar and butter into a small sauce pan and bring up to a boil. Lower the heat and simmer for about 1 minute, stirring constantly until it thickens.  Drizzle over the top of the cooled bread. 
* 1 cup sour cream substitution: 3/4 cup sour milk + 1/3 cup of butter, or 1 cup yogurt + 1 tsp baking soda, or 3/4 cup buttermilk + 1/3 cup butter. 

October 1, 2014

Bacon-Chicken Crescent Ring


I know I'm not the only one who has trouble getting dinner on the table when you've got such a hectic schedule during the week.  

Right? I'm not alone here right? 

I'm going to go ahead and assume you're experiencing these issues too.  Seems like there is very little time after school and before the extra-curricular activities.  I don't usually go for store bought products like canned crescent roll dough but lets be honest, I'm not going to whip it up on a weeknight either.  A little extra help from the store can help sometimes. 

This quick dish can be made quickly and you can add or remove any of the ingredients you don't think your family will eat.  I made it exactly as the recipe called for and my daughter wouldn't touch it because of the red peppers.  Oh well. 


Fairly simple to assemble, once you know what it's supposed to look like.  I like lots of pictures so I thought this might help.


The bacon inside really adds a nice smoky flavor that my husband and I enjoyed.  The flavors all meld together really well.  This ring bakes up beautifully and is easy to reheat and even take with you on the run. Great quick dinner option. 
Bacon-Chicken Crescent Ring
Recipe from "tasteofhome 100 BEST recipes 2011" page 80


Ingredients
  • 2 tubes (8 oz each) refrigerated crescent roll dough
  • 1 can (10 oz) chunk white chicken, drained and flaked
  • 1 1/2 cups (6 oz) shredded Swiss cheese
  • 3/4 cup mayonnaise
  • 1/2 cup red pepper, finely chopped
  • 1/4 cup onion, finely chopped
  • 6 bacon strips, cooked and crumbled
  • 2 Tbsp Dijon mustard (I used coarse ground)
  • 1 Tbsp Italian dressing mix
Cooking Directions
  1. Preheat the oven to 350º
  2. Spray a 14 inch pizza dish with non-stick spray. 
  3. Open both cans of crescent roll dough, break the dough apart into the perforated rectangle pieces and start laying them about 3 inches away from the edge of the pizza pan, wide side facing toward the middle, corner piece drooping over the edge. (see picture)
  4. Overlap the dough pieces until all the pieces are down.  Squeeze the seams together on the wide side pieces. 
  5. Mix the remaining ingredients together in a medium bowl. 
  6. Scoop out the mixture with a large spoon and spread evenly over the wide side of the dough. 
  7. Grab the triangle pieces that are hanging over the edge and pull them over the top of the filling (there will be gaps that aren't covered). Tuck the dough corner under the wide side. (see picture). 
  8. Bake for 20-25 minutes or until golden brown.