January 15, 2014

Honey Wheat Dinner Rolls


It's HUMP DAY! That commercial drives me crazy yet it is oddly addictive at the same time. I'm weird like that.

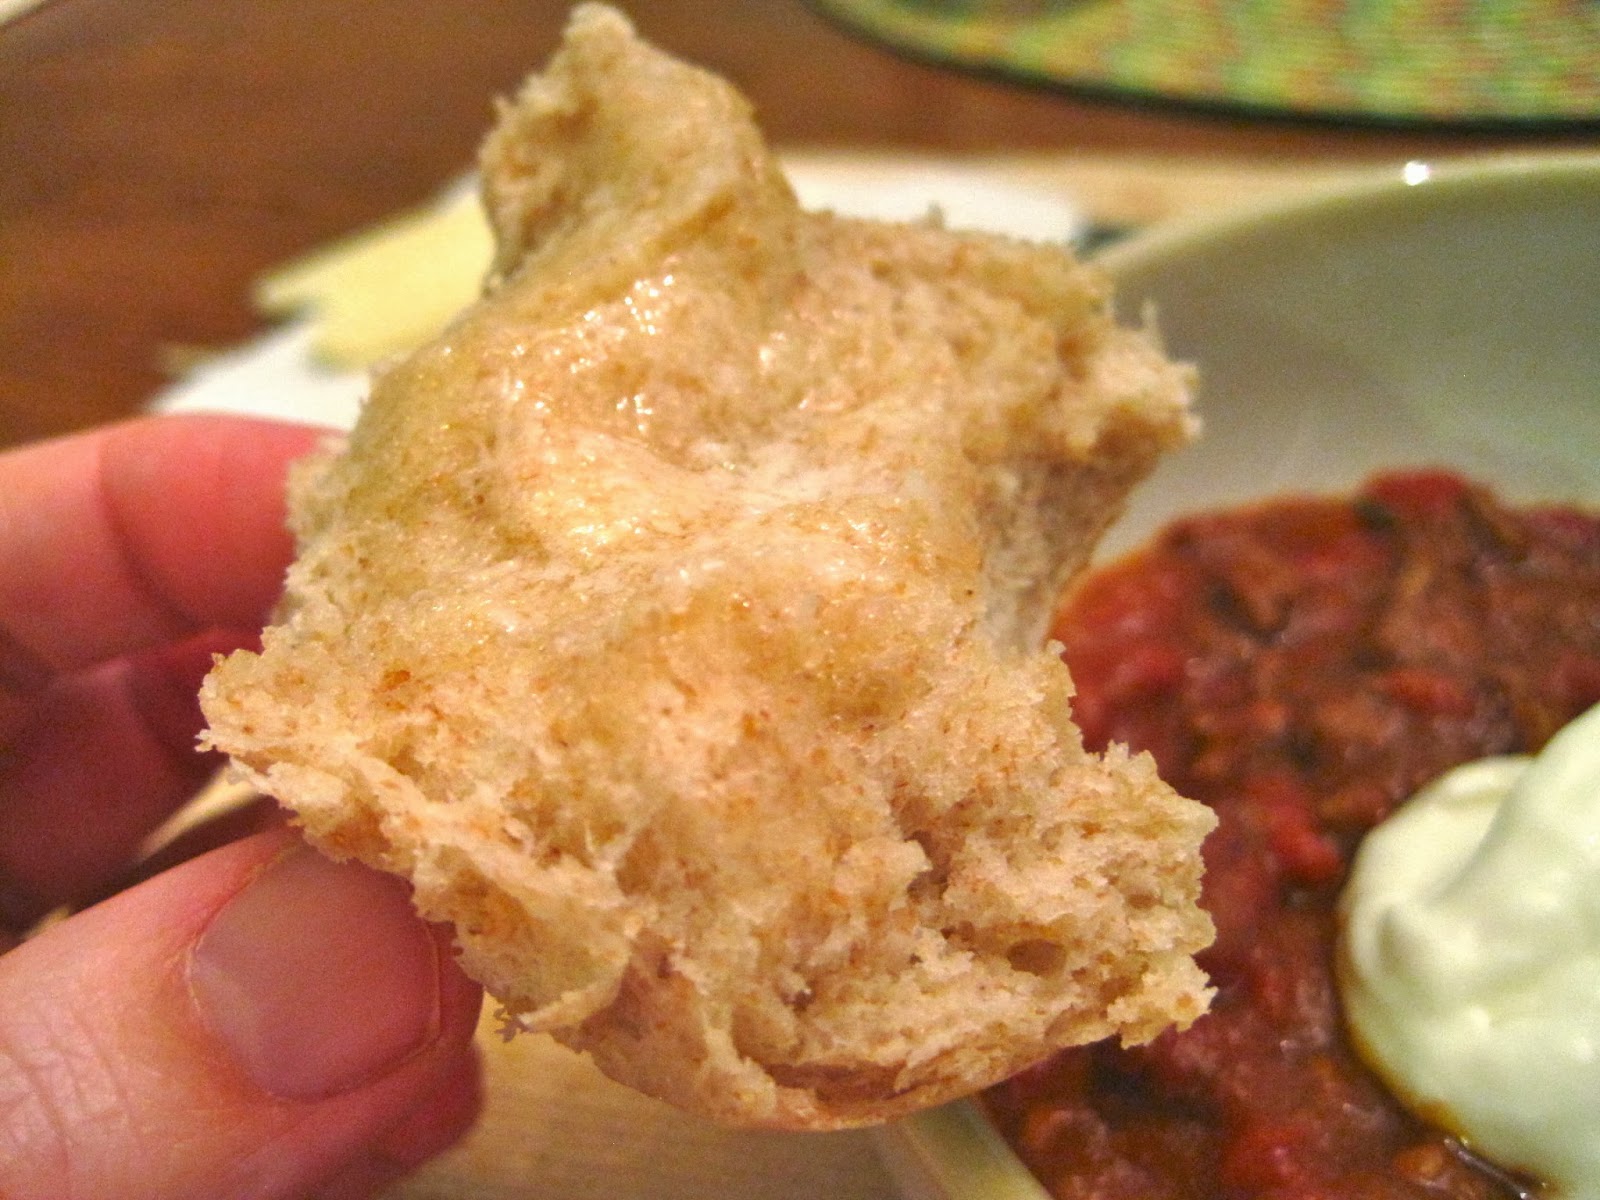
I know most of you can agree that when it comes to dinner, the easier the better.  All I want to do at the end of the day is sit down and relax for a minute.  But dinner must be made first!  I had a huge craving for dinner rolls the other night.  Honey wheat rolls to be exact.  The problem was that I had already started dinner (chili) so I didn't have hours and hours to wait for bread to rise.

I couldn't believe it when I saw this recipe and realized that it only took less than an hour to make.  I HAD to try them. The result? One of the quickest, tastiest dinner rolls I've ever made.  I'm IN LOVE with this recipe!  I can't say enough nice things about it.  I've also had leftover rolls in a zip top bag in my refrigerator for several days and each time I want one I just grab it and put it in the microwave for about 20 seconds and it's still delicious.  Why can't all yeast bread recipes be this easy?

Do yourself a favor and whip some homemade dinner rolls up tonight.  You will be so happy you did!


Honey Wheat Dinner Rolls
Recipe from Jamie Cooks it Up


Ingredients
  • 2 cups wheat flour
  • 2 cups all-purpose flour
  • 3/4 cup hot milk
  • 3/4 cup hot water
  • 1/4 cup honey
  • 1 tsp salt
  • 6 Tbsp butter, softened
  • 1 Tbsp yeast (I used active dry)
Cooking Directions
  1. Preheat the oven to 170º
  2. In the bowl of your stand mixer (using the dough hook) add 2 cups of wheat flour and 1 cup of white flour, 1/4 cup of honey and the heated milk (heat 3/4 cup of milk in the microwave for 1-2 minutes). Add the heated water (water should be hot but not burn your hand).  
  3. Add the salt and softened butter. Turn the mixer on low and blend for about 1 minute. 
  4. Add the yeast and mix for about 30 seconds. 
  5. While the mixer is on, add 1 more cup of white flour. 
  6. Let the mixer mix for about 1 minute, the dough should begin to pull away from the sides of the bowl.  If the dough remains sticky, you can add more flour (up to 1/2 cup).  Once the dough is the right consistency you can turn the mixer up to medium and mix for 5 minutes. 
  7. Coat the bottom and sides of a 9x13 inch dish with some softened butter or cooking spray. 
  8. Dump the dough into the middle of the pan.  
  9. Use a sharp knife to cut the dough into 16 equal pieces. 
  10. Roll each piece into a ball and place in the pan. 
  11. Place the pan in the warm oven and let rise for about 15 minutes or until doubled in size. 
  12. Leave the pan in the oven and raise the temperature to 350º
  13. Bake until the rolls are golden brown on top, mine took about 25 minutes but Jamie's (from the link above) only took 13 minutes so check them often.  
  14. Remove from the oven and brush some butter over the tops.  Salted butter works best I think. 
  15. Allow to rest for 5 minutes in the pan and then enjoy!

January 13, 2014

Hashbrown, Bacon, Mushroom and Cheese Breakfast Bake


I know I may get some haters for what I'm about to say, but I can feel spring in the air here in the South.  I know a lot of you are still buried in snow but we've had two nice days of weather and it's got us all thinking about spring.

I learned from some neighbors just a couple of days ago that there is an old saying in the South.  10 days after a thunderstorm there will be snow.  Guess what we had Saturday?  Right, a thunderstorm.  So just to see if this old wives tale is accurate I put the date on my calendar and if it's correct, we'll have snow on the 20th.  Fun experiment and I'm actually hoping we DO get snow.  Those are my Montana roots coming through.

Before I break out the sunscreen and umbrella straws I have to show you my new (sort of) obsession.  Breakfast bakes.  You can literally add anything you want so I've been experimenting so see what my family likes best.  Really it's just my husband and I since my daughter refuses to eat eggs.  This latest version is one of my husbands favorites.  He loves it because it's full of bacon, I love it because it's pretty easy and very tasty.

I'm pretty sure you have the items you need in your refrigerator or pantry right now to make your very own breakfast bake.  The only essential ingredient is eggs, a dozen would be best but I made this one with only 8 so it's doable.

Hashbrown, Bacon, Mushroom and Cheese Breakfast Bake
From Alissamay's kitchen


Ingredients
  • 6 small yukon gold potatoes
  • 1 medium onion, chopped
  • 1 lb bacon, chopped
  • 1 (8 oz) package mushrooms (baby bella or button) sliced
  • 8 oz sharp cheddar, grated
  • 8-12 whole eggs, beaten
  • splash milk or half & half
  • salt and pepper to taste (or seasoned salt)
Directions
  1. Preheat the oven to 350º
  2. Grate the potatoes' (skin and all) into the bottom of a 9x13 inch dish that has been sprayed with non-stick spray. Spread the potatoes out in an even layer. 
  3. In a medium frying pan fry the bacon pieces until they are crisp, then remove to a paper towel lined dish.  Discard the oil from the pan but do not wash the pan. 
  4. Add the onions and mushroom and cook until they are beginning to get tender, remove to a separate dish. 
  5. Spread the bacon over the hashbrowns and then add the onion mushroom mixture.  
  6. Add the grated cheddar on top. 
  7. In a bowl crack all the eggs and add a splash of milk or half & half and whisk together.  Add the salt and pepper and whisk again. Pour the egg mixture over the top of the other ingredients. 
  8. Bake in a preheated oven for about 20-30 minutes or until the eggs are puffy and beginning to pull away from the sides of the dish. 

January 10, 2014

Chocolate Covered Peanut Butter Balls


No I'm not trying to ruin your diet.

This is the last item I made for my Christmas baking day.  I know it's taken me awhile to post about it but honestly I'm trying not to eat sugar right now and just looking at this picture makes me want to dive it to them again.

One thing I especially liked about this peanut butter ball is the addition of the rice krispies.  The taste is amazing and the little added crunch sets it apart from the rest. The instructions at the link below are really good so if I'm not providing enough guidance you can click on over to her page.

These are an easy candy to make and can be enjoyed any time of the year.  They will of course melt this summer but you could keep them refrigerated or inside until you're ready for them.  To good not to share.  Definitely a keeper in my recipe book.


Peanut Butter Balls
Recipe from Praying Twice


Ingredients
  • 2 cups creamy peanut butter
  • 3 cups krispie rice cereal
  • 1 lb (3 cups) confectioners' sugar
  • 1/4 cup melted butter
  • 2 packages melted chocolate chips
Cooking Directions
  1. In a large bowl, mix together the peanut butter and the cereal.
  2. Add the confectioners sugar and the melted butter (you might need to switch to using your hands to mix it as it will be tough to stir).
  3. If the mixture is to dry add more peanut butter, if too sticky and wet add more confectioners' sugar. You want to be able to form a ball with the mix without it being too sticky or falling apart.
  4. Form balls and lay them on a parchment paper lined cookie sheet. When done put the cookie sheets in the refrigerator to harden.
  5. Melt the chocolate and use a fork to dip each ball and shake off excess before placing back on the cookie sheet. Refrigerate again to harden.
  6. Enjoy!
*Refrigerate in an airtight container

January 8, 2014

Beef Jerky


As I'm sure many of you have done since the New Year, my family and I are trying to get healthier this year.  Part of that for us is trying to figure out how to eat foods that we can make ourselves.  Jerky as you may know is very expensive, but not too bad if you make it yourself!  The flavor is much much better than anything we've bought from the store.

The good news is that we got a dehydrator pretty inexpensively from Bed Bath and Beyond and we used our 20% off coupon.  We can dry fruit and veggies, herbs and even make fruit leather which I'm very excited to try. However, if you don't have a dehydrator there are some homemade versions of that you can make too.

My husband travels a lot for work so jerky is the perfect portable snack for him.  Knowing we made it ourselves makes it that much better!

Homemade Beef Jerky
Recipe from Alton Brown


Ingredients
  • 1 1/2 to 2 pounds very lean beef (flank, top round, brisket)
  • 2/3 cup Worcestershire sauce
  • 2/3 cup soy sauce
  • 1 Tbsp honey
  • 2 tsp ground pepper
  • 2 tsp onion powder
  • 1 tsp liquid smoke
  • 1 tsp red pepper flakes
Cooking Directions
  1. I used a Nesco dehydrator for this recipe but there are additional instructions at the link above if you don't have one.
  2. begin by cutting the meat about 1/4 inch thick.  It's easier to cut if you freeze the meat for 20 minutes prior to cutting. 
  3. Mix all the ingredients together and pour over the meat, refrigerate for at least 4 hours or overnight. 
  4. Remove the meat from the marinade and dry using a paper towel, then place on the trays of the dehydrator in a single layer allowing space between each piece. 
  5. Follow the manufacturer's instructions for exact instructions. Mine said 8-10 hours so I set it up to cook during the night. It took about 10 hours. 

January 6, 2014

Spinach Roll-ups


This has to be one of my favorite recipes from long ago.  I can't believe I've waited so long to make them again because they are so so very good. I got this recipe from my friend Kari and at first I made it all the time for parties or whatever. So for a New Years party that we were invited to I knew that I wanted to make something that was tried and true and proven to be loved.

The party was so much fun and there was ton's of good food but everyone did indeed love these roll-ups. They are packed with flavor and texture.  From the bite of the spinach to the crunch of the water chestnuts and jalapeño, combined with the creaminess of the cream cheese mixture you just can't beat it.  You might be thinking when you look at the ingredients that this is way to spicy for you but it's not.  Trust me.  If you remove the seeds and membrane from the jalapeño you won't get all that heat and the other spicy ingredients just add flavor and not ton's of spice. Of course if you want something spicy you can leave the seeds in, add more chili powder or more cayenne pepper sauce. It's up to you.

There are quite a few ingredients in this roll-up but they are worth it, also allow for a little bit of refrigeration time so the flavors can blend together and the roll-ups won't fall apart when you cut them.
Enjoy!

Spinach Roll-ups
Recipe from Kari S.


Ingredients
  • 1 (10 ounce) package frozen chopped spinach, thawed and squeezed dry using several paper towels or a clean kitchen towel. 
  • 1/2-3/4 cup sour cream
  • 1 pkg (8 ounce) cream cheese at room temperature
  • 1/2 cup mayonnaise
  • 1 (4 ounce) can chopped green chilies
  • 2 cloves garlic, minced
  • 5 green onions, chopped
  • 1/4 tsp cayenne pepper sauce, such as Tobasco
  • 1 package ranch salad dressing mix
  • 1 can (8 ounce) water chestnuts, chopped
  • 1/2 tsp chili powder
  •  6-8 large flour (or whole wheat) tortilla wraps
Directions
  1. Mix all of the ingredients (except the tortillas) in a large bowl. 
  2. Spread about 1/2 cup to 3/4 cup of the mixture evenly over one tortilla, leaving about 1/2 inch space around the outer edges, then roll up tight and wrap in plastic wrap or tin foil. Repeat until all the mixture is gone. 
  3. Refrigerate the rolls ups. 
  4. When ready to serve, remove the wraps from the plastic wrap or tin foil and cut into 1/2 inch slices. 
  5. Makes 6-8 whole wraps before cutting. 

January 2, 2014

PW's Onion Strings


I can't believe it's taken me so long to post this recipe.  A funny thing happens every time I've made these onion strings.  They get eaten before I can snap a decent picture.  Honest.  OK I may have been the one to eat them all before it occurred to me to grab my camera.  I've had to make them three times before getting a picture.  Torture I tell ya, pure torture.

The first time I ever made them was last summer for a neighborhood barbecue, no picture taken. I made them again recently for my husbands birthday dinner and they disappeared in no time and no picture.  I made them again the very next night for another dinner and finally grabbed some pictures.  I had to show you a picture because my husband is a onion ring connoisseur and he's very particular about the kind of onion rings that he likes.  He likes the thin sort of onions with a light flaky layer of breading so they are nice and crunchy.  These babies totally fit the bill.  The seasoning is perfect, the onions are flavorful and the breading is thin yet crispy.

If you've got a few extra calories to use one of these nights I highly suggest you splurge on this recipe.  They are so darn good!


PW's Onion Strings
Recipe from The Pioneer Woman


Ingredients
  • 1 whole large onion (I used yellow)
  • 2 cups buttermilk
  • 2 cups all-purpose flour
  • 1/4 tsp salt (scant)
  • 1 quart (or 2 quarts) canola oil
  • pepper to taste
Directions
  1. Slice the onions very thin and place in a large bowl
  2. Pour the buttermilk over the top of the onion and stir around so it's fully covered. 
  3. Let soak in the buttermilk for at least an hour. 
  4. Combine the dry ingredients in another large bowl or a large zip lock bag. 
  5. Heat the oil to 375º
  6. Line a plate or bowl with paper towels (for the cooked onion strings)
  7. Dredge a handful of the sliced onions into the flour mixture and then plunge into the hot oil.  Fry for a couple minutes or until they are golden brown.  Remove to the prepared paper towel lined dish. 
  8. Repeat until they are all cooked, serve hot.